PERFECT Easy Cut-Out Sugar Cookies (No spread!)
Get excited, friend: These are cut-out cookies that hold their shape, taste fantastic, and are super easy to make! These easy cut-out sugar cookies are perfect for baking classic Christmas cookies that you’ll love making & sharing with others. (Plus, they make for absolutely gorgeous Christmas cookies that everyone will be drooling over!)

The hunt for the perfect cut-out sugar cookie recipe is no more! Friend, this is IT.
This is a great recipe for homemade sugar cookies. In fact, I might even claim that it’s the BEST sugar cookie recipe for cut-outs.
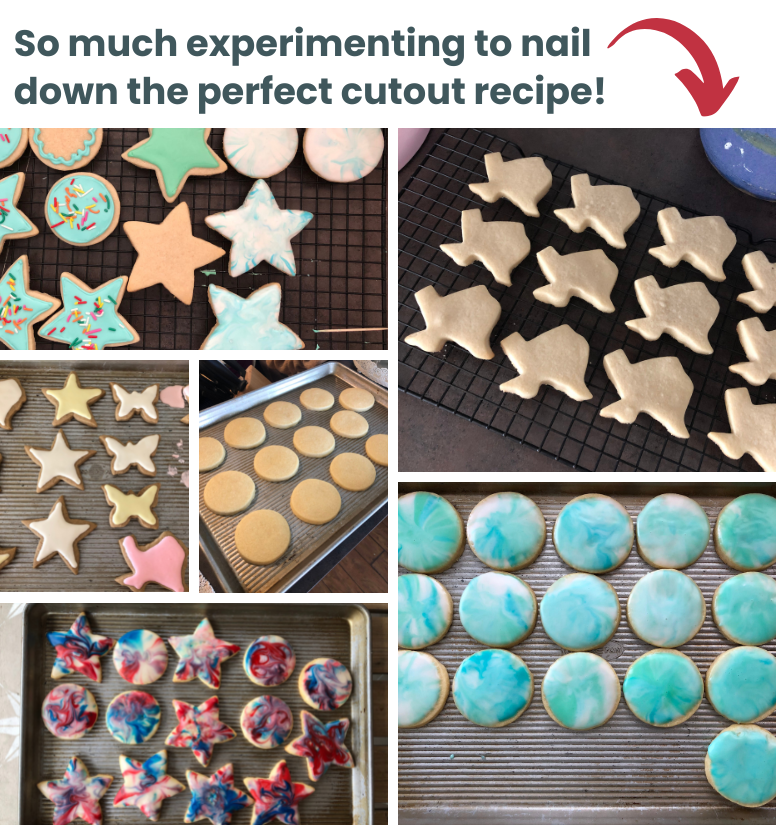
Believe me, I’ve tried many cut-out cookie recipes. So many, that I had pretty much sworn off of them because none of them ever came close to the deliciousness of a soft, chewy sugar cookie. But, because my buttercream frosting for sugar cookies is such a popular recipe and people love to use it to decorate cut-out cookies, I decided I should try to come up with a cut-out cookie that actually meets my standards of a great cookie…

…and after tons of experimenting in my kitchen over several months, I was so pleased to finally land on this one.
Get ready to level up your Christmas cookie exchanges, friend! This thick sugar cookie recipe is absolutely delicious, and I can’t wait for you to get your hands on it!

Here’s why you’ll love this classic cut-out sugar cookie recipe:
- These cookies actually taste GOOD. They’re not bland. They’re not puffy. They’re not too crispy. They’re soft, classic sugar cookies with a wonderfully chewy bite. The edges of the cookies will be smooth and slightly crisp while still having soft centers.
- It’s easy to make! This simple recipe just needs a handful of everyday pantry ingredients to achieve perfect sugar cookies! You probably already have everything you need, making it super simple to whip up a batch of cookies.
- It’s the perfect sugar cookie recipe for decorating. Making cookies for a cookie exchange? To give away as gifts? To share at a Christmas party? JUST FOR FUN?! These are the perfect cookies for icing traditional sugar cookie cutouts!
- You don’t have to chill the dough for very long. Most cut-out cookie recipes will tell you that you need to chill the dough for at least 1-2 hours, if not overnight. However, if you’re in a hurry to get these done, you can quickly chill the dough enough by placing it in the freezer for just 30 minutes. (This is what I usually do when I make them!)
- They don’t spread or puff up. Yep, you’ll get nice, clean shapes from this dough!
- It really is the best sugar cookie recipe for royal icing. Or buttercream frosting. Or regular ‘ole sugar cookie icing that hardens. Basically, it’s just a darn good recipe that I have a feeling is going to become your go-to year after year (after year)!
Plus, it makes for an absolutely gorgeous Christmas cookie tray!

How this is different from other sugar cookie recipes:
- It’s different from “drop sugar cookies” – i.e. the sugar cookies you just roll into a dough ball and then bake – in that these will hold their shape. Drop sugar cookie recipes are made for cookies to be rolled into dough balls & baked, not to be cut out. This recipe is specifically made for you to be able to cut out your sugar cookies into various shapes and have them come out with beautiful, clean edges.
- But it’s different than other cut-out sugar cookie recipes in that I think this one REALLY gets the flavor & texture right. Like I’ve mentioned, other cutout recipes might be able to deliver a beautiful cookie, but the texture and flavor just often aren’t there.
Here’s the deal:
Not much beats a soft, chewy sugar cookie. But soft & chewy sugar cookies (i.e. “drop sugar cookies”) – in order to get that amazing melt-in-your-mouth texture – require more leavening (i.e. baking powder and/or baking soda) and a lower dry-to-wet ingredient ratio (i.e. you’ll have a higher butter-to-flour ratio in soft & chewy sugar cookies).
BUT, if you want beautiful, perfectly-shaped cut-out sugar cookies that don’t puff up or spread when you bake them, you need less butter, less leavening, & more flour, and that often produces a somewhat…sad…sugar cookie. Cut-out cookies can taste a bit hard, dry, and bland.
Kinda like cardboard. 🙈
They might be pretty with their perfectly crisp cut-out edges, but their overall taste is often less than impressive.
Which is why I swore off of them for so long. But, with the demand so high specifically for cut-out cookies, I decided I’d try to see if I could come up with a recipe that didn’t taste like cardboard, break your teeth, and that had a delightful flavor.
And by golley, after a zillion test runs in my kitchen, I think we’ve got it!

This post contains affiliate links for your convenience. You can read my full disclosure policy here.
Ingredients for this easy sugar cookie recipe:
You only need super simple ingredients here. They’re pretty standard for sugar cookies; in this recipe, the secret to deliciousness is all in the ratio of the ingredients.
- Granulated sugar – essential for any sugar cookie recipe
- Unsalted butter – either room temperature butter (not warm) or butter that you’ve slightly softened in the microwave
- One egg – for structure and moisture
- Vanilla extract – When I bake, I always use Mexican vanilla that I get at a little local market. But, a regular quality vanilla extract is fine!
- All-purpose flour – essential for pretty much any cookie recipe!
- Baking powder – baking powder helps give the cookies a little bit of height and softness, but you’ll use less baking powder in this recipe than you do in other recipes. The smaller amount of baking powder is one thing that helps prevent these from puffing up too much & losing their shape.
- Salt – for flavor
Yep, that’s it. I’m telling you, BASIC ingredients without it being a boring, basic cookie! The deliciousness is all in the ratio of the ingredients and the process of making them!

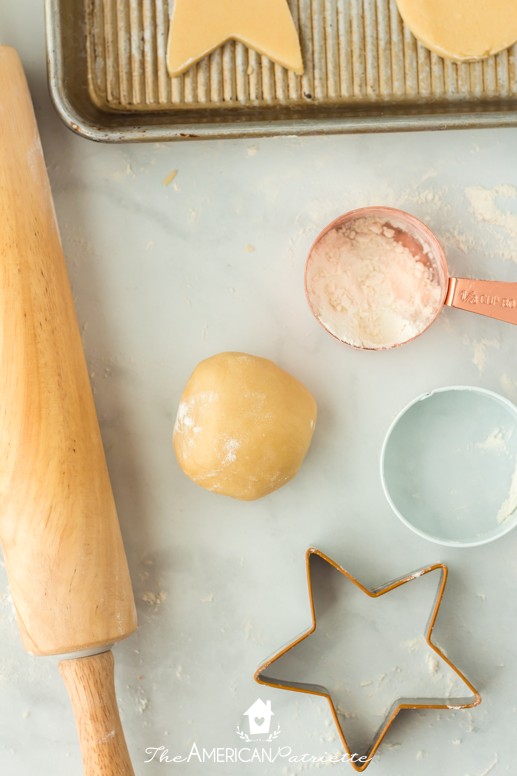
Equipment you’ll need:
- Baking sheets – GOOD ones. (And good ones don’t have to be expensive, but they 100% make a GIGANTIC difference. I always, always, always use these USA Pans. I’ve been using them for years – over a decade – and they’re still my fave!) These make a HUGE difference for accomplishing evenly-baked, soft cookies!
- Rolling pin – just a regular ‘ole wooden rolling pin will do
- Cookie cutters – choose your faves! (I talk more about this later in the post, but if you’re using a variety of sizes of cookie cutters, you’ll want to bake like-sizes with each other. Batch your smaller cookies on one pan and your larger ones on the other. If you mix large + small shapes on the same pan, they’ll bake unevenly.)
- Mixer – A stand mixer is always preferred, but if you only have an electric hand mixer, that’ll do!

How to make this classic sugar cookie recipe:
Just some simple steps to follow and you’ll be well on your way to beautiful, delicious sugar cookies!
Cream butter & sugar
Using your stand mixer with the paddle attachment (if you only have an electric hand mixer, that’s fine), cream together butter & sugar for 2-3 minutes on medium speed.
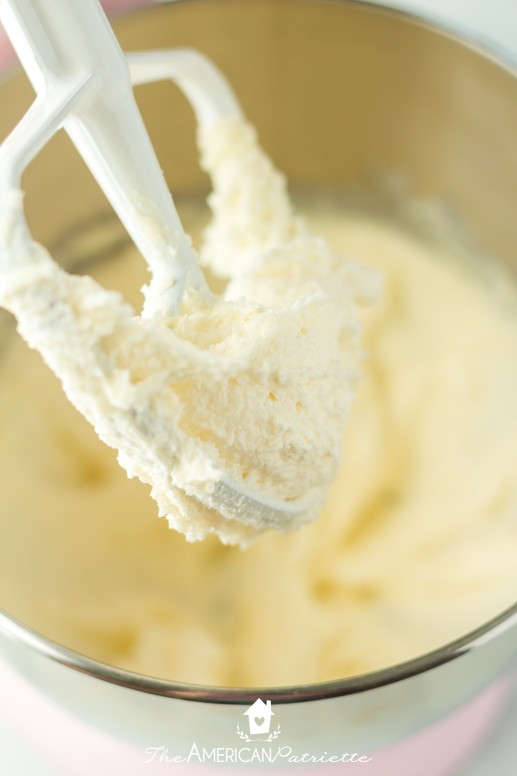
Your mixture should look light and creamy.
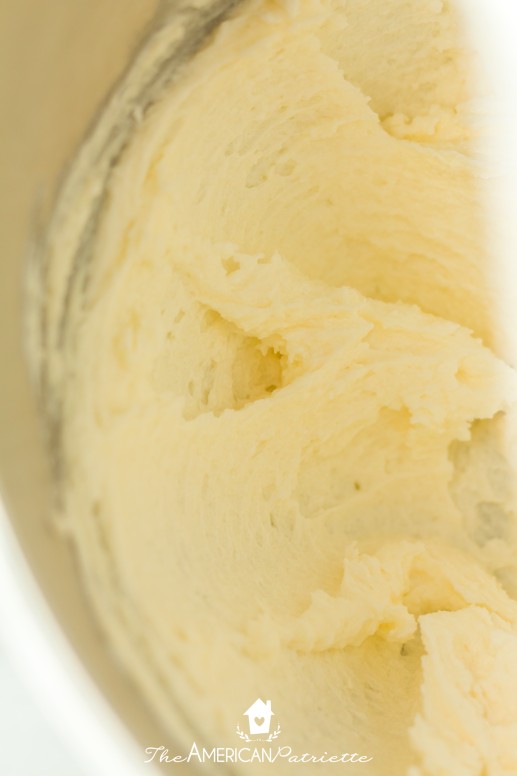
Add egg & vanilla
Scrape down the sides of the bowl & add in egg and vanilla extract. Mix just until everything is incorporated – about 10-15 seconds on medium speed.
Scrape the sides of the bowl again with a spatula.
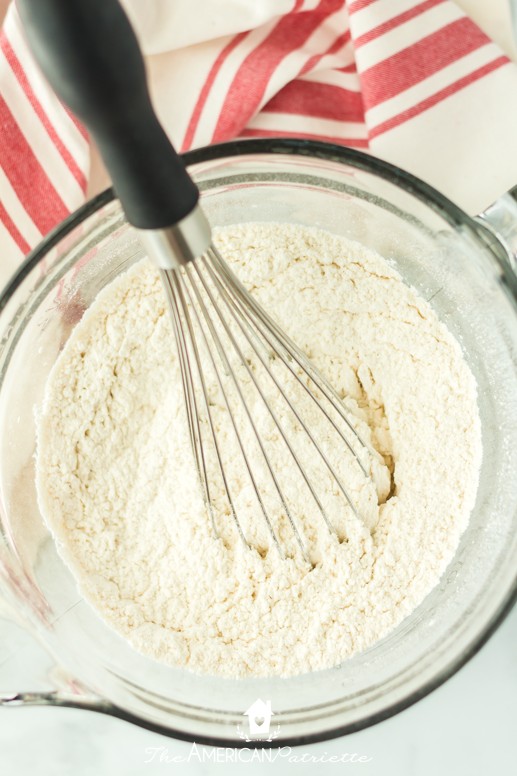
Whisk together dry ingredients
Combine flour, salt, and baking powder in a separate large bowl. Whisk together.
Add dry ingredients to the wet ingredients
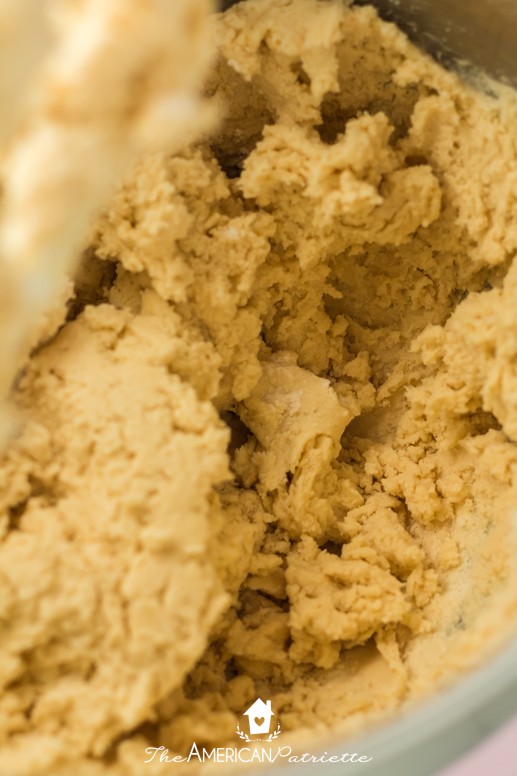
With your mixer on low speed, gradually mix in dry ingredients, just until everything is incorporated into the butter mixture & the dough is an even consistency.
You want the dough to be smooth and not crumbly, so if it’s crumbly (especially at the bottom where you might have some ingredients that didn’t get fully incorporated), go ahead and scrape the bowl with your spatula, and then run the mixer for a few more seconds.
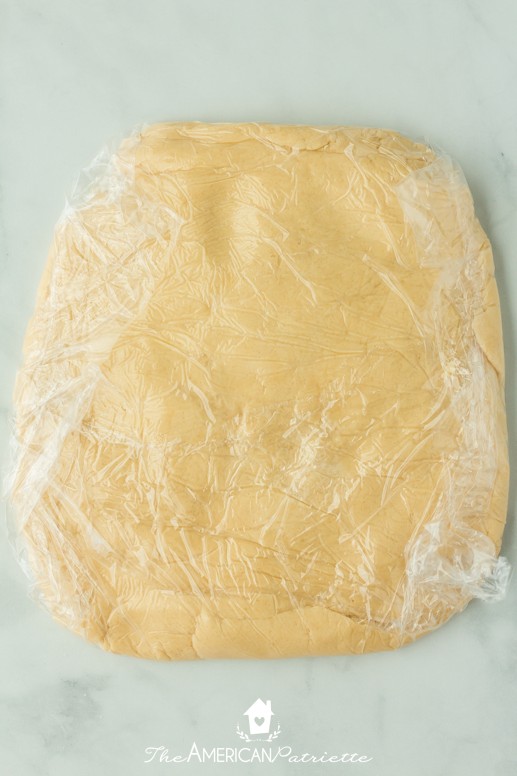
Wrap the dough in plastic wrap and chill
When you’re taking the dough out of the bowl and putting it onto a sheet of plastic wrap, work it just a little bit with your hands to make sure any additional crumbly pieces get incorporated into the dough. You want it to be a nice, even consistency – kind of like PlayDoh…ish?
Pro tip: flatten out the dough as you place it on the plastic wrap. When you chill the dough in a layer like this, it’ll chill much more evenly and it’ll be way easier to work with when it’s cold.
To chill: place in the freezer for 30 minutes or chill in the fridge for at least 1 hour (or you can leave it in the fridge for a couple of days if you’re making it ahead of time).
Dust your work surface with flour, remove dough from fridge/freezer, & start the process of rolling it out
When you remove the dough from the fridge/freezer, it’s going to feel pretty hard, but it should be easy to work with fairly quickly.
Before you start to roll it out, go ahead and coat your surface with a light layer of flour. Have a little measuring cup handy with extra flour to sprinkle on when you need more.
To start working with the dough: I always take off a hunk of the dough and then work it with my hands until it’s pliable (maybe 15-20 seconds).
You definitely don’t need to work the dough with your hands until it’s completely soft. Mine is still pretty cold & hard when I start to roll it out. I think this helps with them not spreading as they bake. I really just work the dough with my hands until it’s soft enough that I can run the roller over it and it’ll respond & flatten out.
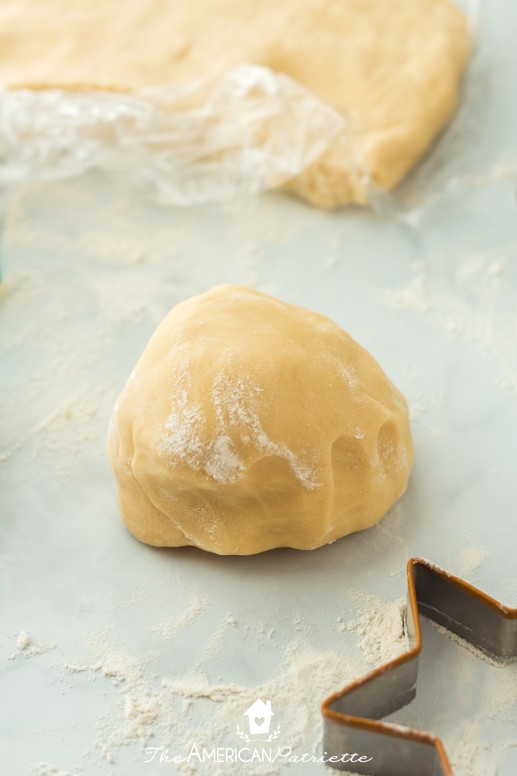
Once it’s pliable enough, you’ll then roll the dough around in enough flour to lightly coat it & then start to flatten it just a bit…
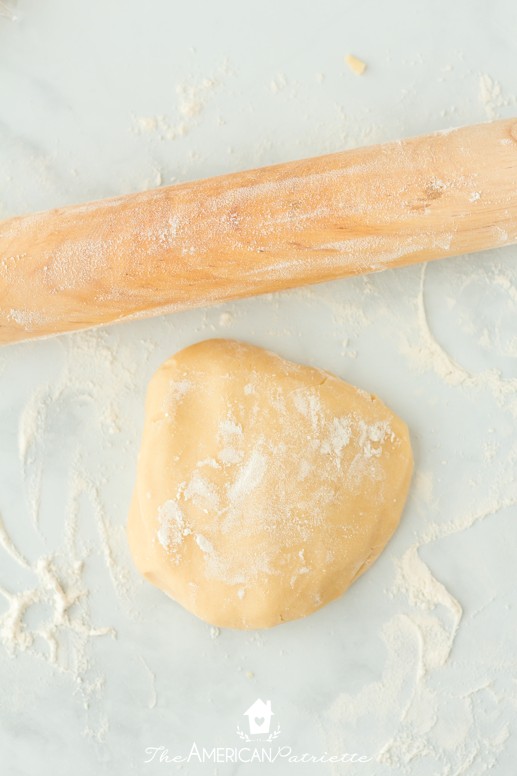
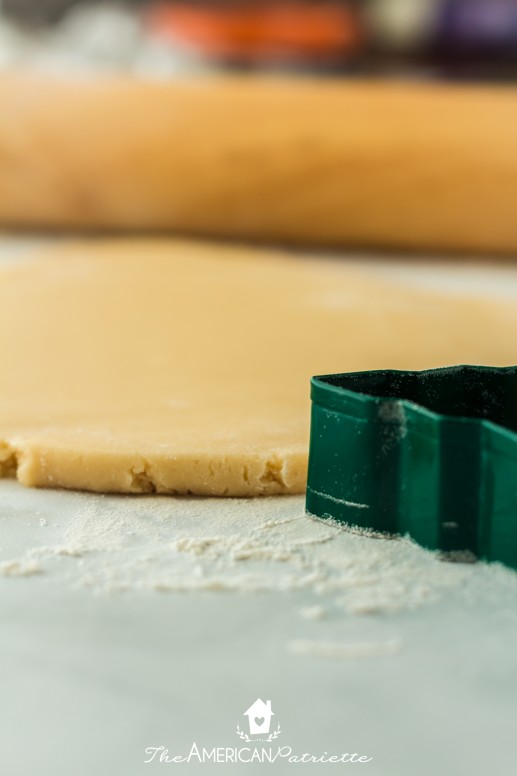
…and then use your rolling pin – rubbed with some flour – to roll it out to about 1/4 inch thickness. You want the cookies to be at least this thick to prevent them from over-baking and breaking.
Pro tip: if the dough feels sticky at all – on your hands, on the surface, or on the rolling pin – just add a little bit more flour until it’s not sticky anymore. You’ll likely repeatedly add little dustings of flour throughout the rolling & cutting process. You don’t want to use TOO much flour, but don’t be afraid to use it when you need it.
Here’s a picture for some reference on thickness:
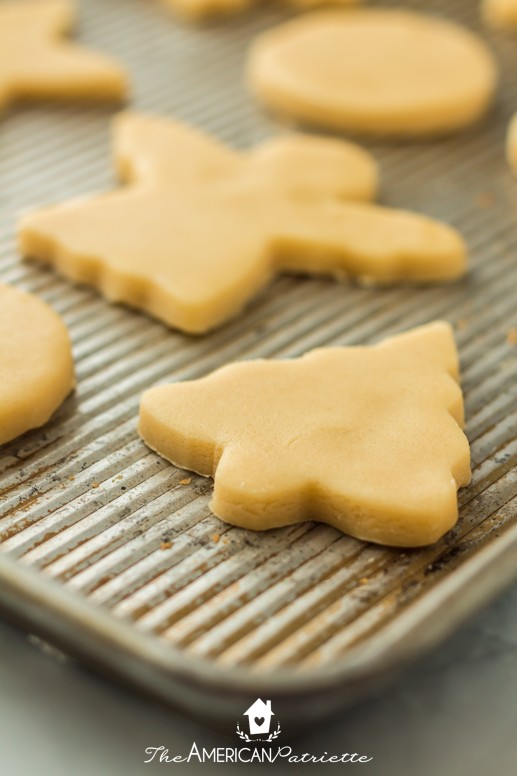
And then here’s another image to help you see about how thick these are once they’re cut:
Preheat your oven & start cutting shapes out of the dough
Preheat your oven to 375.*
*Side note: I almost always bake mine at 375, but I have noticed that when I bake them at 350, they come out slightly softer. BUT, then the edges aren’t quite as clean. They’ll still look just fine, but they aren’t as defined as if I bake them at 375. So, just FYI – both are options! They will definitely still come out delicious & soft at 375, they’re just softer at 350, but then you lose a little bit of the definition.
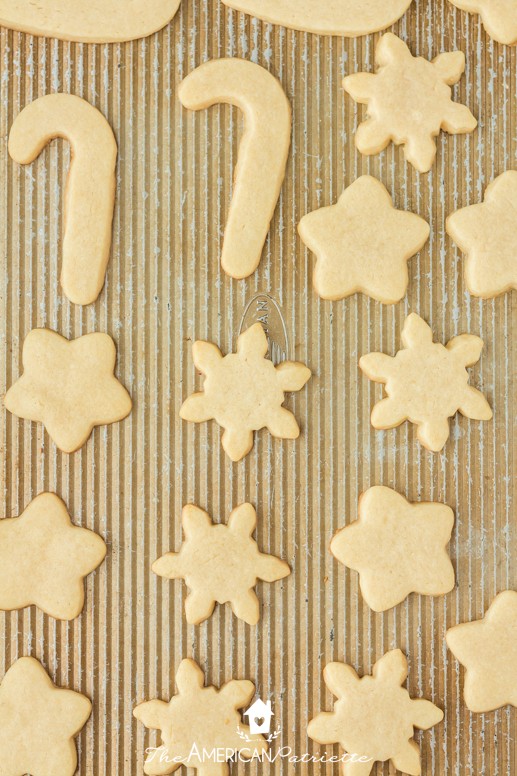
Grab your favorite cookie cutters & start cutting! You can see that I only cut a few shapes at a time. I find that it’s WAY easier to work with the dough, roll it out to the right thickness, cut shapes, and ensure the cookies maintain their shape if I just work with small amounts of the dough at the time.
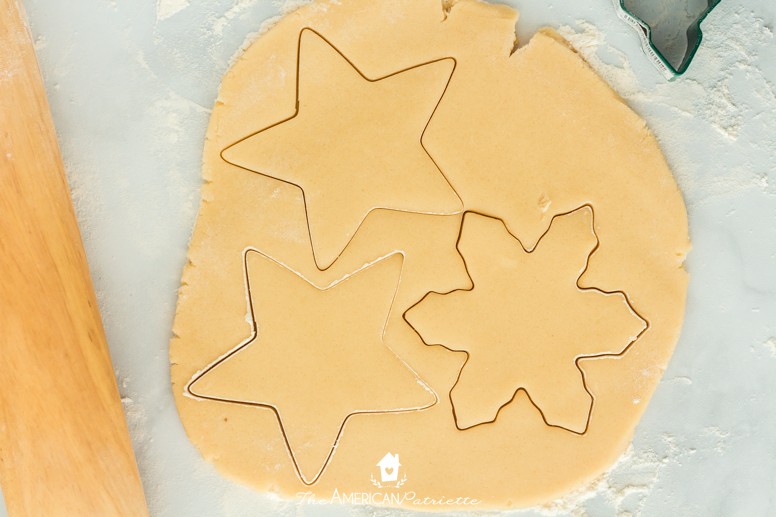
Your shapes should come right up and leave scraps of dough behind.
Pro tip: If you’re having issues here, see my troubleshooting tips toward the bottom of the post!
Place shapes on baking sheet
Depending on the baking pans you’re using, you may want to line them with parchment paper to prevent sticking.
These USA pans are the *only* pans I EVER use when I bake. I’ve had mine for over 11 years, and they’ve always been absolutely fantastic at baking cookies! They bake evenly, hardly ever stick, and produce the perfect texture. I’ve converted tons of people over to using USA Pans (they really are that awesome!), but if you’re not one of them & you’re using a different baking sheet/cookie pan, unless you’ve made several batches of cookies on your baking pans and know they don’t stick, you may want to consider lining them with parchment paper to prevent sticking. For some reason, cut-out cookies tend to stick more easily than other cookies. (But I’ve never had a problem with cookies sticking on my USA Pans – I never have to use parchment paper on them.)
Repeat the process with the remaining dough
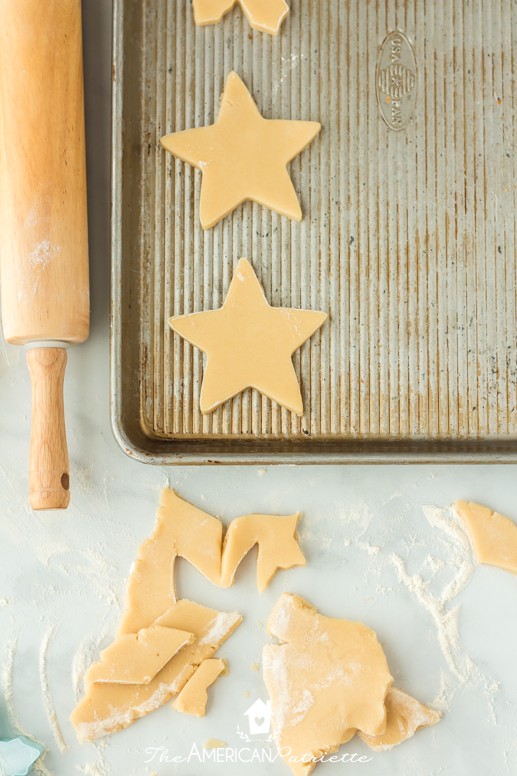
Collect your dough scraps, re-roll them, and cut more shapes. You might need to sprinkle a little more flour down on your workspace – you always want to have a lightly floured surface when rolling.
Then, repeat the process of breaking off a hunk of dough from the chilled batch, working it with your hands until it’s pliable enough to roll, and keep cutting until you’ve worked through all of the dough.
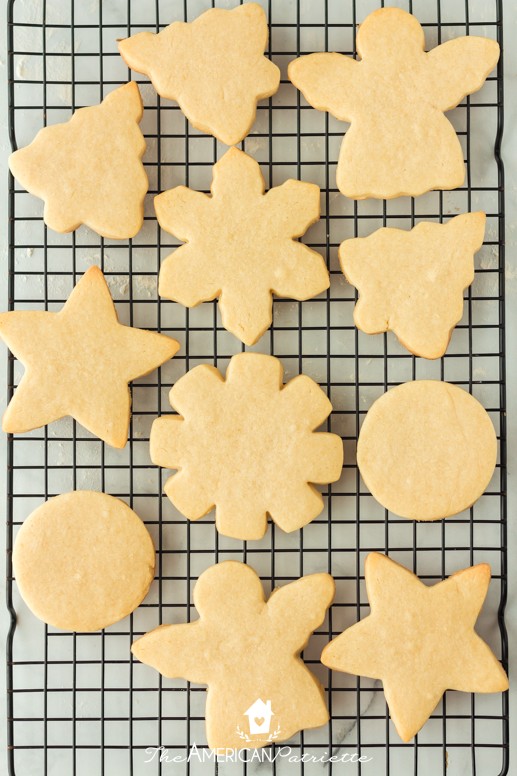
You’ll likely have enough shapes to fill up 2 regular-sized baking pans.
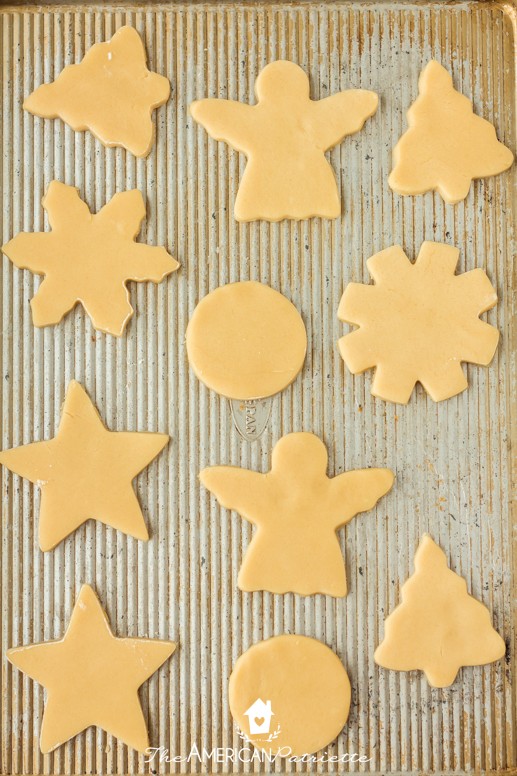
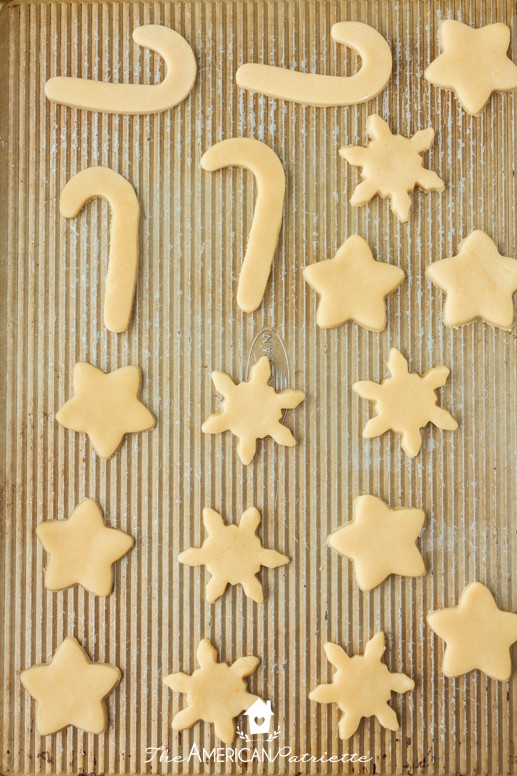
Pro tip: if you’re cutting out shapes that are smaller/thinner, then put all of those together on the same baking pan. See how the shapes in the photo below are all either skinnier and/or smaller than the shapes in the photo above? You want to put like-sized shapes on the same pan to prevent them from baking unevenly.
If you do cut smaller shapes, you’ll want to take off a minute from the bake time.
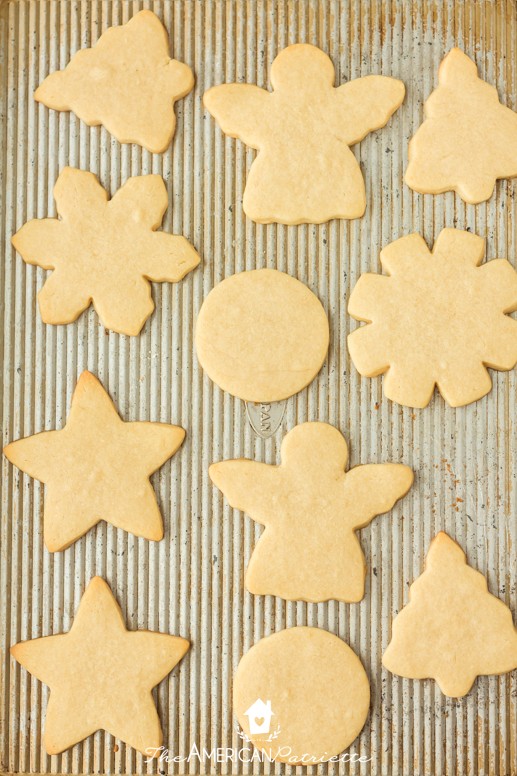
Bake cookies in 375 degree oven for 10 minutes…
…or if you cut out smaller/skinnier shapes, bake at 375 for 9 minutes.
The cookies should be light golden brown, have slightly crisp edges, and shouldn’t be shiny in the middle. (If they’re shiny, that means they’re still a little under-baked.)
Allow to cool on the baking pan for 5-10 minutes, and then transfer to a wire cooling rack.
For best results, you’ll want to use a thin spatula (I always prefer using a thin metal spatula – I feel like it works the best) to remove them from the baking pan and transfer them to the cooling rack.
Once they’ve cooled, you’re ready to decorate them! After all, cut-out sugar cookies are MADE for decorating, aren’t they?!
Look below to see my sugar cookie icing recommendations, and you’ll get super helpful decorating tips depending on which icing you want to use. (Hint: they’re all good! It’s just up to your preference on flavor & decorating style!)
Sugar cookie frosting – 3 versions!
- Glossy sugar cookie icing that hardens – this icing comes together easily & is simple to use. It produces a lovely glossy sheen and has a super soft bite, even though it hardens up!
- Easy royal icing recipe – finally, a royal icing recipe that ACTUALLY tastes good! If you’re looking for a traditional royal icing recipe that hardens up, decorates beautifully, AND is actually enjoyable to eat, you’ll love this recipe!! Made with meringue powder (vs. egg whites), it completely hardens, but it’s still soft to the bite and it has a great flavor. It’s not your typical chalky, candy-like royal icing. It’s very good.
- Buttercream frosting for sugar cookies – the most popular recipe on my blog to date! (And for good reason – it’s SO GOOD and so fun to use, and it actually hardens up a lot better than other buttercream recipes.) Buttercream IS THE BEST!!

Troubleshooting tips for sugar cookie dough:
If your cookie shapes are challenging to peel away and place onto your baking sheet, it may be because of a few reasons:
1) The rolled dough is too thin. To fix: ball the dough back up, re-roll it (making sure it’s thicker this time), and try cutting out your shapes again.
2) The dough is too sticky. To fix: ball the dough back up, roll it around in more flour, make sure your surface & your rolling pin are lightly floured, and try cutting shapes again.
3) The dough is too warm. I really don’t ever have this problem, but maybe it got too warm because your kitchen is too warm or you’ve worked it for too long for your hands. Try re-chilling it for a little while in the freezer and see if that helps.
For me, the problem is almost ALWAYS solved with #1 or 2 – it’s usually because I need to cut the shapes a little thicker or because I need to add a little more flour to the dough.

Questions about this easy sugar cookie recipe:
How thick should cut-out sugar cookies be?
About 1/4 inch thickness is what I aim for! Any thinner, and you run the risk of the sugar cookies breaking too easily or getting too crisp when the bake in the oven.
Should you chill the dough before baking?
Yep, you really need to. I’ve tested many different recipes for cut-outs, and the ones with the chilled dough always turn out much better. If you don’t want to wait a long time for chilling, you can get away with just 30 minutes in the freezer. I often do this and it works fine.
Can I add almond extract to this recipe?
Yes, but I don’t think you need it. When I was testing recipes, I tried cookies with and without the extract, expecting the ones with almond extract to have more taste. While that’s true, I don’t think they need the extra flavor, especially if you use one of my sugar cookie icing recipes: sugar cookie icing, easy royal icing, and buttercream icing. Each of those icings have so much flavor, that I really don’t think you need the added extract in the cookies. And believe me, if you’ve been around here for more than a minute, you KNOW that big flavor is a huge priority of mine! 😉
How long will these cookies stay fresh?
They taste best when eaten within the first 3 days, but they’ll still taste good for up to a week as long as you store them in an airtight container.
Can you freeze these cookies?
You sure can! I’ve done it many times. I almost always freeze them before I ice them, but if you want to decorate them with royal icing, you should be able to freeze them iced and they’ll freeze/thaw just fine. (You can go read more details on that in my royal icing recipe.) If you want to freeze them without icing (which I would recommend doing if you’re NOT using royal icing – I don’t think buttercream or glaze freezes as well), then just wait until they’ve completely cooled, and stack them in an airtight container. You can use parchment paper between cookie layers just in case, but when they’re not iced, I rarely do this – my cookies never stick together.
What’s the best way to decorate these cookies?
Woo! The fun part! I have 3 delicious icing recipes that you can choose from – all perfect for sugar cookies: buttercream frosting that hardens, easy royal icing, and glossy sugar cookie icing. I give you lots of tips for decorating sugar cookies in those posts.
What type of food coloring should I use?
Regardless of the icing you use to decorate this, I always use gel food coloring when decorating cookies. The colors are more vibrant, the icing is less likely to separate, and it’s less likely to affect the icing consistency.
Do I need to use a silicone mat to bake these?
A lot of cookie recipes will recommend that you use a silicone mat/silpat mat for baking – a mat helps cookies not to stick to the pan and also to bake evenly. However, because I’ve always used USA Pans (seriously – my favorite baking pans EVER – I use them for all cookies & anytime I need to bake anything on a sheet pan!), I’ve never needed to use a mat. My cookies have always baked so well on those pans! If you’re NOT using that brand of pans, then yes, you may want to consider using a silicone mat or parchment paper, just so your cookies don’t stick to your pans. You want them to glide right off so that you don’t break the shapes as you’re removing them.

Other sugar cookie recipes you might enjoy:
- No-chill pumpkin spice cut-out cookies – oh man, these are so good. They’ve got a super soft bite, they’re full of flavor, and they’re easy to make. A different twist on a classic sugar cookie.
- Soft & chewy sugar cookies – if you don’t need to make cut-out shapes and you’re just looking for a perfect recipe for a traditional sugar cookie, this recipe is amazing! Super soft centers, a deliciously chewy bite, and just an all-around fantastic cookie. (I get tons of compliments on this cookie recipe!)
- Orange & clove sugar cookies – a regular sugar cookie recipe + some seasonal flavors. So tasty!!

Delicious Cut-Out Sugar Cookie Recipe
Equipment
Ingredients
- 2 sticks butter room temp**
- 1 ¼ c granulated sugar
- 1 egg
- 2 tsp vanilla extract
- 3 c all-purpose flour
- ½ tsp salt
- ¼ tsp baking powder
Instructions
- Using the paddle attachment of a stand mixer, cream together butter & sugar for 2-3 minutes on medium speed.
- Scrape sides of bowl with a spatula. Add egg & vanilla and mix for 10-15 seconds.
- Whisk together dry ingredients in separate bowl. Slowly add dry ingredients into the wet with the mixer on medium speed until incorporated.
- Check the consistency of the dough - if it's crumbly at all, use your spatula to scrape the sides of the bowl, especially the bottom, and mix again until the dough is a smooth, even consistency. You don't want to over-mix, but you also don't want crumbly dough.
- Wrap the dough in plastic wrap - flattened out a bit so that it chills evenly - and place in the freezer for 30 minutes or in the fridge for at least one hour (or up to a couple of days).
- Remove from fridge/freezer. Preheat oven to 375. Break off a chunk of dough at a time, work it with your hands for a little while to soften it up enough to roll out (it does not need to be completely soft - you just want it pliable enough to roll).
- Roll dough with floured rolling pin on floured surface to 1/4 inch thickness. Cut shapes & place on baking sheet. (See my notes on baking sheets!) You'll likely be able to fit about 12 regular-sized cutout cookies on one pan.
- Bake cookies for 10 minutes. Remove from oven and allow cookies to cool for 5-10 minutes before transferring them to a wire cooling rack.
- Repeat process for remaining dough.
- Allow cookies to completely cool before decorating. See my notes about decorating below!
Notes
- FYI: Pay attention to the thickness of your cutout cookie dough - you really want to roll it out to about 1/4 inch. Any thinner, and you run the risk of the sugar cookies breaking too easily or getting too crisp when the bake in the oven.
- A note on baking pans: Depending on the baking pans you’re using, you may want to line them with parchment paper to prevent sticking. These USA pans are the *only* pans I EVER use when I bake. I’ve had mine for over 11 years, and they’ve always been absolutely fantastic at baking cookies! They bake evenly, hardly ever stick, and produce the perfect texture. If you're using different baking sheets, unless you’ve made several batches of cookies on them and know they don’t stick, you may want to consider lining them with parchment paper to prevent sticking. For some reason, cut-out cookies tend to stick more easily than other cookies. (I never use parchment paper, though, when I use my USA Pans!)
- To decorate: I have 3 delicious icing recipes that you can choose from – all perfect for sugar cookies - buttercream frosting that hardens, easy royal icing, and glossy sugar cookie icing. I give you lots of tips for decorating sugar cookies in those posts.
- To store: Keep them in an airtight container, and they'll keep for up to a week! (They're best within the first 3 days, but they still taste good for a week.)
- To freeze: Wait until they’ve completely cooled, and stack them in an airtight container. You can use parchment paper between cookie layers just in case, but when they’re not iced, I rarely do this – my cookies never stick together.
- A note about baking temp: I almost always bake mine at 375, but I have noticed that when I bake them at 350, they come out slightly softer. BUT, then the edges aren't quite as clean. They'll still look fine, but they aren't as defined as if I bake them at 375. So, just FYI - both are options! They will definitely still come out delicious & soft at 375, they're just softer at 350, but then you lose a little bit of the definition. So your choice!
I’m not a fan of sugar cookies because I think they’re to sweet and lack flavor. This cookies are not that, the salt makes a wonderful contrast to the sweetness and brings them a distinct flavor.
I don’t usually care for cutout cookies over the Ooey-gooey ones, but these are delicious! Great icing!