Easy Sugar Cookie Icing Recipe that Hardens (easy & tasty!)
This is the perfect, easy sugar cookie icing recipe that hardens when dry, but has a deliciously soft bite. It’s simple to make, easy for decorating, and tastes SO good!

Why in the world does the internet need another recipe for sugar cookie icing?
Because we all have different icing preferences, and this one seems to check so many of our boxes, especially when it comes to FLAVOR!
✔️ Easy to make
✔️ Easy to use
✔️ Makes beautiful cookies!
✔️ Completely hardens on the cookies (but still has a soft bite)!
✔️ Actually tastes GOOD and not like chalky candy – WAHOO!
While my buttercream frosting recipe for sugar cookies is absolutely delightful and is still my favorite sugar cookie frosting, some people want an icing recipe that completely hardens & is still easy to make. So, I went on a quest to see if I could develop a simple icing recipe that does harden completely…but, that still has a rich, creamy taste vs. a chalky, candy taste like so many other sugar cookie icings have.
Because really, that’s one of the biggest draws to buttercream, right? It tastes so darn good.
Believe me, this was no easy feat, but I think I got about as close as you can get with this recipe, and I am SO excited to finally have it in your hands!

Just like when I developed my buttercream frosting that hardens recipe, I treated my kitchen like a laboratory for this one, too – I tested, tested, tested (y’all, we had a lot of cookies in our house for months), and I finally came up with a winning combination for both texture AND flavor.
Overall, this is a pretty basic homemade icing recipe except for one STAR ingredient that so many other sugar cookie icings are missing: butter extract! (Yes, there is such a thing, AND! It was super easy for me to find at my grocery store, it was very inexpensive, and it lasts – I’ve used one bottle for dozens of batches of icing.)
TRUST ME on this: for those of you who absolutely love buttercream frosting on sugar cookies but are looking for an easy icing recipe that gets completely solid, this might just become your new favorite recipe to use on Christmas cookies…or for any time of year!

Tips for making this sugar cookie icing recipe:
- You can use it to decorate cutout sugar cookies, regular soft & chewy sugar cookies, or other cookies that require some icing/piping like gingerbread man cookies. For a gingerbread house, however, I’d stick with royal icing because of the structure & the dry time. (This easy royal icing recipe is a great option!)
- This icing is great for simple decorating, especially if you just want to flood cookies with different colors & festive sprinkles. Just because you’ll want to strive for simple designs doesn’t mean you can’t get some beautifully decorated cookies with this icing! However, if you want to do more intricate design work, you might want to give this easy royal icing recipe or this easy buttercream frosting recipe a try.
- Allow cookies to dry in a single layer on a baking sheet overnight. You’ll want to plan ahead and make these at least a day before you need them. Depending on what time of day you make them & how thick the icing is, they should be almost completely, if not 100% completely dry/hardened by the next morning. They’ll certainly be dry to the touch, but if you’re going to ship them or transport them in such a way that they’re going to have quite a bit of friction, you may want to give them an extra few hours to really harden up. (And yes, the cookies themselves will still stay soft during that time frame, but then you’ll want to transfer the cookies to an airtight container.)

How is this different from royal icing?
- While you can do a little bit of piping with this icing, it is more of a shiny glaze and doesn’t have as much structure as royal icing since it doesn’t contain meringue powder or raw egg whites. While you can do a little bit of detail work with this icing, if you’re wanting to do anything particularly intricate, I’d still recommend royal icing or buttercream.
- Because it doesn’t contain meringue powder or egg whites, you don’t have to spend much time mixing all of the ingredients. You stir this icing by hand – no hand mixer or stand mixer needed. Because of that, it comes together more quickly and feels a little less fussy to make. (Although, now that I know how to make a delicious royal icing – and teach you how to do it, too! – I don’t really think royal icing is all that fussy anymore, either!)
- This provides a glossier finish than royal icing. It will still dry hard, but depending on how thick the icing goes on the cookie, it’ll take more time to dry than royal icing does, and it’ll have a nice shine to the icing, whereas royal icing dries matte.
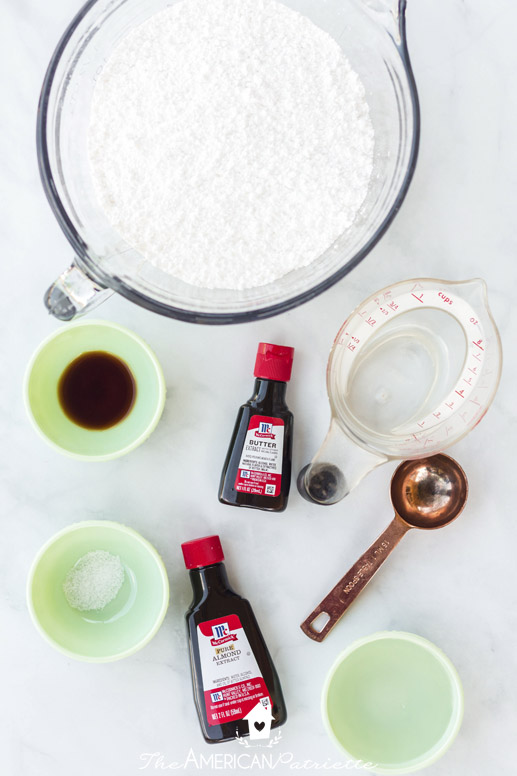
Here’s what you need to make this easy sugar cookie icing:
If you look up sugar cookie icing recipes, the ingredients seem pretty similar from one recipe to the next. However, when I was trying out other recipes, I always felt something was missing, especially in the flavor department. I really wanted to see if I could create an icing recipe that still hardened but had a much richer flavor…and I definitely think this is it!
So, while it does *mostly* contain simple ingredients from your pantry, there’s one “ringer” in there – the butter extract (that was very easy for me to find at my grocery store!) – that does make a HUGE difference in this recipe in regards to flavor.
- Powdered sugar – the base of pretty much all sugar cookie frosting recipes (I just use my store brand powdered sugar). Also known as confectioners’ sugar.
- Light corn syrup – I tried making the recipe both with and without corn syrup, but I definitely preferred the times I made it with. The corn syrup helps add a softer bite to the icing so it doesn’t have such a hard-candy-ish texture. It also adds a lovely gloss to the icing!
- Water – some recipes call for using milk (vs. water) as the liquid in an icing recipe – I tried both, thinking using whole milk vs. water would make the flavor much better. BUT, here’s what I found: 1) There really isn’t a taste difference because the extracts give so much flavor, and 2) The icing took longer to dry when I used milk. So, it just made more sense to stick with water as the liquid!
- Flavor extracts! This is where the magic really happens and what so many other recipes are lacking. (Don’t skip these if you want flavorful icing!)
- Vanilla extract – I always use Mexican vanilla when I bake, but any good vanilla extract will do. (Some people may prefer to use clear vanilla extract if you want a very crisp white icing, but I don’t bother – I think the icing is white enough even with using a regular dark extract.)
- Almond extract – this adds a ton of flavor. When doing all of my recipe tests, we definitely preferred icing with almond extract vs. without. However, if you really don’t care for almond extract or you’re making these for someone who is allergic to nuts, the icing will still come out tasty without it. It just has more flavor with. 🙂
- Butter extract – YES, there is such a thing, and you should be able to easily buy it alongside the other extracts on your baking aisle! This is my not-so-secret ingredient in this recipe that REALLY helps drive that flavor home. A little bit goes a long way – you know that saying, too much of a good thing…? You don’t want to use too much or else you really won’t care for the flavor, but a little bit makes a HUGE difference.
- Pinch of salt – just like the butter extract, a little goes a long way, but it helps tremendously with the flavor. This is another ingredient that I can’t believe gets left out of many other icing recipes – it makes such a big difference!
How to make the icing:
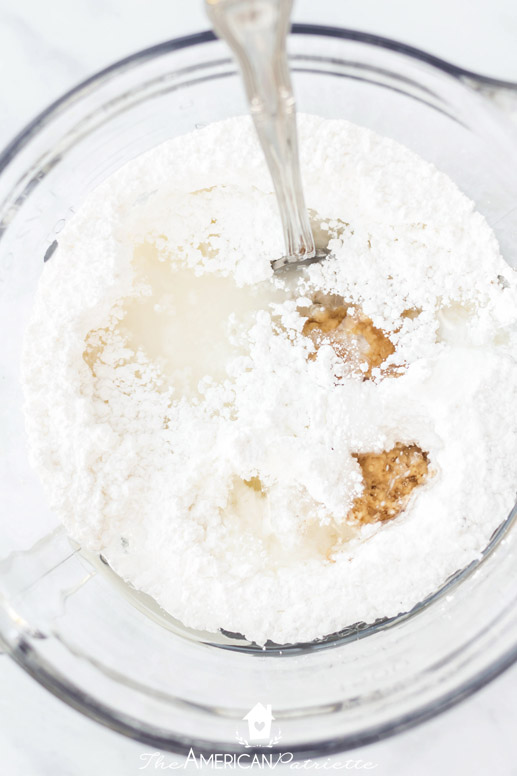
Add all of the ingredients (starting with just THREE tablespoons of water) to a mixing bowl and stir with a fork.
You’ll likely end up with a frosting that looks a little lumpy and feels very thick – almost like peanut butter. That’s ok! This is where you might be tempted to add in quite a bit more liquid, but don’t do it!
At this point, you just want to add a tiny bit of water at a time. Add one teaspoon, give it a stir for at least 10 seconds to make sure everything gets incorporated, and then evaluate if you need more water. I rarely use more than an additional 1-2 teaspoons (on top of the initial 3 tablespoons) of water. Various factors are at play (i.e. a really humid climate vs. a very dry one), so you may find that you need more/less, but the principle is still the same: just start small, and then add a little bit at a time.
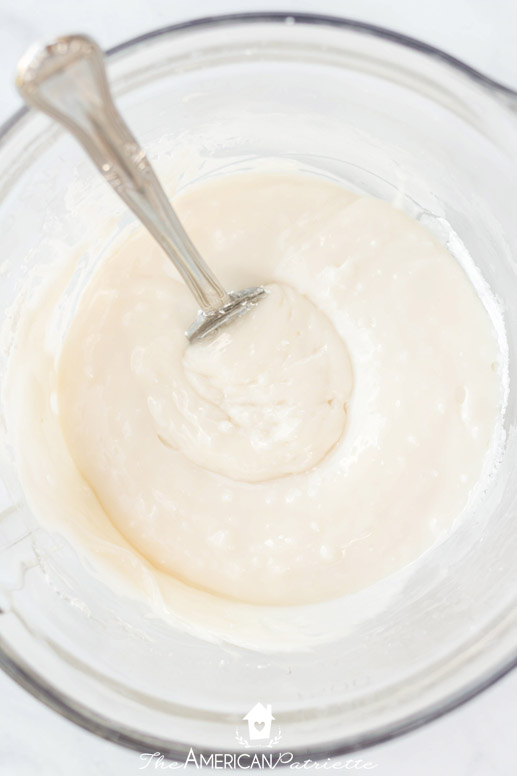
Continue to stir until all of the lumps are out and your icing has an even consistency. The icing will still feel thick, but it should have a little bit of a flow too it. When I had my husband test my recipe with my detailed instructions, he said, “Tell your audience I think it has the consistency of queso.” 😆 (It’s true! Hopefully that analogy helps!)

When you remove the whisk from the icing and icing starts to drip back into the bowl, it should take about 8-10 seconds for it to melt completely back in with the other icing.
But, there’s a more assured way to test the icing without wondering…is this gonna work?!
To test the consistency: put a small amount of icing – maybe about a tablespoon – into a sandwich baggie (or a piping bag, if you prefer), cut the tip at one end, and practice on a cookie. Can you outline the cookie without it running over the edges? If so, can you also nicely fill in the rest of the cookie where the icing has a smooth finish?
Now, if your icing seems too runny, you can add a little more powdered sugar to get it to the right consistency, but I’d really just focus on not adding too much water in the first place.

If you’re not going to start using your icing right away, make sure to cover it with plastic wrap – it starts to set pretty quickly. More details on storing the icing below!
To decorate with this icing:
Use gel food coloring.
I always prefer to use gel vs. liquid food coloring for frosting. It makes for better texture & color. I always just use the basic Wilton gel bottles you can get at the grocery store.
Separate icing out into smaller bowls, add drops of color to each bowl, and then stir. If you know you want a very light color, start small! A little goes a long way! However, for really deep colors, you’ll probably find that you need more drops than you expected. But, start small – you can always add more!
Pro tip: I really like using different shades of green, and it’s easy enough to do! I’ll vary up the amount of green extract I use in different bowls for lighter/darker shades, but then in one bowl I might add a little bit of blue and in another, a little bit of yellow, in order to get different hues of greens.
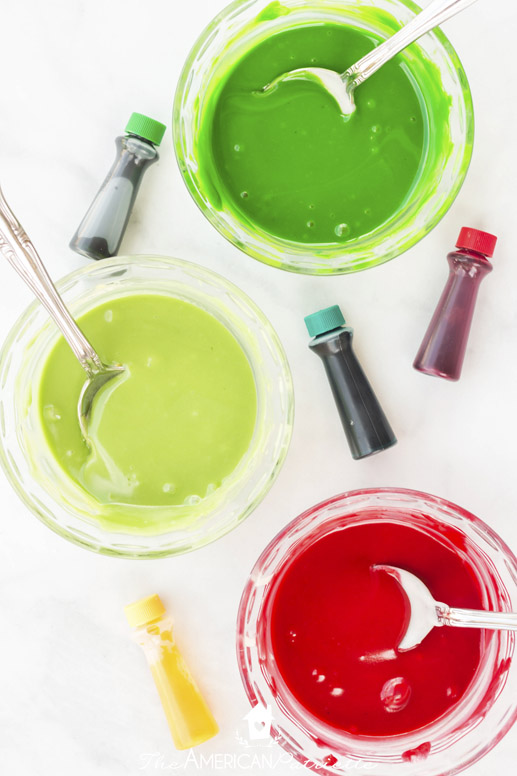
You can see that the icing does have air bubbles in it, but once you transfer the icing into a piping bag and then squeeze the icing onto the cookie, you really shouldn’t see many more air bubbles.
And, if you do, you can easily give them a little pop with your piping tip as you’re adding the icing to the cookie.
Cover bowls of unused icing with plastic wrap.
Even though you’ll want to allow your cookies to sit out overnight to dry, the icing begins to set pretty quickly, so you don’t want to leave the icing in the bowls exposed for too long. I’d put plastic wrap over bowls of unused icing until I’m ready to color them/add them to piping bags.
Use piping bags vs. sandwich bags.
I very often use sandwich bags, cut the tips off the corners, and use those for decorating with frosting. However, because this icing feels thicker, I prefer to use piping bags with this recipe. You could probably get away without using any decorating tips, but I also think I prefer to use them for this icing – just allows for a smoother flow. I use Wilton tips 2, 3, 4, and 5 interchangeably for this icing – the flow is faster in the 5 and slower in the 2, but I don’t notice a huge difference when using them with this glaze-like icing.
You can also use squeeze bottles if you prefer, but I personally always stick with piping bags or sandwich bags!
Pipe the edges then flood (fill in) the icing.
Some recipes call for you to have a piping icing that’s thicker than the flooding icing, but I think the consistency of this one works well enough for both, especially since you’re not going for pristine detail with this one.
To decorate, just pipe around the edges of the cookie…
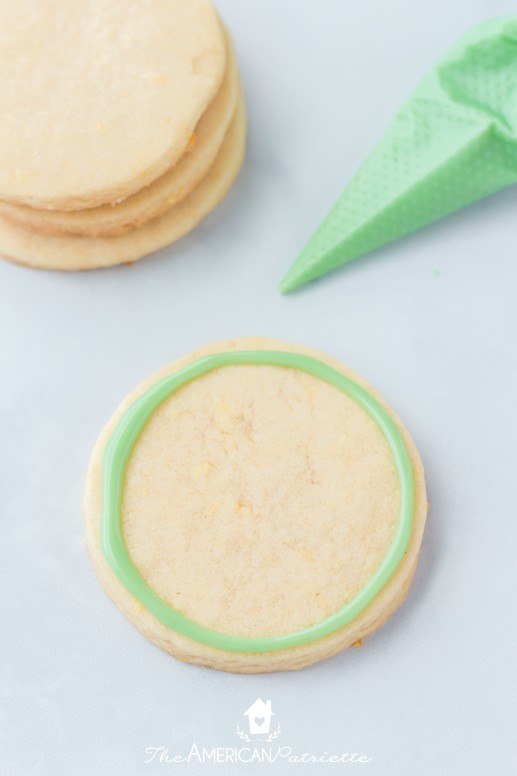
…and then fill it in – the same way you’d color a picture – using the same bag/tip you used to give it the outline.


Then add sprinkles!

Or, you can just pipe the scribbled look:

Add sprinkles.
Because this frosting begins to set so quickly, you’ll want to add sprinkles soon after you add the icing. I’d add sprinkles after icing at least every 2-3 cookies, if not after icing each cookie individually, just so you make sure they stick to the frosting.
Allow them to dry in a single layer on a baking sheet overnight.
While the cookies that you decorate with just the “piped scribble” will harden up in probably 4-5 hours, any cookie that you fill in with icing will need overnight to fully set. I’ve tested what feels like zillions of different variations of recipes like this, and all of them required at least an overnight dry time, so just trust me on that! 🙂

Questions about making this sugar cookie icing:
What do I do with the leftover icing?
You can keep it in the piping bags and/or in an airtight container for a few days. The coloring will start to separate from the icing after 2-3 days, so you don’t want to plan to use it too much later.
How long can I store the icing?
If you’re storing the white icing in an airtight container, it’ll keep for several days in the fridge. (I’ve also left it out on the counter for a few days in an airtight container, and it was completely fine.) However, I wouldn’t necessarily suggest intentionally making it ahead of time. I think fresh icing is easier to work with, and since it comes together so quickly, it’s pretty easy to make when you’re ready to use it.
How long does it take for the icing to dry?
If you just decorate with the squiggles (i.e. you don’t fill in the entire cookie), that icing will probably set within 4-5 hours. But if you flood the cookies (i.e. outline them & then fill them in with frosting), the drying process is going to take longer – I’d let them sit out at least overnight before stacking.
Will the cookies dry out or get stale if I leave them out to dry all night?
Nope! I’ve done this many times, and while you’ll want to move cookies into an airtight container the next day to preserve the freshness, overnight won’t make the cookies get too dry or stale.

How long will the cookies stay fresh?
Well, that probably depends on the cookie recipe you use! I typically use this icing on two different types of cutout cookies – pumpkin spice cutout cookies & cut-out sugar cookies. The pumpkin spice ones are VERY soft and will stay soft for several days. The regular cutout cookies are probably best within 3 days.
Can you use this icing for other baked goods?
If a baked good calls for a glaze, then yes! It’d be fine on top of Bundt cakes, but I’d stick with regular frosting (i.e. buttercream or cream cheese) for cakes & cupcakes.
Can I freeze iced cookies?
It depends. I did some test freezes of this particular icing recipe on my cutout pumpkin spice sugar cookies, and regarding flavor, the cookies came out of the freezer and tasted great. The cookies + the icing were still really flavorful, the texture didn’t change, and they really were delicious. Appearance, however, was a different story – the icing was no longer glossy and it just didn’t look as appealing. So, if you’re wanting to make these ahead of time to store in the freezer and then thaw to wrap up as gifts or serve at a party, I wouldn’t do that with this icing recipe – I’d use my easy royal icing recipe, which freezes beautifully! However, if you just ended up with extras of these iced sugar cookies and you want to freeze them to then enjoy later packed in kids’ lunches or just to munch on as a treat, then yes, freeze away! They’ll still taste great!
Do I have to use the butter extract? And almond extract?
Well, that also depends. There are SO many other recipes out there for sugar cookie icing, but my goal for this one was to actually nail down a recipe that tastes much more creamy and buttery than typical icings (i.e. other than buttercream). So many of the icings that harden taste too candy-like vs. decadent. Both of these extracts in this icing help give it that huge boost of flavor. This recipe – with this ingredient combo – is a great compromise if you love buttercream frosting but really want the hardness that buttercream can’t allow.
Can I add lemon extract to this?
I have definitely made a lemon version of this, but I will say: it doesn’t take much. I’d just use a tiny bit of lemon extract – too much and the icing will taste more like candy than a creamy frosting. Also, if you choose to use the lemon extract, I’d use that before adding in the almond extract. Give it a little taste, and then see if you want to also add the almond. The two together might be a bit…powerful.
Also, here’s the deal: instead of making lemon icing, I’d keep the icing recipe the same and just put it on lemon sugar cookies. I’ve done this several times and it is DIVINE. (i.e. Regular sugar cookie recipe + zest from 2 lemons in it. That’s it!)
Can I add lemon juice to this?
If you don’t need the icing to dry really hard, then yes, you can use some lemon juice (but make sure you then use less water). Because lemon juice is sticky, the icing won’t dry quite as hard, but that may not matter to you!
Will runny icing set?
Yes, eventually, but if it’s too runny, it could take well over a day to fully harden. I’d just make sure that your consistency isn’t too thin! (See details in the “how to make this icing” section for icing consistency!)

Have a question I didn’t answer? Leave it for me in the comments & I’ll happily respond!
Have so much fun making this easy icing recipe! You can really produce some beautiful holiday cookies with this one. 🙂
Other recipes you might like:
- The BEST cut-out sugar cookie recipe – these cookies are delish!! They’re not too hard, not too flour-y, and just overall have a great flavor and texture. They’re a great option if you want to make cutout cookies.
- Soft & chewy sugar cookie recipe – perfect for absolutely delicious, classic round sugar cookies. I wouldn’t use this recipe for cut-outs, as it’ll spread/puff up too much, but for traditional round sugar cookies, I’d recommend this one with flying colors!
- No-Chill Pumpkin Spice Cut-Out Cookies – for a fun, seasonal alternative to regular sugar cookies. These are SUPER soft, very flavorful, and soooo tasty!
- Easy royal icing recipe – this is a great recipe if you’re wanting to do more detailed decorating and want more structure to your icing. It only varies a little bit from this icing, but it does hold up to intricate details, and it also freezes nicely on decorated cookies.
- Buttercream frosting that hardens – the king of all delicious icing recipes! Nothing beats a simple buttercream. If you don’t need your icing to harden up 100%, this might just need to be your go-to sugar cookie recipe. It is DIVINE.

Easy Sugar Cookie Icing Recipe that Hardens (easy & tasty!)
Equipment
Ingredients
- 4 c packed powdered sugar*
- 3 tbsp light corn syrup
- ½ tsp vanilla extract
- ½ tsp almond extract**
- 16 drops of butter extract***
- Pinch of salt about ⅛ tsp
- 3-4 tbsp water see instructions
- Gel food coloring
Instructions
- Add powdered sugar, corn syrup, extracts, and salt to a mixing bowl. You'll need to use a spatula to scoop out all of the corn syrup from the measuring spoon each time - it likes to stick!
- Add 3 T of water to the mixture (You'll likely add a little more later, but just start out with 3 tablespoons.)
- Stir together using a fork until everything is blended together. Your icing will likely be pretty thick and will need more water, but it's easier to thin icing than it is to thicken it, so that's why I wanted you to start out with less water. To thin it out, add a teaspoon of water, stir, and then evaluate if you need to add more. See the note just below about testing the consistency!
- Test the icing consistency: The icing should be thin enough to flow out of a piping bag, but not so thin that it'll run off the cookies. Testing is easy! Just take about a tablespoon of the icing, spoon it in a piping bag or Ziplock-type sandwich bag, cut a small tip out of the bag, and practice on a cookie. You should be able to outline the cookie without the icing running off, and you should be able to fill it in pretty easily. If the icing is too runny, you can add a little bit of powdered sugar - about a tablespoon at a time, mixing between additions - and repeat until it's thick enough.
- Note: the icing in the mixing bowl will likely have air bubbles in it. I don't worry about it - the air bubbles usually go away when you add the icing to the piping bags and frost the cookies. You can always use the tip of your piping bag/icing bag tip to pop any small air bubbles that come up as you're decorating.
- To color: use gel food coloring (I use Wilton brand), starting with just a small amount, in separate bowls & mixing with the desired amount of white icing. The icing starts to set pretty quickly, so you'll want to cover the main bowl with plastic wrap while you add color + smaller amounts of icing in the other bowls. Transfer to a piping bag soon after you mix in order to prevent the icing from getting too hard in the bowls.
- To decorate: Add icing to piping bags or Ziplock sandwich bags, cut the tip out (start out with cutting a smaller tip - you can easily make it larger if you need to), and then use it to pipe an outline around your cookie, and then fill in the inside. You can use the tip to spread the icing around a little bit as you gently squeeze out more icing to fill in the shape. Or, simply drizzle some icing on the cookie for a "scribbled" look. You'll want to add sprinkles right after you ice each cookie, just because the icing does start to set on top pretty quickly.
- To dry: Allow cookies to set out overnight - just let them sit on a baking sheet on your counter. (Yes, they'll still taste great the next day!) Unless the icing is very thick, cookies should be dry enough to stack by the morning. If you plan to ship them or transport them in such a way that they'll shift around quite a bit, you may want to give them a few extra hours on top of that to set.
I’ve been a royal icing user for years but today I am a convert! Thank you for taking the time to work out so many little kinks!
I’m so glad you enjoyed it!! (It really is such a great recipe!!)
Thank you so much for sharing. It looks and sounds delicious! I don’t use corn syrup though. Is there anything that you would suggest as a substitute?
No need to sub! (I also don’t know that I have a good sub recommendation anyway!) The corn syrup is there for the shine & the texture, but you can leave it out. The corn syrup is what gives it that glossy sheen & a softer bite, but if you need to leave it out, you can do that and then just add in a tiny bit more water to compensate for the lost liquid. I would make it without the corn syrup, and then add 1/2 tsp of water at a time, stirring between additions, until you get it to the right consistency.
Depending on what you’re looking for, if you need icing to stiffen up but don’t need it to be 100% hard, you might want to try my buttercream frosting. It’s DELISH and corn syrup-free! https://theamericanpatriette.com/the-best-buttercream-frosting-for-sugar-cookies-that-hardens/