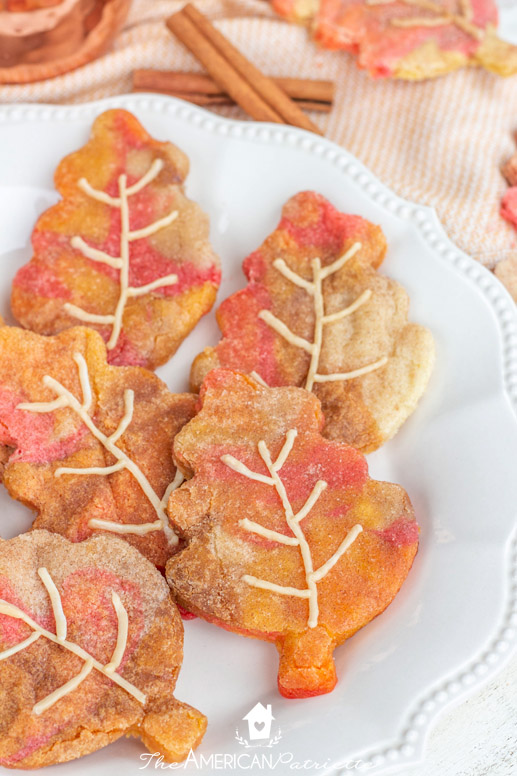
Easy Fall Leaf Snickerdoodle Cookies
These easy fall leaf snickerdoodle cookies are GORGEOUS and absolutely delicious! Soft and chewy snickerdoodle recipe, perfect for Fall & Thanksgiving desserts!

It’s always fun to eat snickerdoodles, but it’s even more fun when they’re BEAUTIFUL and look just like fall leaves!
And, these delightfully soft and chewy fall leaf snickerdoodles are fun to make because they’re SO EASY – they’re almost fool proof as long as you follow these steps below. I have a few notes in here that’ll help set you up for success.
I have a feeling these soft & chewy snickerdoodles are going to be one of the most requested recipes of yours each fall from here on out! Are you ready to make these things with me?!
This post contains affiliate links for your convenience. You can go here to read my full disclosure policy.
How to make Fall Leaf Snickerdoodle Cookies
After making the dough according to the recipe (bottom of the page), and split the dough up into 4-5 bowls, you’re going to start coloring the dough. So, we’re jumping into the process of making them assuming you’ve already made the dough.
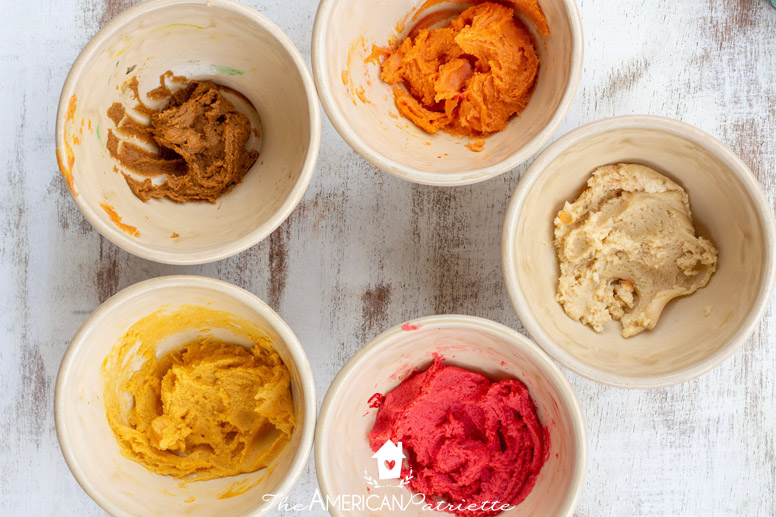
Step 1: Color the Snickerdoodle Dough
Split the dough up into 4-5 bowls, and then add food coloring to each bowl. To color the dough, I used red, yellow, and green food coloring. When I made the orange, I just mixed a drop of the red with a few drops of yellow (you mix it however you want the color to be), and when I made the brown, I mixed red, yellow, and green together to get that caramel color I was going for.
Note on food coloring: if you’re using gel food coloring, I would recommend the Wilton brand. When I’ve used gel coloring in the past, it always turns the frosting/cookie dough so pink! So, for the red, I’d recommend either using liquid food coloring OR the Wilton brand gel food coloring.
Once you’ve got your colors made, you’re about ready to start the really fun part!
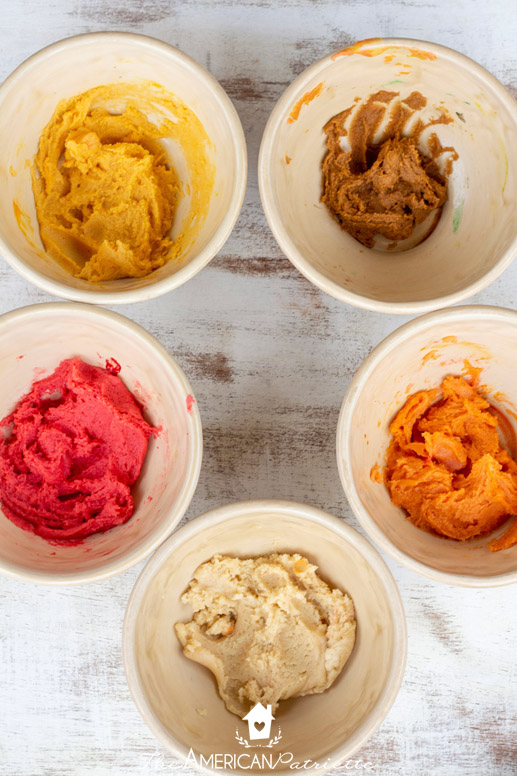
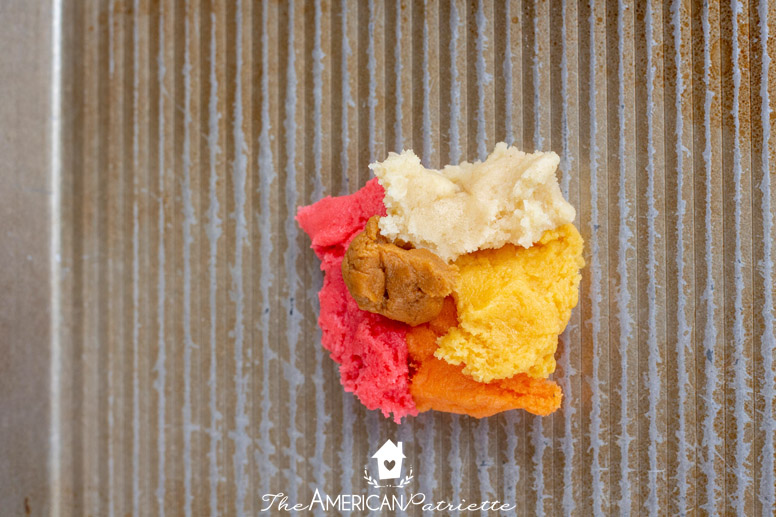
Step 2: Take a pinch of each color and start to form a dough ball
You’re going to take a pinch of each color – doesn’t necessarily have to be an even amount of each one – and start to form a dough ball like this:
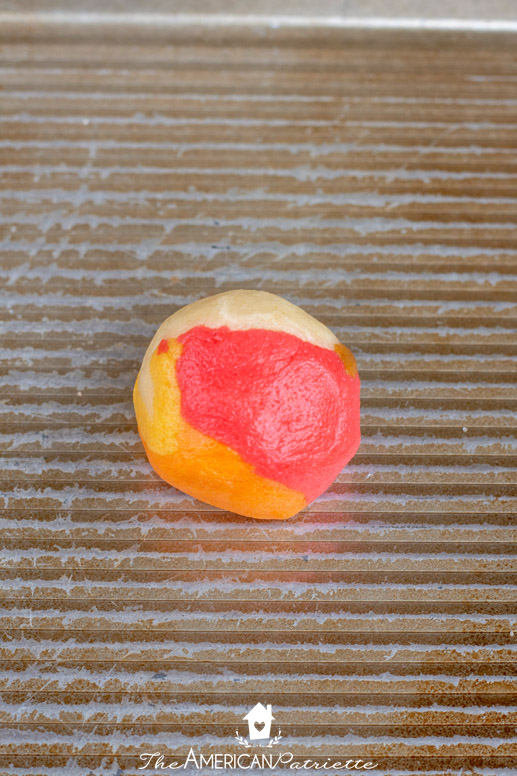
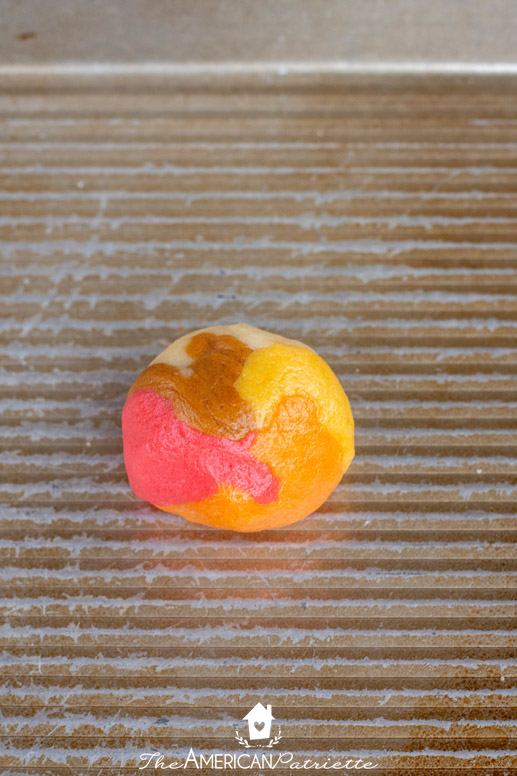
And then gently roll it together like this:
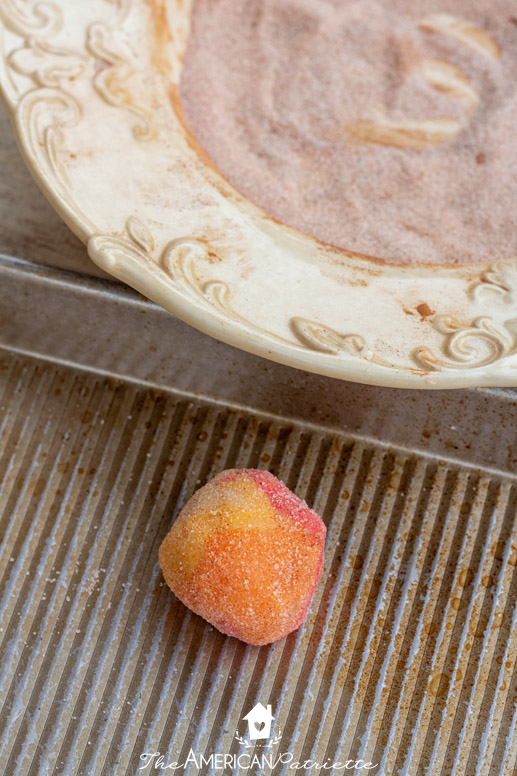
Step 3: Roll the dough ball in your shallow bowl of cinnamon and sugar
Just give the dough ball a nice, even coating of cinnamon and sugar.
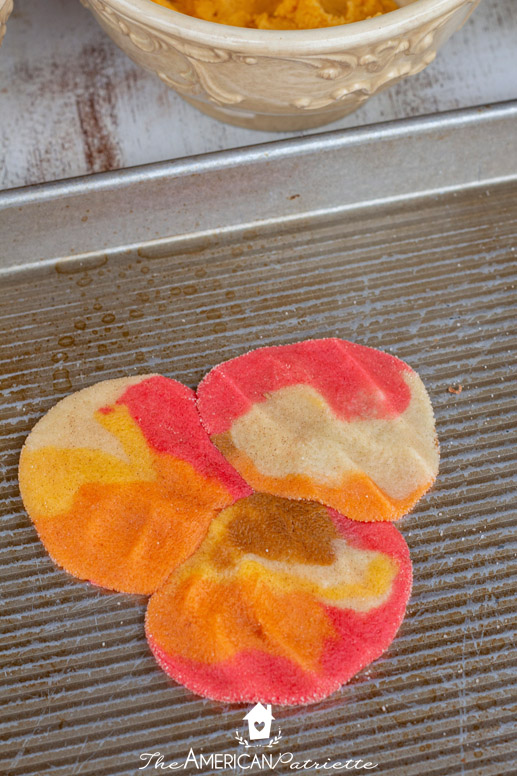
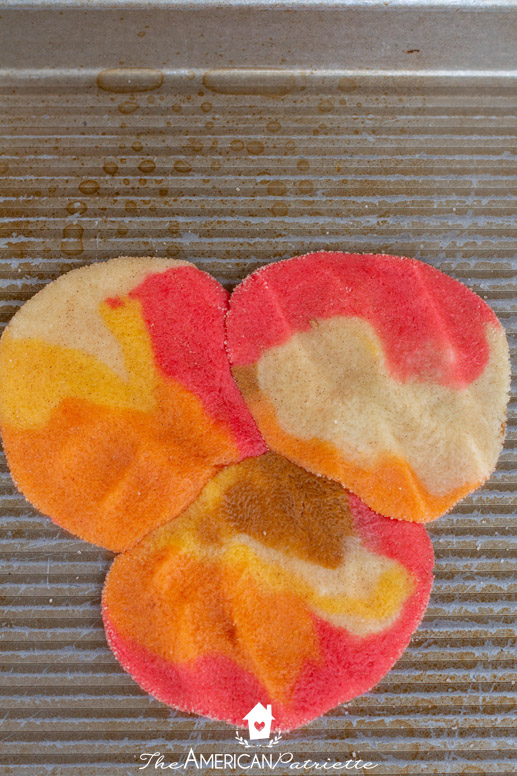
Step 4: Gently press the dough ball onto the non-stick baking pan & repeat
Gently press the dough ball onto the baking pan, and then repeat the same process above to create more dough balls and press them together, side-by-side, onto the pan.
Tip for success: These are the ONLY baking pans I EVER use – I absolutely swear by ’em! I would highly, highly recommend them for your kitchen, and especially for cookies. They’re amazingly non-stick, and that’s what you want for this type of recipe!
Just keeeep going until you’ve gone through all the dough! If you use a large baking pan like I did, you’ll probably *almost* fill it up, but you may not get the dough all the way to the edges, and that’s totally fine.
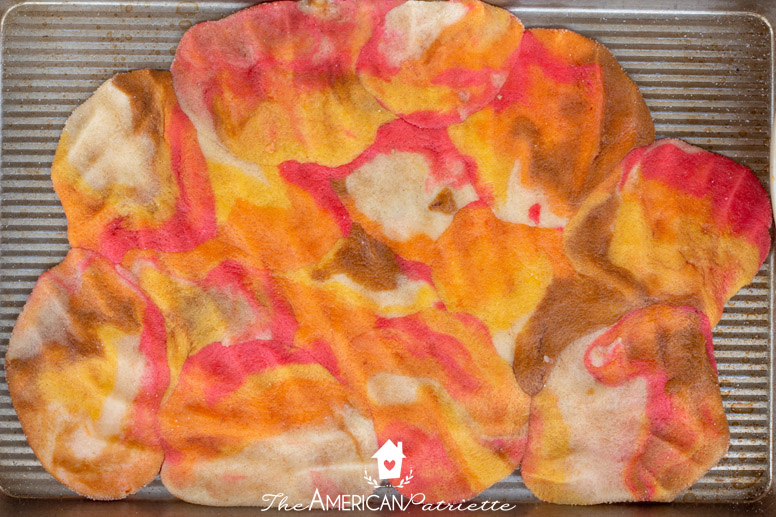
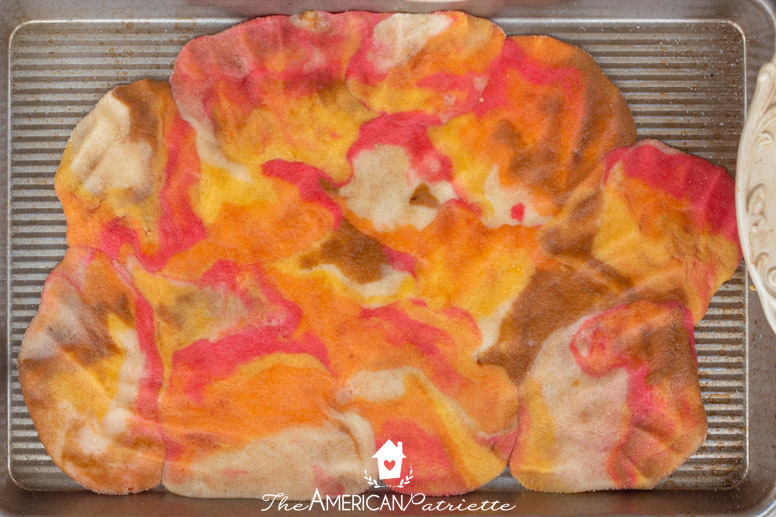
Step 5: Gently press seams together in the dough
This isn’t a huge deal, but I’m trying to make as seamless a cookie as possible. So, I just used my index finger and pressed some seams into one another…
And then used the palm of my hand to gently flatten my fingerprints out.

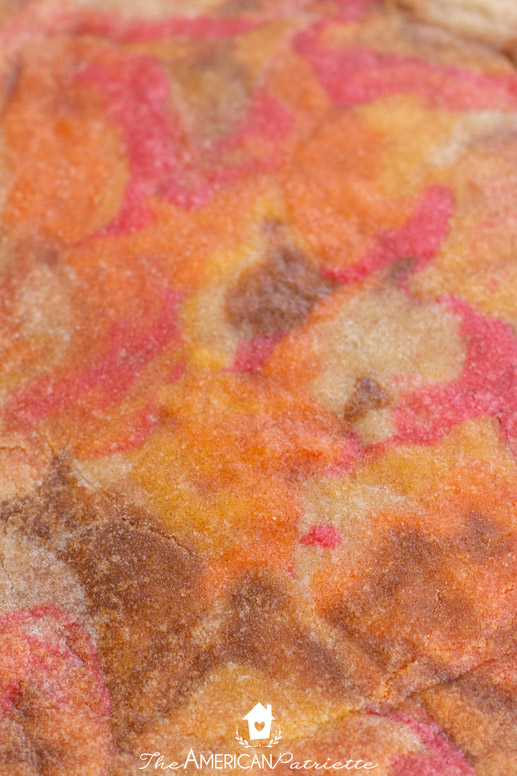
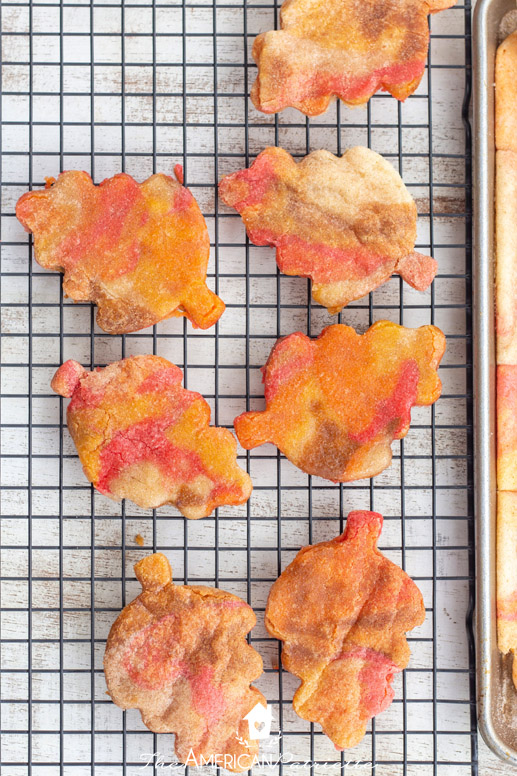
Look at that pretty fall-colored marbled cookie!!
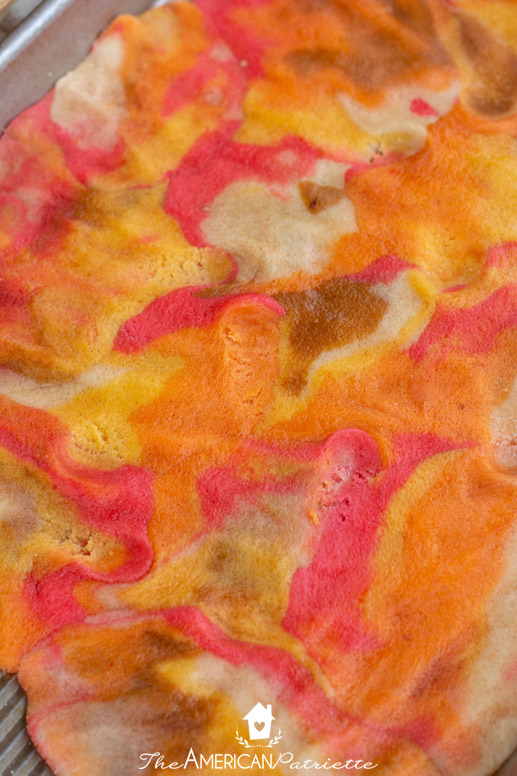
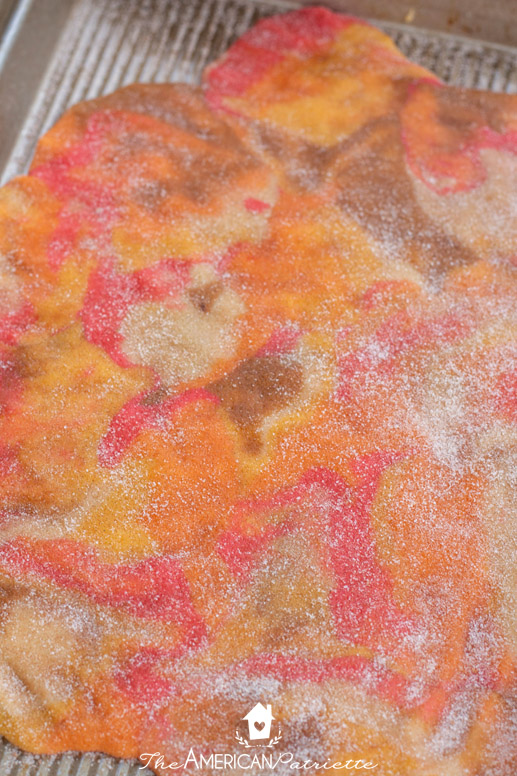
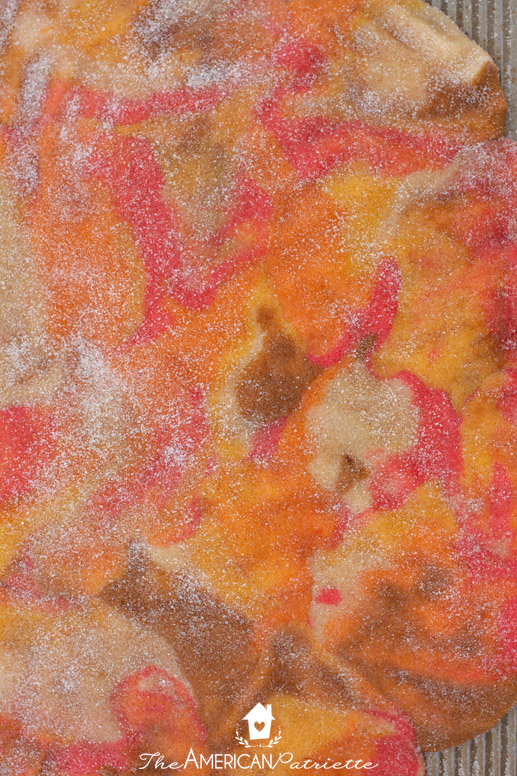
Step 6: Sprinkle cinnamon and sugar on top of the dough
Use the leftover cinnamon and sugar from the cookies (or mix a little more together if you need it) and sprinkle it over the top. Don’t need too much, but you want to give it a nice even coat like this:
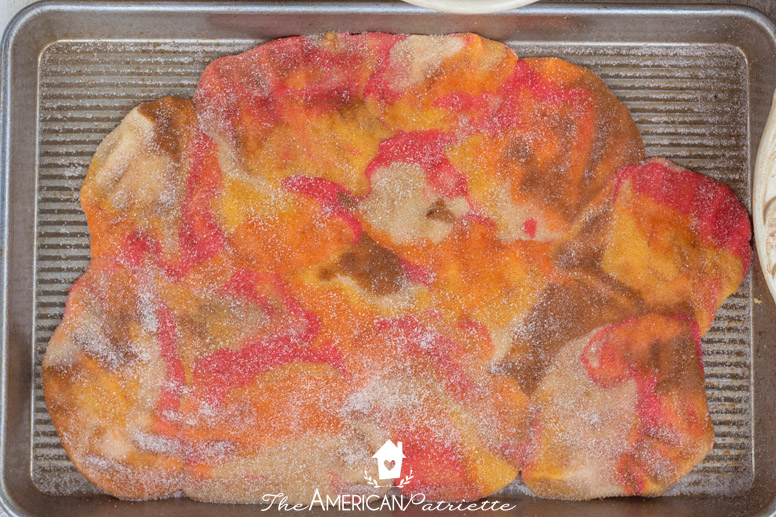
Step 7: Bake the pan at 350 for 10-12 minutes
Tip for success: You don’t want to over-bake these, but you also don’t want to under-bake them, either. When you pull the pan out of the oven, the dough may seem a bit soft in the center part, but that’s probably ok. You don’t want it to be un-cooked, but soft is great.

Let it cool for about 10 minutes (but not much longer than that) and then you’re ready to start cutting the leaf shapes out.
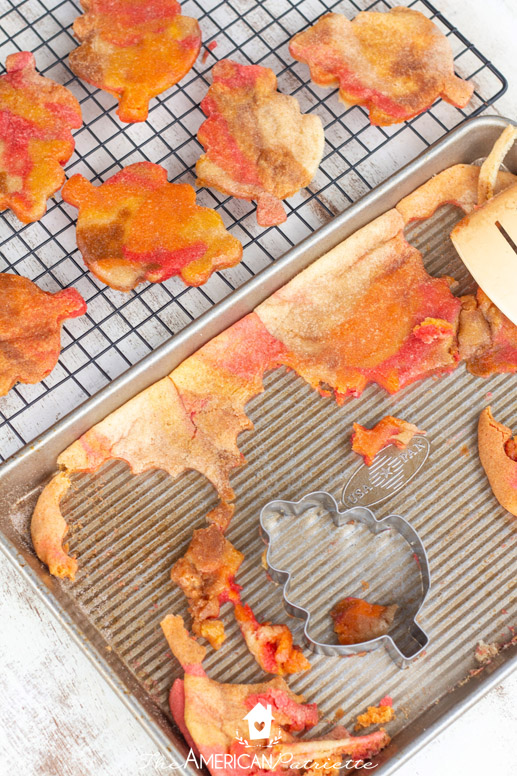
Step 8: Cut the leaf shapes out with a metal cookie cutter
Tip for success: You REALLY want to make sure to use a metal cookie cutter for this, not a plastic one!
Another tip for success: You also want to do this when the dough is still really warm. The cookies won’t cut out very well if it’s too cool – the cookie cutter won’t just slice right through the dough and make a gorgeous shape. It’ll start to crack the cookie if you’ve let it cool for too long. So, really, just about 10 minutes out of the oven is great!
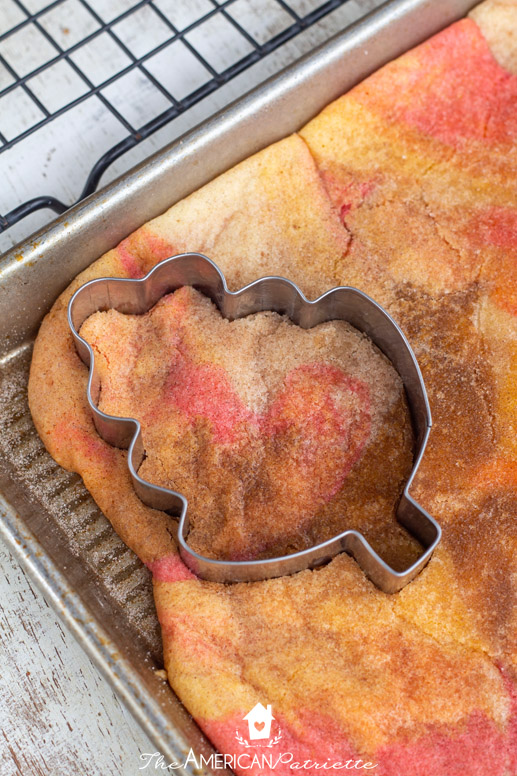
You’re going to use that metal cookie cutter and start cutting leaf shapes out as close together as you can and then transferring them onto a cooling rack.
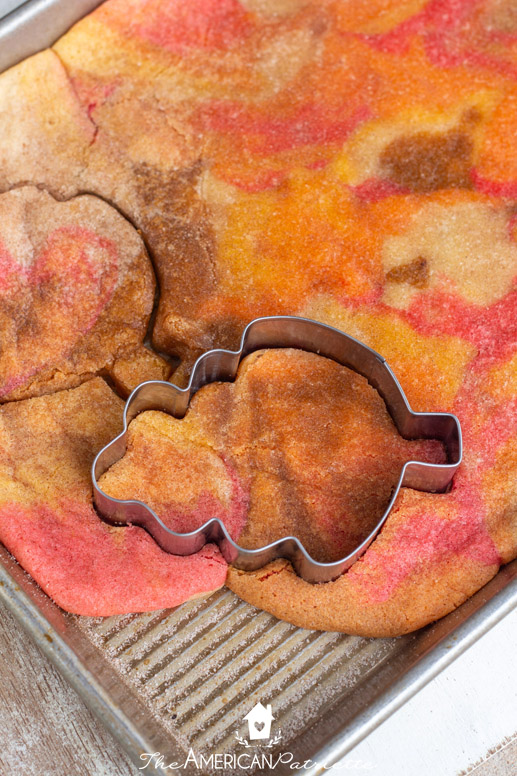
You should be able to transfer them directly from the cookie cutter (I’m telling you, these non-stick baking pans are just miracle workers!), but if you need to use a spatula, just gently use it to lift up the cookie without disturbing the rest of the baked dough around it.
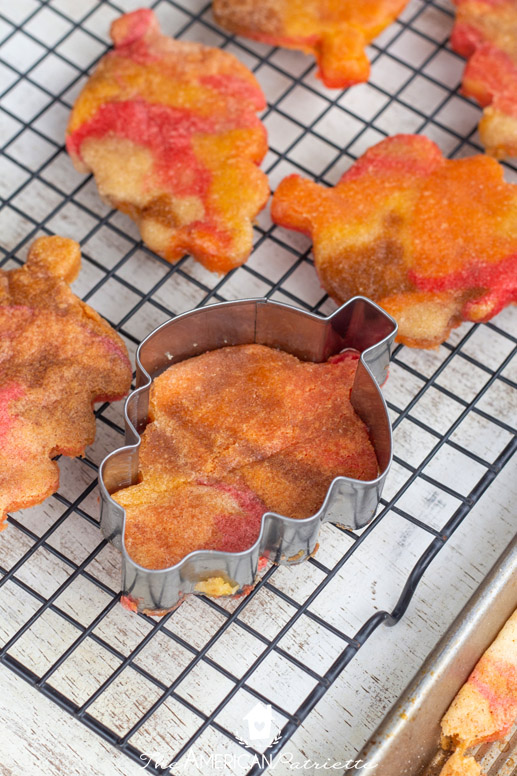
Once you’re done cutting out all these gorgeous leaf cookies, you’re about ready to start giving them some little leaf veins!
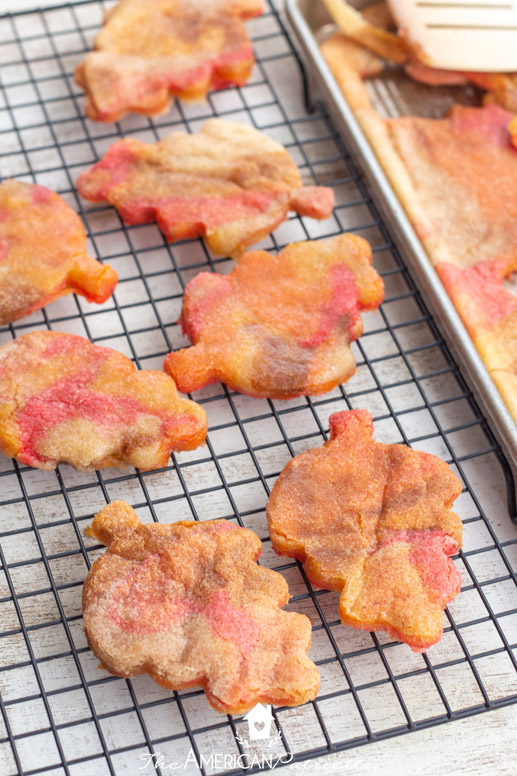
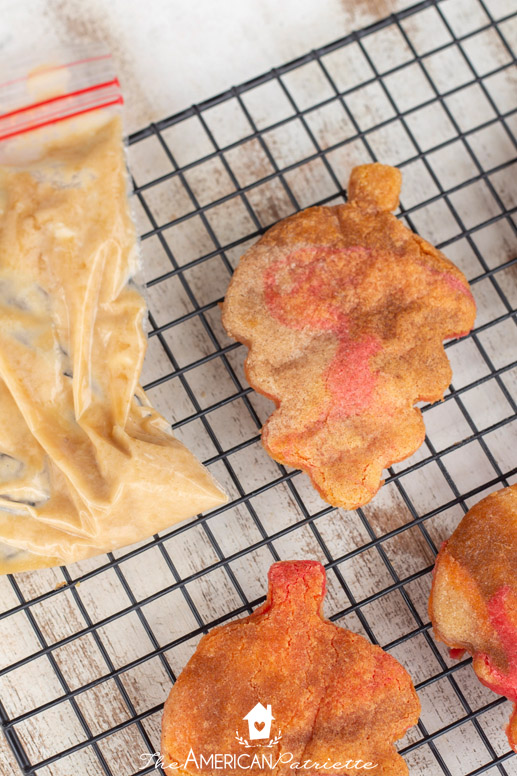
Step 9: Prepare the buttercream frosting according to the recipe & pipe onto the cookies
Just make sure the cookies are cool before you begin this process, but once they hit those cooling racks, it doesn’t take long!
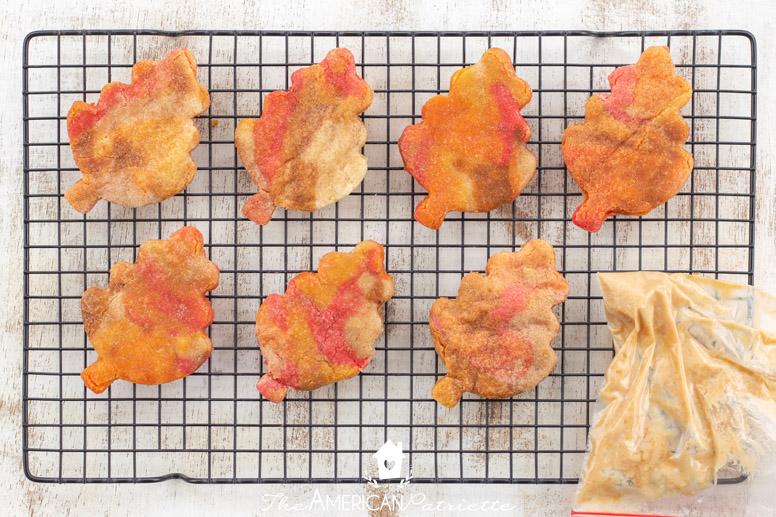
No need for fancy frosting equipment for this icing – just a sandwich bag will do! My frosting got really brown because I added too much vanilla to it – yours probably won’t be this brown! But, it turned out ok since I didn’t want bright white icing for the leaves.
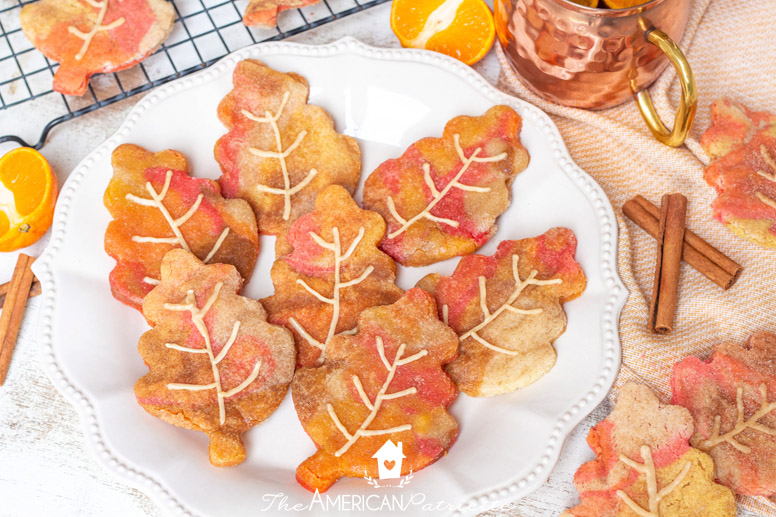
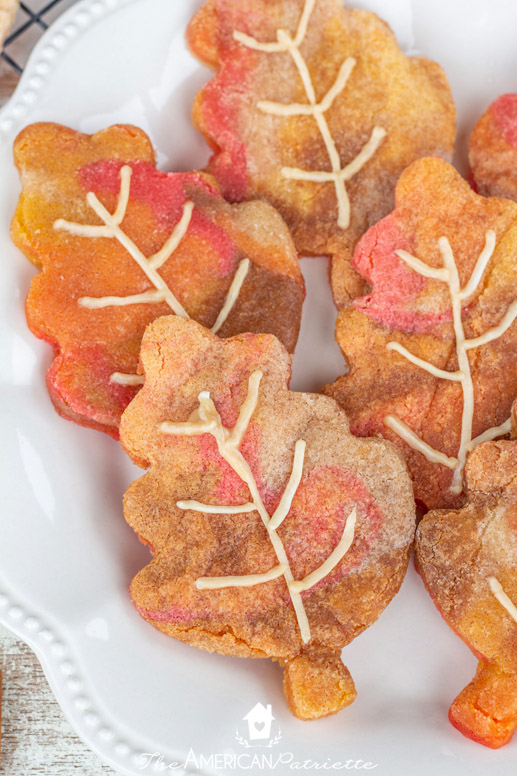
Gently pipe the veins on there, and voila! You have yourself a gorgeous leaf to eat! You can sprinkle some extra cinnamon and sugar onto the icing if you’d like, or just leave it bare – whatever works for you. Either way, these are going to be delicious!

What a perfect dessert recipe to make for Thanksgiving or for a fall potluck gathering!
Just a reminder, here are some of the biggest tips I have for making these fall leaf snickerdoodles:
- If you want more of a red than a pink hue to your dough, use either liquid food coloring or Wilton brand gel food coloring. Other brands of gel food coloring turn things pink rather than red.
- Amazing non-stick baking pans are a must for these cookies. These baking pans/cookie sheets are my absolute favorite in the entire world. I have 2 large ones and one small one, and I use them ALL THE TIME.
- Make sure you don’t wait too long after the large cookie is out of the oven before you start cutting out the leaf shapes. You want the dough to still be pretty warm in order to have that cookie cutter slice right through it.
- Use metal cookie cutters, NOT plastic ones, since you’re working with a really warm cookie. You’ll get much better cut-outs.

Go enjoy these delicious cookies this fall with family & friends!
If you’re looking for other fall-themed dessert recipes, be sure to check out this list of some of my favorite fall desserts – I’ve got some GOOD ones on there! 🙂
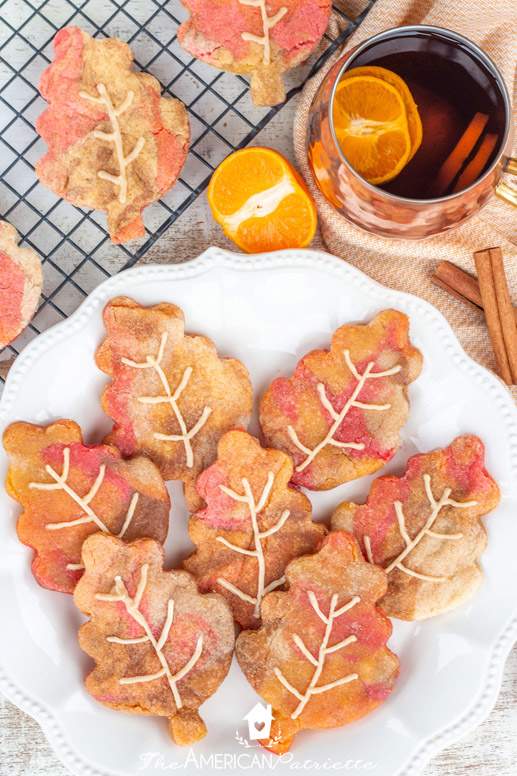
Happy fall! Happy baking! Happy gathering with others!
Love this recipe and want to remember it later? Be sure to save it to your favorite Pinterest board!


Easy Fall Leaf Snickerdoodle Cookies
Equipment
Ingredients
For the snickerdoodles
- 1 c unsalted butter softened
- 1 3/4 c white granulated sugar divided
- 2 eggs room temperature
- 2 3/4 c flour
- 2 tsp cream of tartar
- 1 tsp baking soda
- 1/4 tsp salt
- 3 tsp cinnamon
- Food coloring red, yellow, green* (see notes)
Buttercream frosting (for the leaf veins)
- 2 tbsp unsalted butter room temperature
- 1/2 c powdered sugar
- Dash of vanilla
- Dash of whole milk or cream** see notes
Instructions
- Preheat the oven to 350.
- In a separate bowl, whisk together flour, cream of tartar, baking soda, and salt. Set the bowl aside.
- Using a stand mixer with the paddle attachment, cream butter and 1.5 c sugar together.
- Continue mixing and add eggs to the creamed butter & sugar one at a time.
- Gradually add in the dry flour mixture to the wet ingredients, mixing between additions.
- Once you've prepared the dough, split dough up into 4 additional bowls (leaving some still in the mixing bowl so you have some dough left that doesn't have any food coloring on it).
- In the four bowls with dough, add in the food coloring to reach the hues you're looking for - probably 2-4 drops of a color in each bowl. For these cookies, I had one bowl with red dough, one bowl with yellow, one with orange (I mixed a drop of the red food coloring with a few drops of yellow), and one brown (where I mixed red, yellow, and green together). Mix each bowl up until the food coloring is thoroughly blended into the dough.
- In a separate shallow bowl, mix the remaining 1/4 c sugar + 3 tsp of cinnamon and set aside.
- Take small pinches of each dough color and begin to roll them together to form a dough ball - about an inch or so wide. Roll the dough in the cinnamon + sugar mixture in the shallow bowl.
- Once you've got a sugar/cinnamon-coated dough ball, gently press the dough onto a non-stick baking pan (see my notes for the BEST ones to use for this), and repeat this process until you've used up all the dough, pressing each dough ball into the next to form one large pan of marbled cookie dough (see photos for details!).
- After you've used all the dough and pressed it onto the pan, use your fingers to blend seams between flattened dough - nothing too technical!
- Sprinkle remaining cinnamon and sugar over the top of the dough (if you don't have anymore, just whip up a little more to sprinkle on top), and place in preheated oven.
- Bake the dough for 10-12 minutes, and remove from the oven. **You don't want the cookies to be crispy, but you also don't want them to be way too soft, so check the dough before you officially remove it from the oven.** (You're going to allow the freshly baked cookie to sit out of the oven for about 10 minutes before you begin cutting the cookies.)
- Set the pan aside to begin cooling, and in the meantime, whip up the buttercream frosting by mixing together the butter, powdered sugar, and vanilla. Add a tiny splash of milk if you need it, but you don't want the icing to be too runny! Set the frosting aside until you're ready to use it.
- After the dough has cooled for about 10 minutes out of the oven, start using your leaf-shaped cookie cutters to press into the dough and set on a cooling rack. I recommend metal cookie cutters for this - not plastic ones! Repeat this process until you've run out of large cookie to cut out! Try to cut the leaves close together so you use up as much of the dough for the leaf shapes as you can.
- The number of cookies you get out of this dough will depend on the size of your cookie cutter, but I got about 15-20 large leaf cookies from this amount of dough.
- Once you've cut out all the cookies and allowed them to cool on the cooling rack, put your buttercream frosting into a Ziplock bag or other type of sandwich bag, cut a small hole in one of the corners of the bag, and begin piping the leaf veins onto each cookie.
- Optional: sprinkle on some cinnamon & sugar over the leaf veins if you want them to be a little more brown and a little less white.
- Enjoy!
Notes
- Use METAL cookie cutters for this. Do NOT use plastic ones, because you need to cut the dough when it's still quite warm. The metal ones will cut much better for you. - The baking pans you use for this make a HUGE difference. These are absolutely the only baking pans I EVER use for baking cookies (and roasting veggies, etc.). They're AMAZING! You just need to make sure your pan is non-stick, or else it's going to be really challenging to get those shaped cookies off of the pan. - Do not wait until the baked cookie cools before cutting shapes out of it. Warm (almost hot) dough will still be really soft to work with and will cut easily from the cookie cutter and remove smoothly from the baking pan.
Just curious – why not cut them out before baking. Then squish the dough together again for more cookies. The scraps would be delicious – especially dipped in frosting! 🙂
You have to make special dough for cutting cookies out prior to baking, and I don’t usually care for that kind of cookie because it’s much less chewy. In order for the cookie to hold its shape in the oven, you’d have to add a LOT more flour – this moist, chewy cookie dough wouldn’t hold that leaf shape if you cut it out prior to baking. So, this method, which I do really often for absolutely any kind of cookie recipe, enables me to create any shapes I want with any cookie I want! I’m not limited to a dry cookie recipe! 🙂