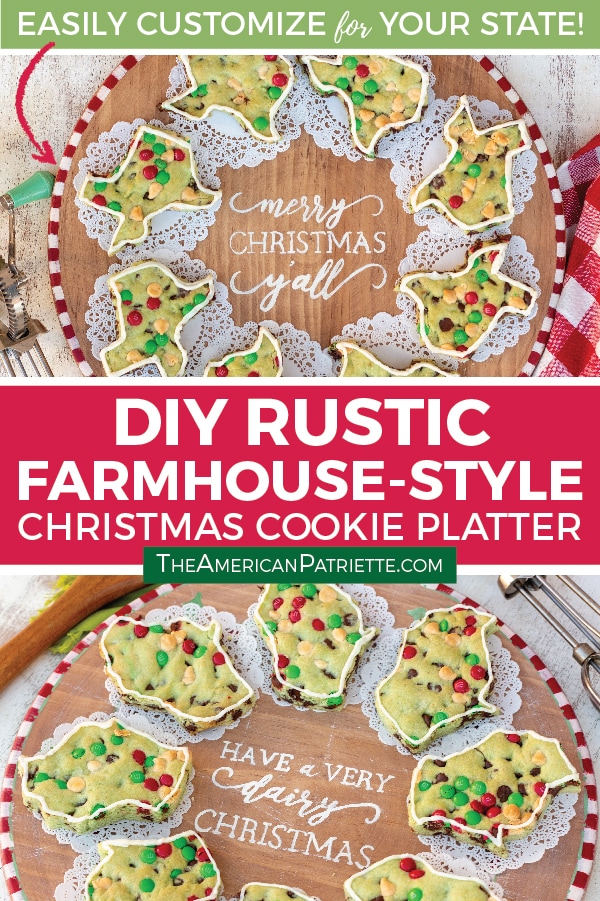
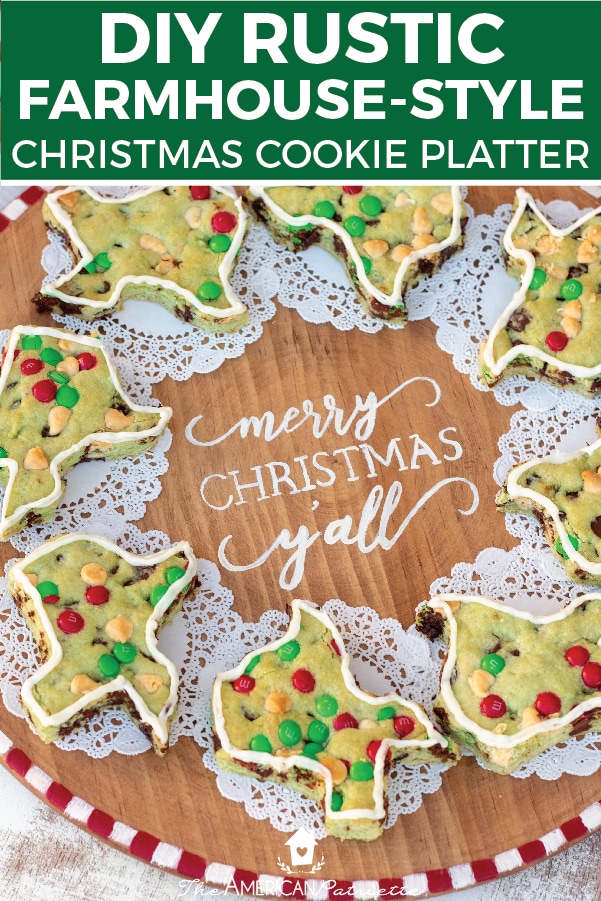
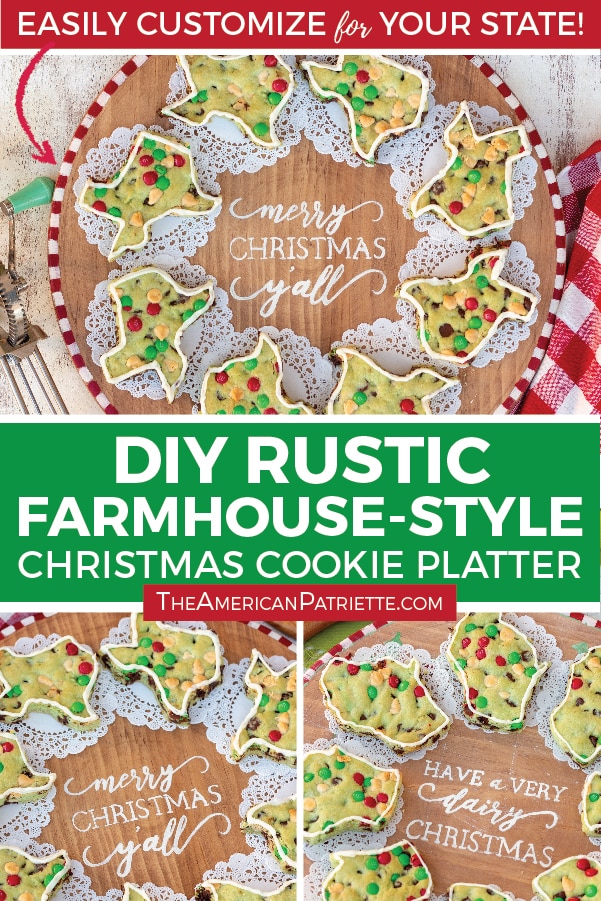
DIY Rustic Farmhouse Style Christmas Cookie Platter
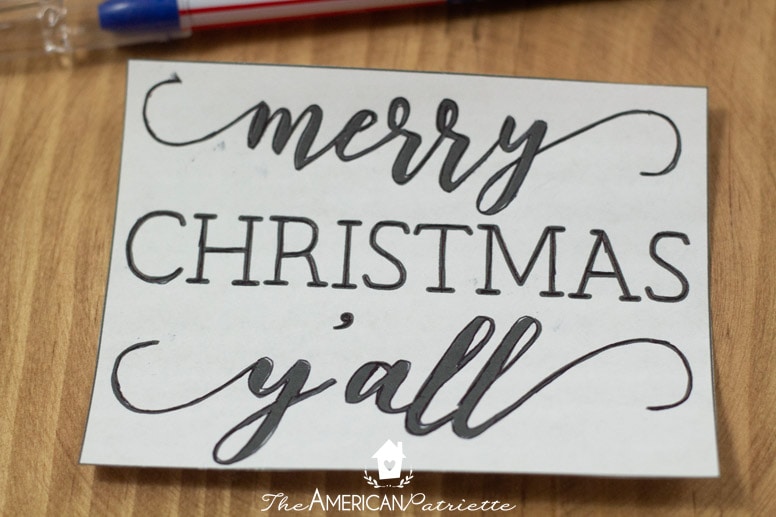
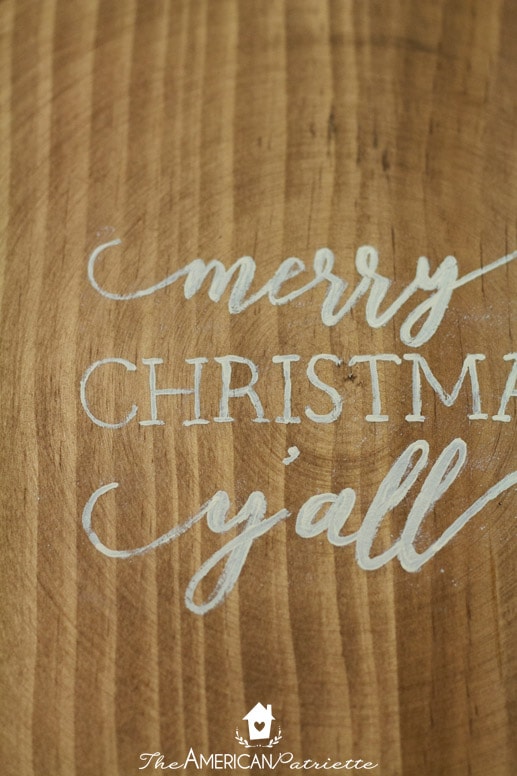
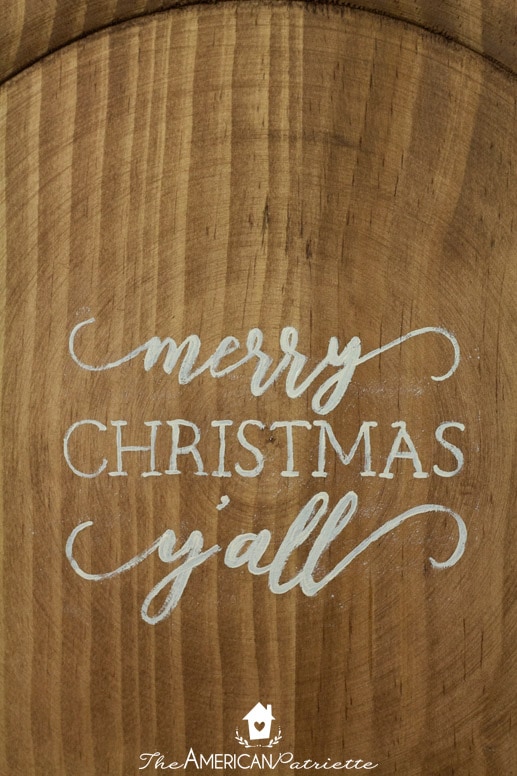
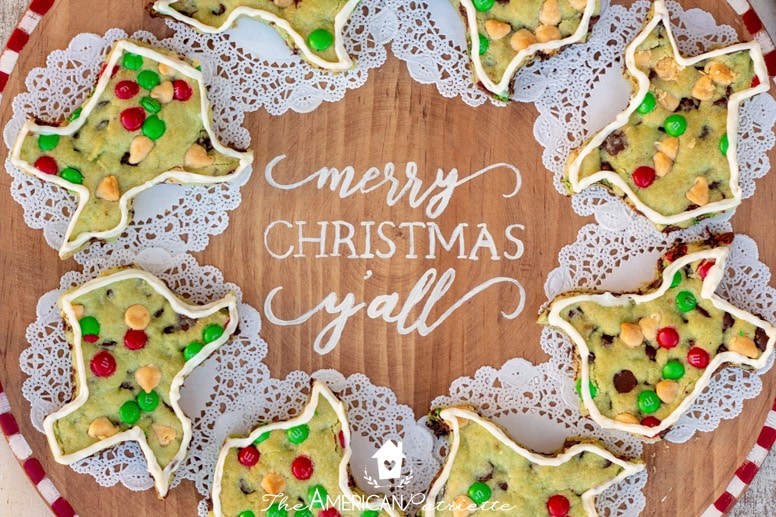
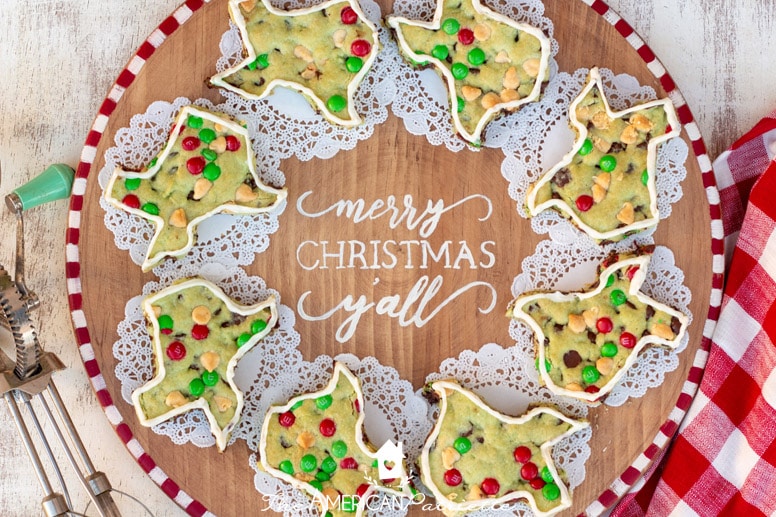
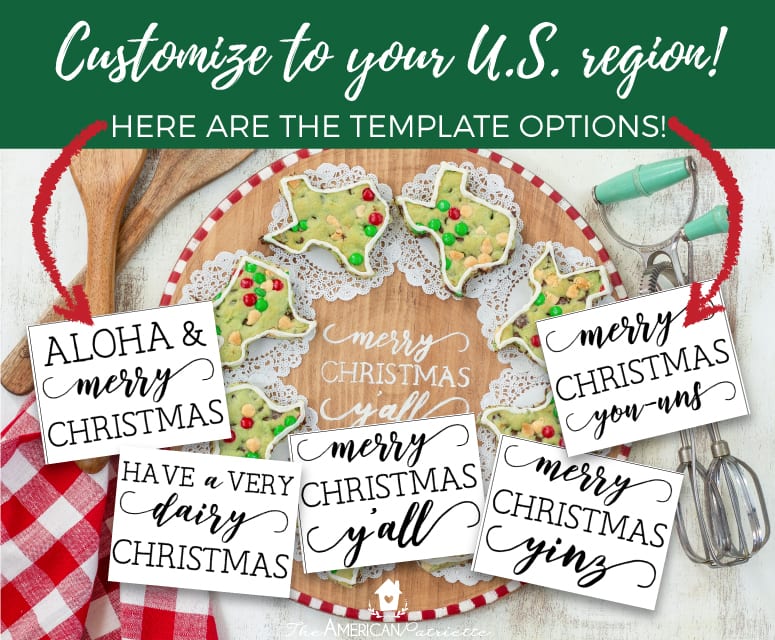
This DIY rustic farmhouse-style Christmas cookie platter is a super simple holiday craft project! Perfect as an easy and inexpensive homemade Christmas gift, hostess gift, or to make in anticipation of a Christmas party! Use the “Merry Christmas Y’all” or any of the other colloquialisms (free templates at the bottom of this page!) and make this platter for your own home state cookies – yes, there are cookie cutters available for each of the states!
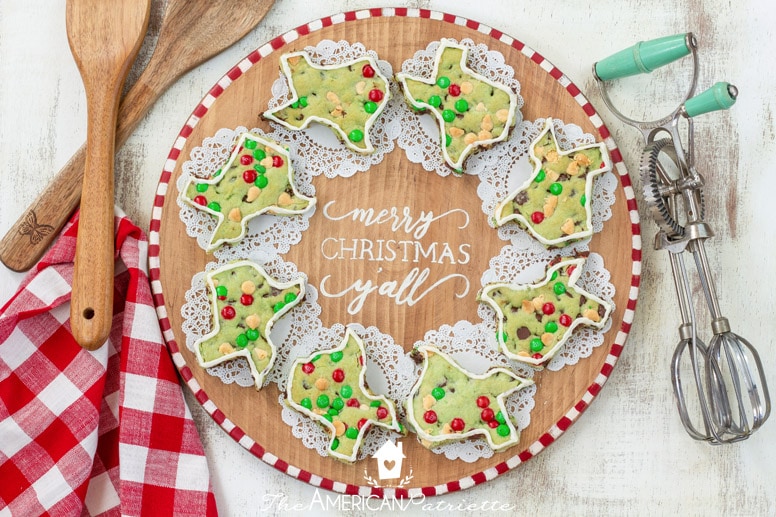
I’ve had this Christmas craft project on my mind for over a year – I am so excited to finally share it! This adorable rustic cottage-style wooden cookie plate will be the cutest thing at your table. And, you can have so much fun customizing it to your own home state – I’ve created several templates for different colloquialisms.
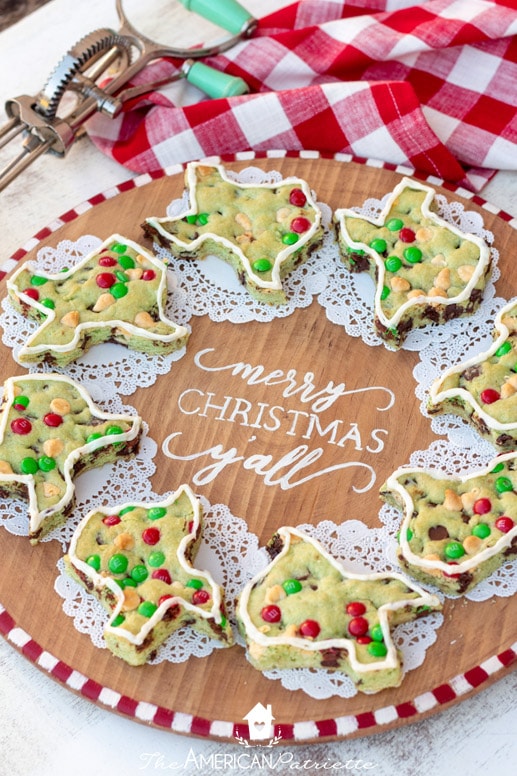
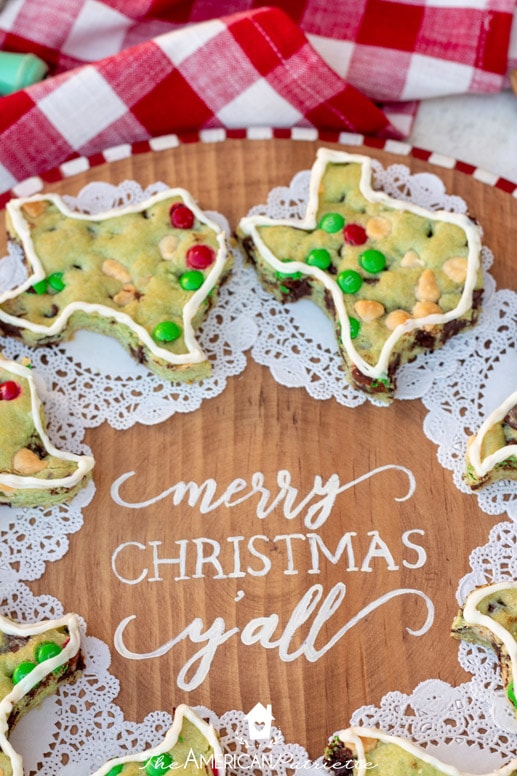
Fellow southerners, y’all enjoy the “Merry Christmas Y’all” template! All the rest of ya – I’ve got several of you covered! 🙂
And before you start thinking you can’t make cookies that are shaped like your own state, let me tell you – I have a fool-proof way to cut out just about any shape of cookie from just about any cookie dough. You can totally do this! 🙂

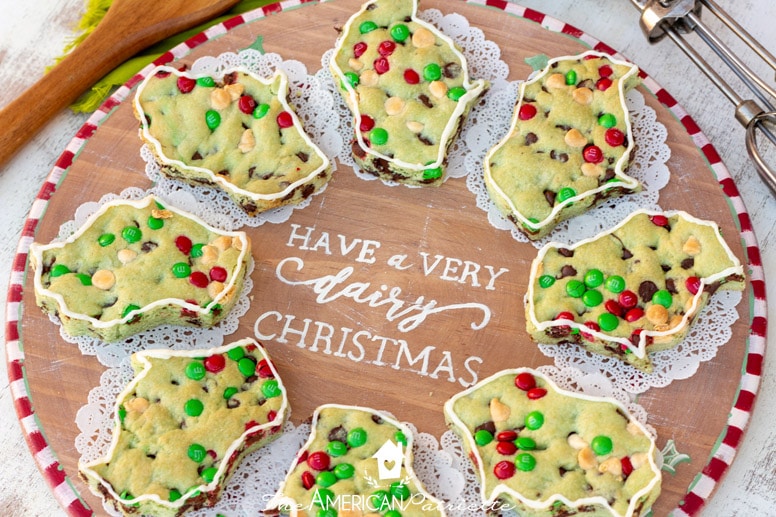
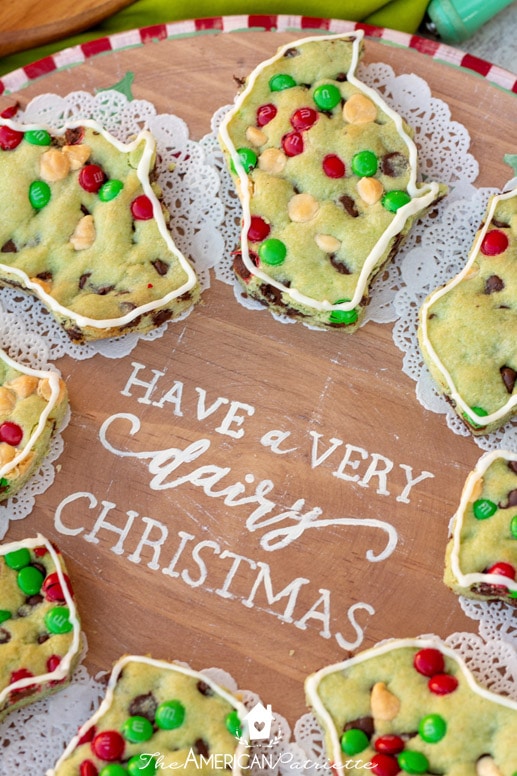
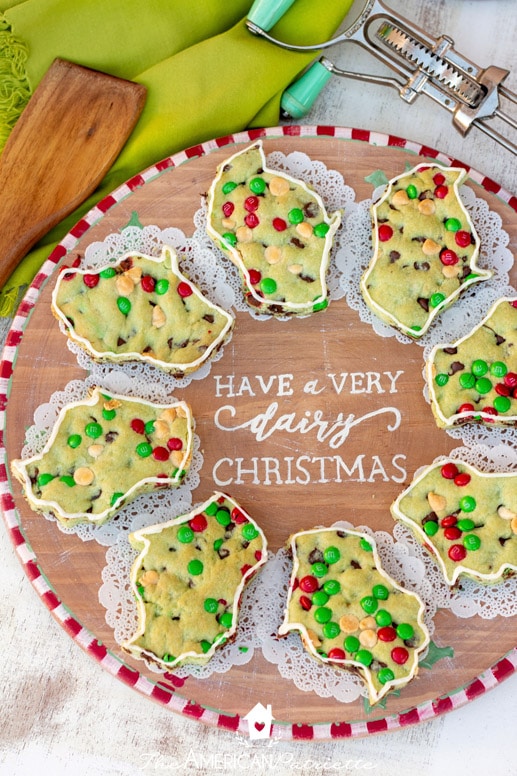
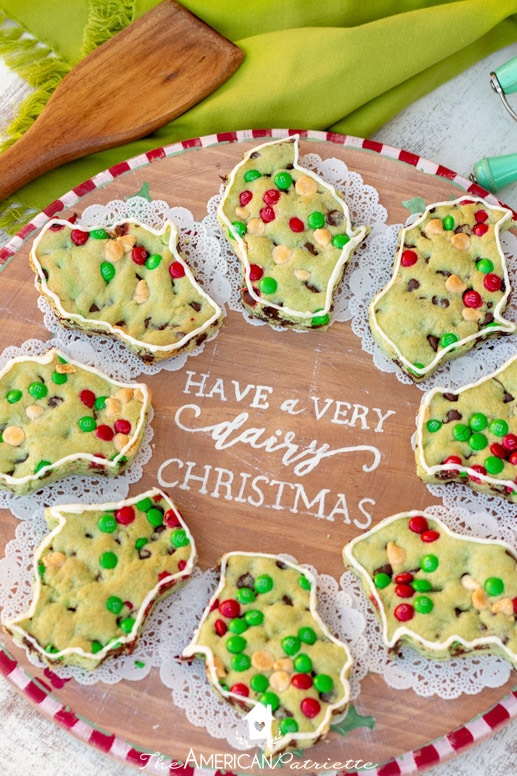
Though I’m a Texan through and through, I have a special place in my heart for Wisconsin – that’s where my mom’s side of the family is from, and the punny gal I am, I just couldn’t resist.
Check out my platter for Wisconsin:
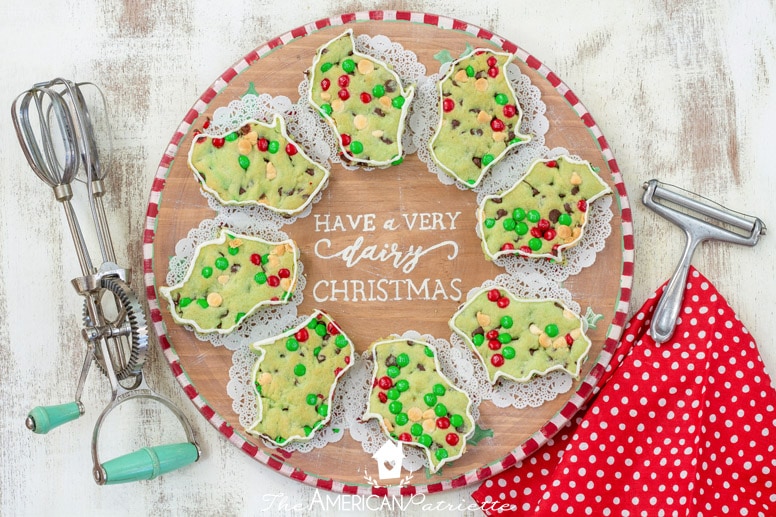
(Yes, this template is available to you for free, too!) I hope every one of you who is from the Dairy State is excited to run out and make this adorable cookie platter & make the corresponding cookies to go with it!
I’m going to walk you through the easy tutorial how to make these super fun home state Christmas cookie platters – everyone is just going to love them when you share this idea with others!
Here’s what you need to know before we get started:
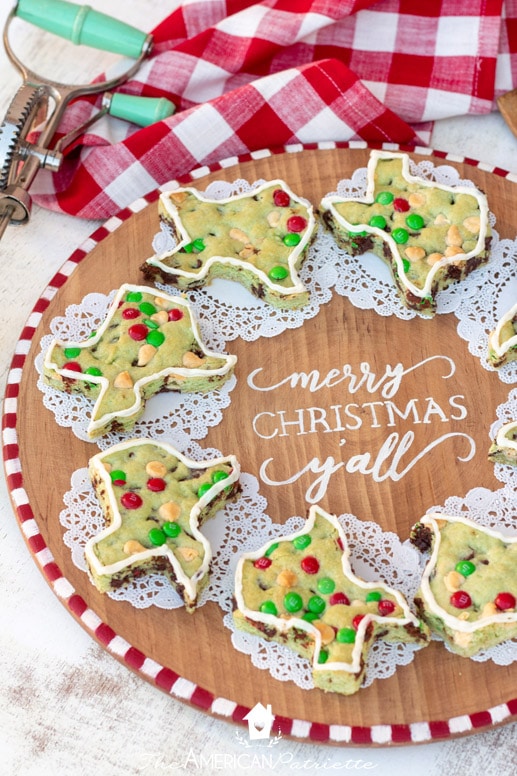
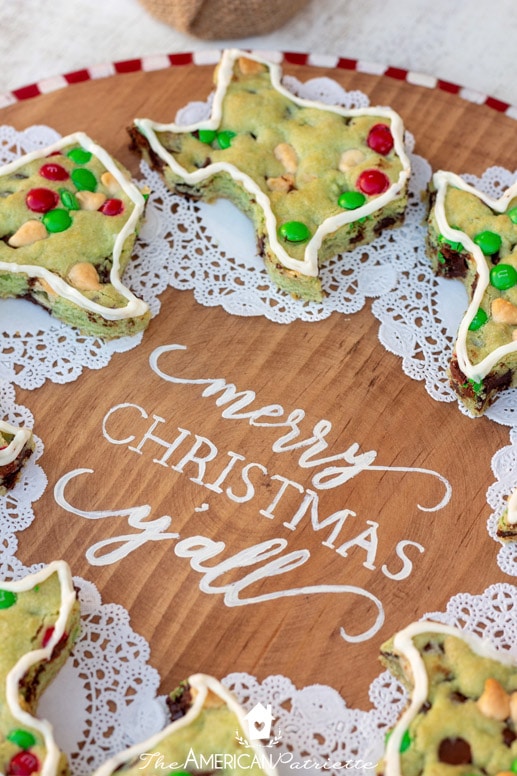
- Cookie recipe & cookie cutting tutorial: If you want to make these fun, Christmas-y green pistachio chocolate chip cookies for your platter, you can find that recipe here, along with a tutorial for how to cut the shapes out of the dough. It’s for a Christmas tree cookie recipe, but the recipe & the concepts are the exact same for these state shapes.
- Your state’s cookie cutter: You can find a link to your own home state cookie cutter (or, are you making this for someone who lives elsewhere? Such a good gift!!) at the bottom of this page. Yep, every one of you is represented in the form of cookie cutters on Amazon. 🙂
- Access to the template to trace the words onto the platter: you have free (yippeeeeee!) access to the templates in my resource library. Check out the bottom of the post to see which ones I have available – I know not everyone says “y’all,” so I had fun with it and used some different common colloquialisms (U.S.).
Fill out the form at the bottom of the page and you’ll get free access to the templates in my resource library. (Don’t see an option that you’d like? Leave me a comment on this post – I’ll gladly consider adding more to the collection!)
- You’ll want to use doilies on the platter: Everything I used in this is specifically non-toxic, but I did hours of research (seriously – so much) online as well in stores as asking a BUNCH of people at Lowe’s & Hobby Lobby specifically seeking food-safe paint/sealer. Let me tell you, it was impossible to find paint and sealer that claims the exact label of “food grade” or “food safe.” However, after a bazillion conversations, we all agreed that using paint/sealer that specifically says “non-toxic” and has no warning labels on the packaging should be completely fine for a cookie platter, but to use doilies underneath the cookies.
I wouldn’t serve anything hot or use the platter as a cutting board, but as a tray, I am perfectly fine using it to serve cookies to my family and guests. So, just know that ahead of time – you do whatever you feel is best! I’ll talk more about the materials I used in the steps below and you can decide from there. 🙂
This post contains affiliate links for your convenience. You can read my full disclosure policy here.
Ok, let’s get started crafting!
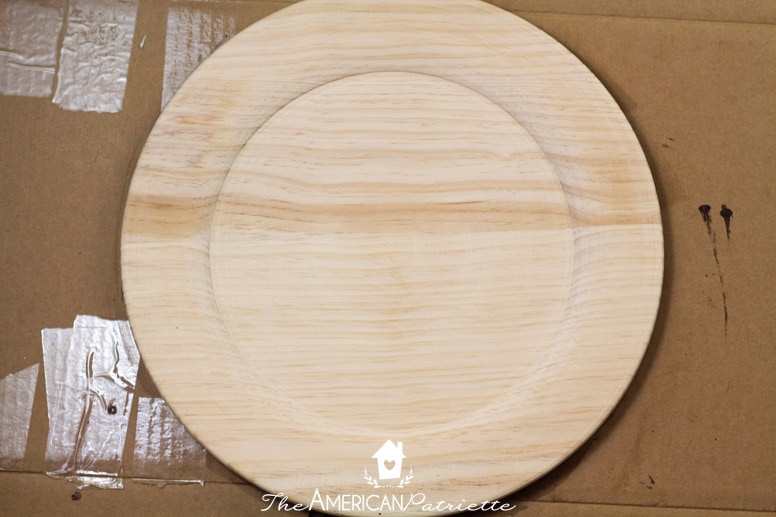
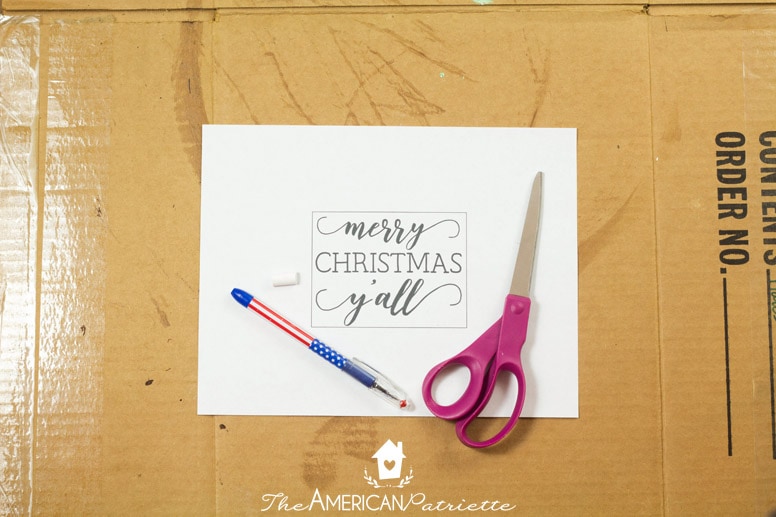
Here’s what you need for this project:
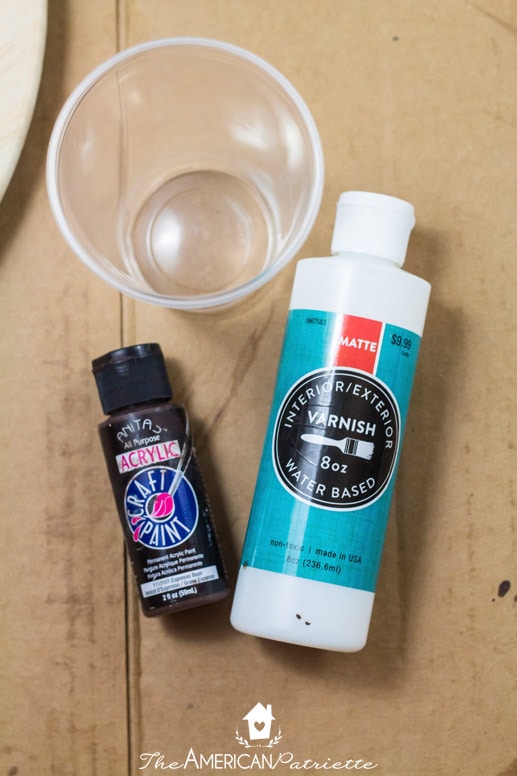
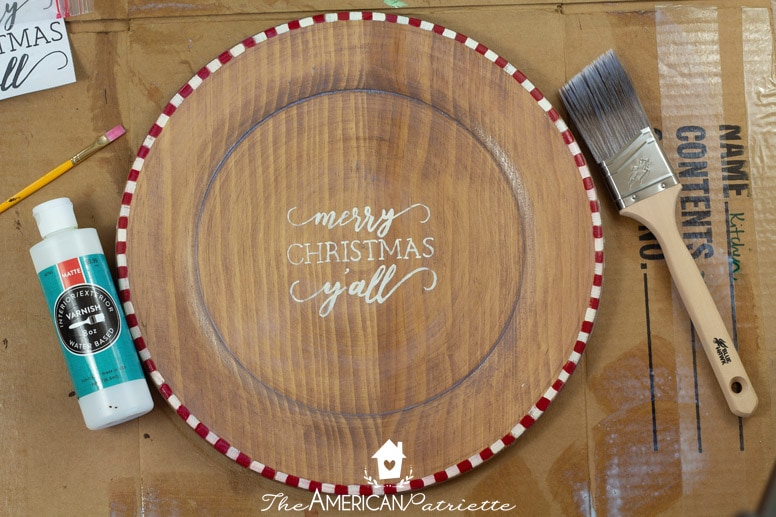
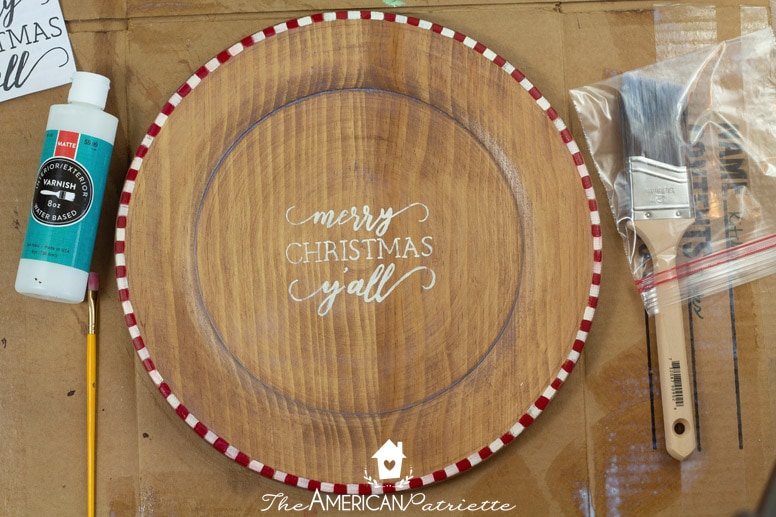
- Large wooden plate (I got mine from Hobby Lobby)
- Brown non-toxic acrylic craft paint – check the labels. The one I used specifically said “non-toxic,” “water-based,” and had no warning label on it. (I got mine at Hobby Lobby)
- Interior/Exterior Varnish – this is exactly what I used. It specifically says “water based,” “non-toxic,” and also had no warning label on it. (Again, from HL)
- Plastic cup or small plastic/paper bowl
- Soft-bristle, larger paint brush (to apply paint/varnish as a stain)
- Old sock or rag
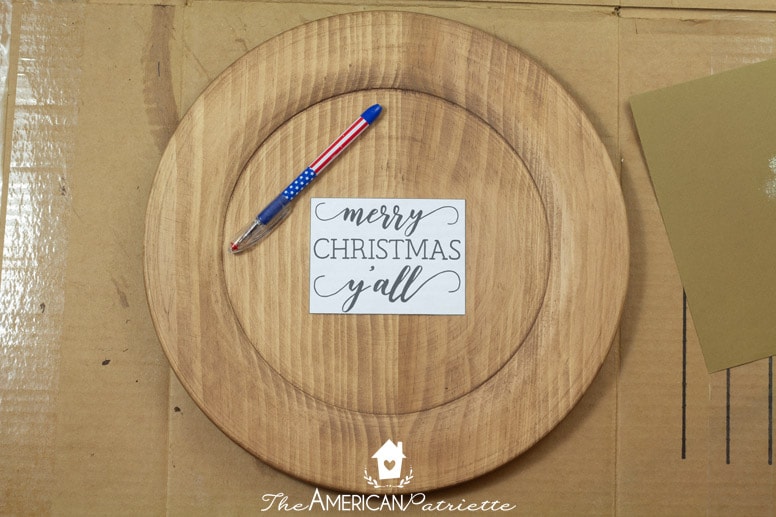
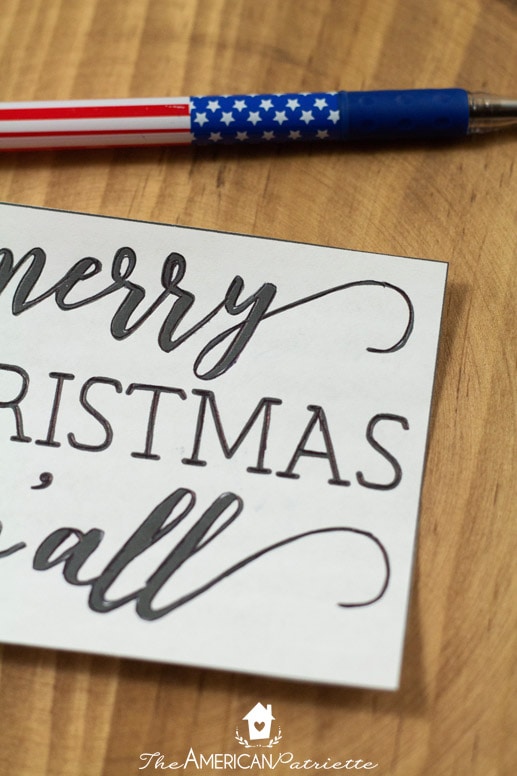
- Paper template for the “Merry Christmas Y’all” (or other) words (you can snag it by filling out the form at the bottom of this page)
- Piece of plain chalk
- Pen
- Small, firm craft paintbrush to paint the letters
- White or ivory acrylic paint (again, I used one from Hobby Lobby that said “water based,” “non-toxic,” and had no warnings on it)
- Red acrylic paint (same conditions as above)
- Additional craft paintbrush for painting the red & white stripes on the rim
- Larger, good-quality angled paint brush with soft bristles to apply top varnish (I used one from our garage – this is what I used and it worked well!)
- And then for the cookies – get your home state cookie cutter (links are at the bottom!) & snag the Pistachio chocolate chip cookie recipe over here
Yay! Let me walk you through the steps for how to make this adorable Christmas cookie platter!
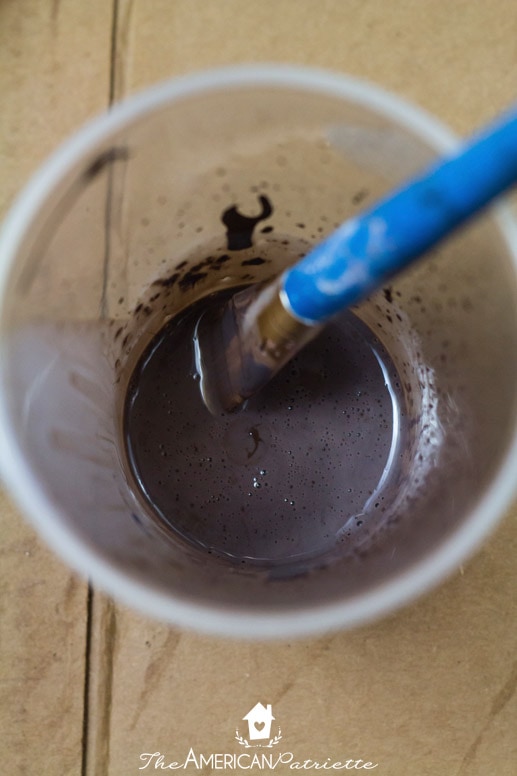
Step 1: Mix varnish & brown paint to make faux stain
Mix a ratio of about 3:1 of varnish to brown paint in a plastic cup or bowl. You can always adjust the ratio to make it darker, but it’s harder to make it lighter, so start out on the lighter side.
By doing this, you’re making somewhat of a faux stain to spread onto the platter – it is SO cool!
Step 2: Spread stain on front (work quickly!)
Get your wooden platter out…
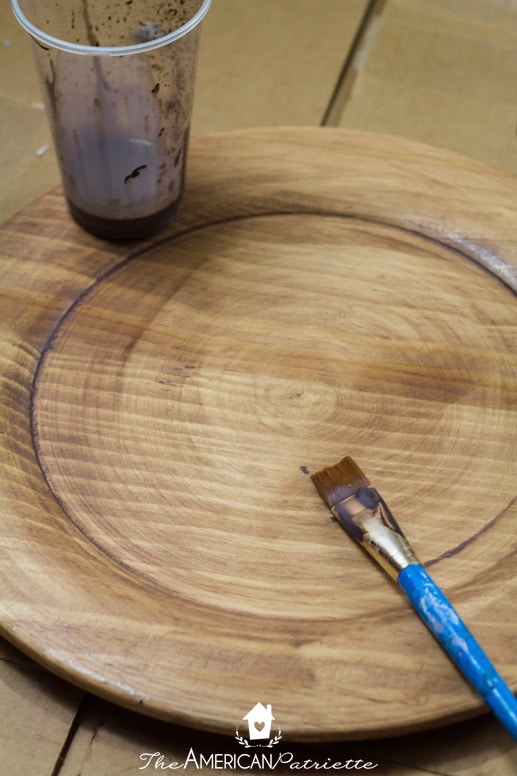
And begin spreading the faux stain on with a wider craft paintbrush. The one I used had pretty soft bristles, and I think it worked really well to help me spread it evenly. You’ll want to work quickly so that the stain doesn’t set in and cause uneven lines.
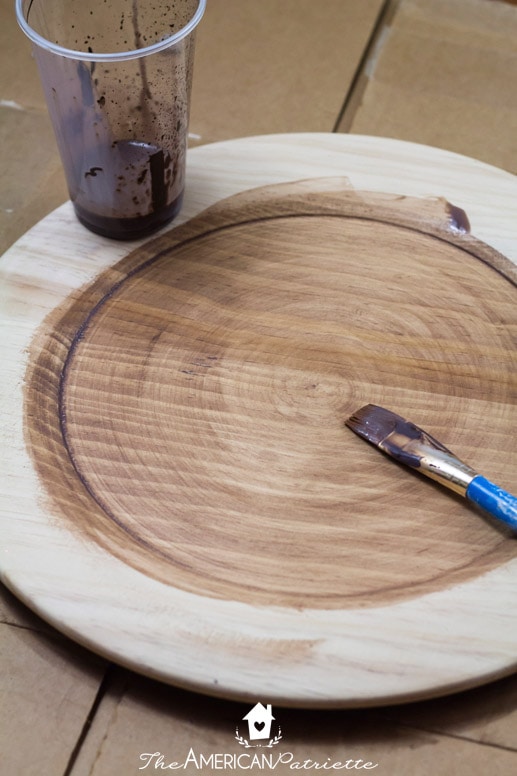
You can see I just painted it on in circular motions along with the platter. This process only took a minute or two.
Then wipe the faux stain (lightly) with an old sock or rag.
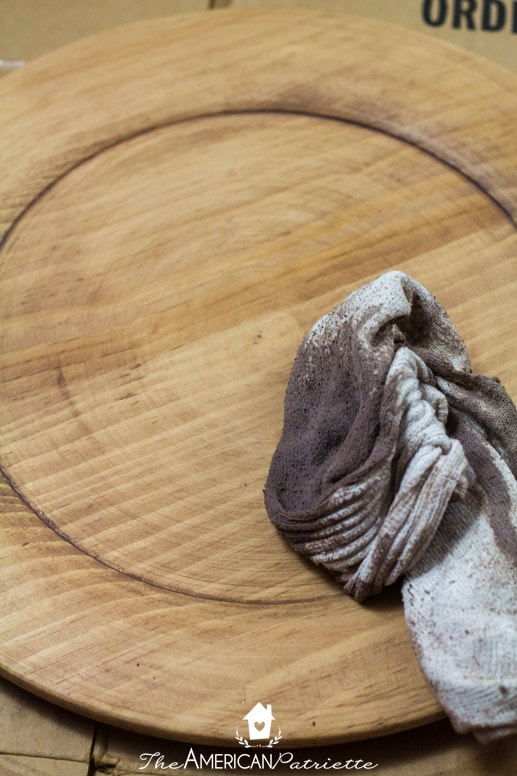
You’ll somewhat rub it into the wood, and then let it dry for about 5 minutes before you decide if you’re going to put on a second coat. I think I did 3 coats of this to get it to the desired tone/hue I wanted on my plate, but that’ll vary depending on what color of brown paint you use, as well as depending on the ratio of varnish to paint you use.
Step 4: Repeat stain process until desired hue/tone of wood
I didn’t think about taking a picture of the finished platter before moving onto the next step – sorry! You’ll see it in images below.
Once you’ve done the front, then you’ll move onto the back and do the same. Allow to fully dry before moving onto the next step – probably at least an hour or so.
Step 5: Print & cut template
Once you print the template from my resource library, you’ll cut it out the lettering.
Step 6: Chalk back of template
You’ll use regular ‘ole blackboard chalk to do this – just turn the template over and cover the back with chalk.
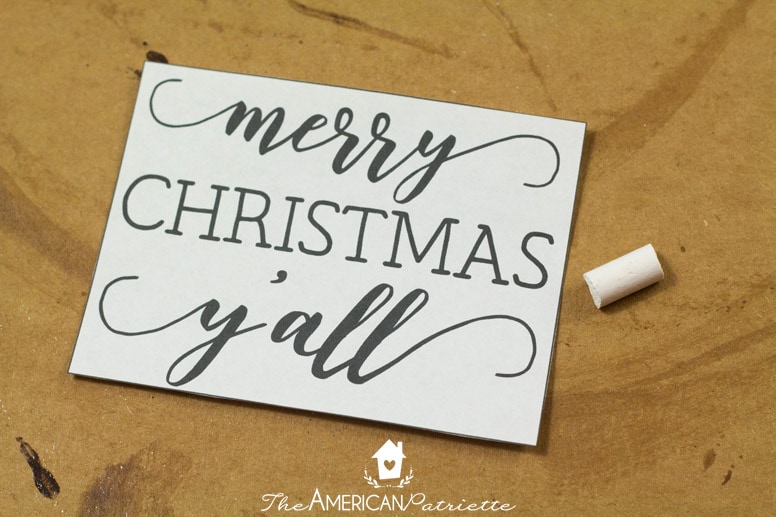
Just color it quickly to make sure the whole thing gets colored with the white.
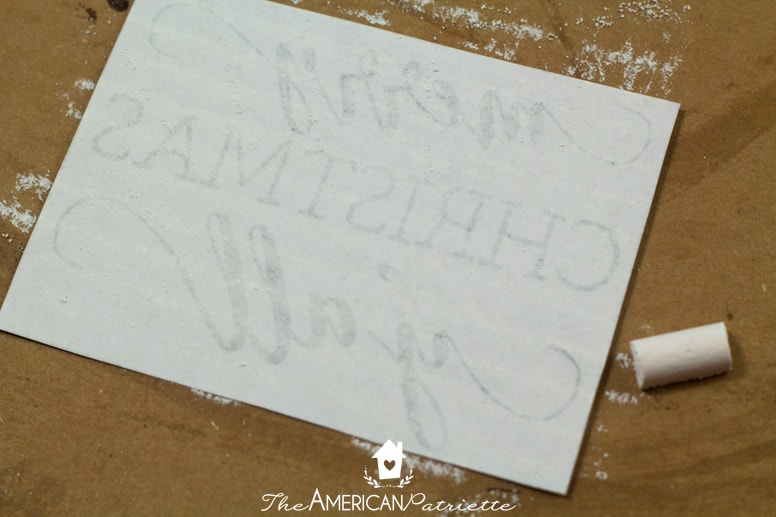
Step 7: Center template & trace onto platter
Center the template in the middle of the platter.
Hold the template firmly in place, and then using your pen, press hard to trace the lettering onto the platter – this is tracing it in chalk (from what you put on the back) onto the platter so you can easily paint the lettering.
Step 8: Paint lettering
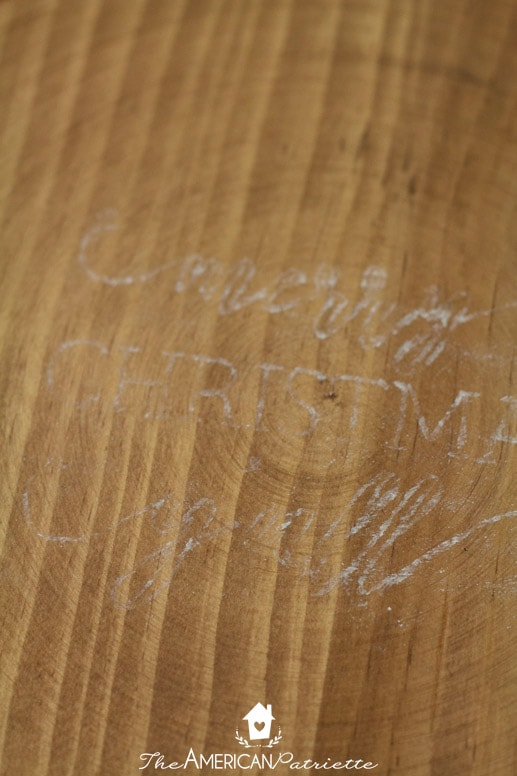
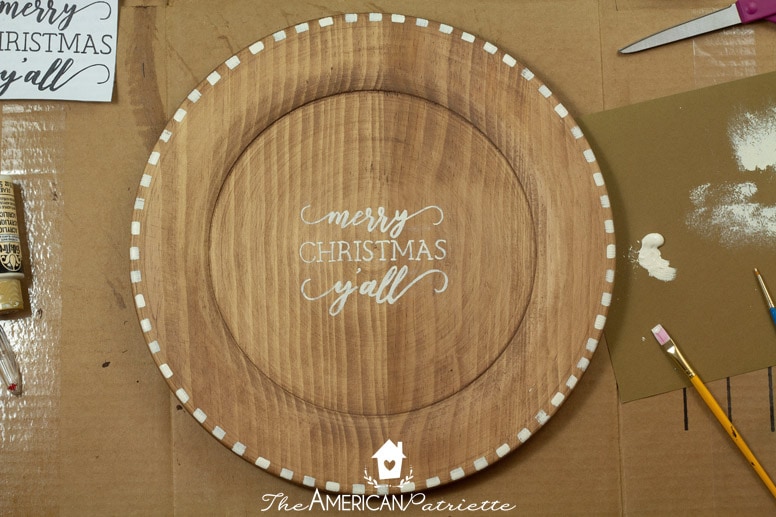
You can see the chalk outlines (they’re easier to see in person) on the platter. You’ll use this as a guide for tracing the letters with paint.

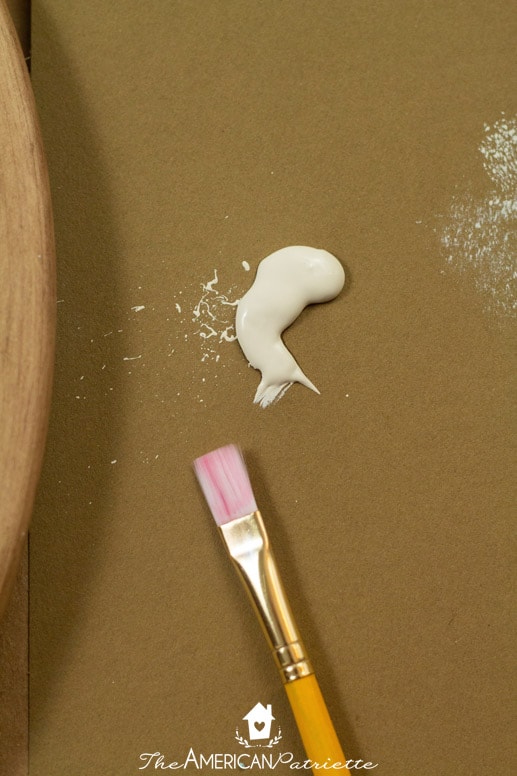
Squirt some of your white/ivory acrylic paint onto a piece of paper or paper plate…
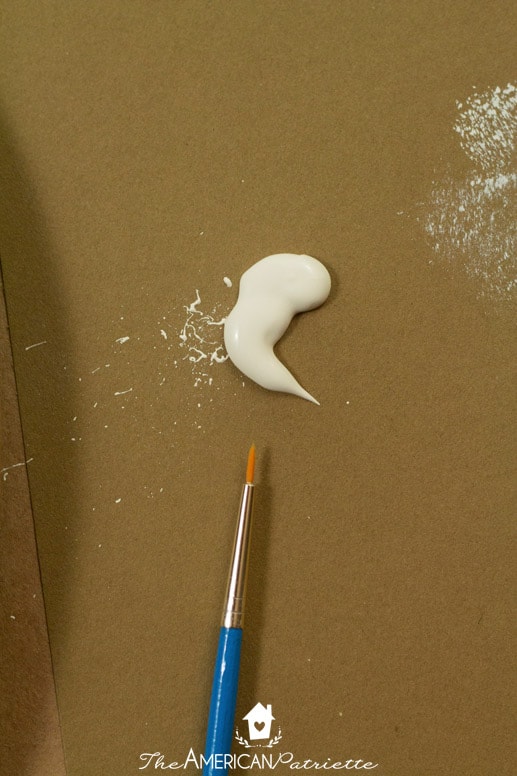
Grab your little paintbrush and paint on those letters! This shouldn’t be too hard as long as you got a good indention from the chalk/pen. Use the template as a guide if you need it.
You might need to do a couple coats of the white/ivory in order to make it pop. I did one full coat, and then I followed up in some weaker areas with more paint.
Step 9: Paint stripes on rim
Get another craft paintbrush (as wide as you want the stripes – this makes it super easy) and begin painting the white stripes along the rim.
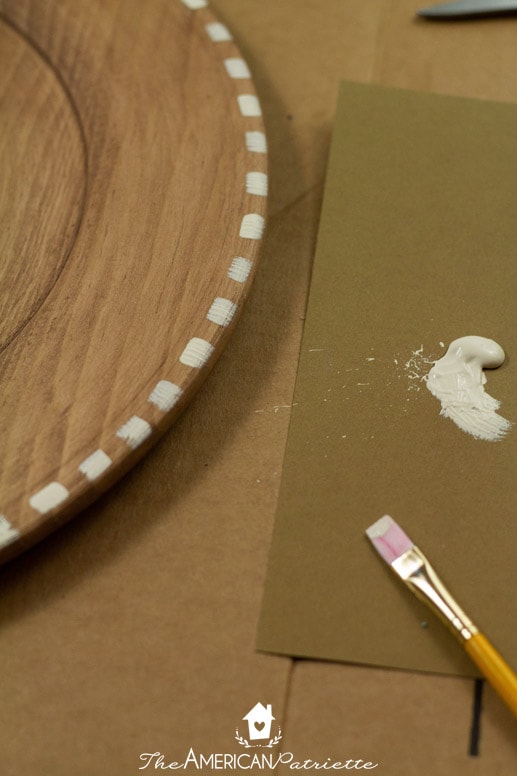
I spaced the white stripes to make room for the red ones later.
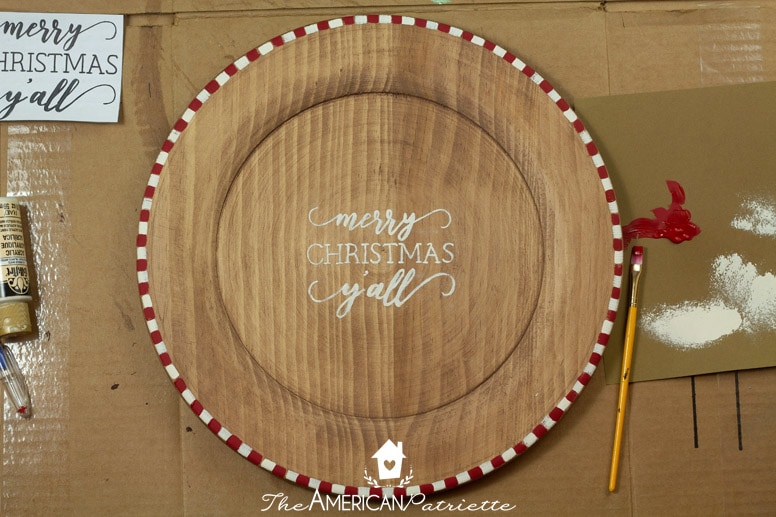
After I let the white stripes dry (honestly, this acrylic craft paint dries so fast, so I didn’t even wait – they were dry enough by the time I got back around to the beginning), I got started on the red and did the same:
Step 10: Add top coat of varnish
This is super important: you need to make sure all the paint is dry before doing this. Because the paint is water-based and so is the varnish, the varnish wants to pick that acrylic paint right up!
Just make sure the paint is dry before moving onto this part. If some of the red bleeds into the white (it did it a little bit on mine), just follow back up later doing some touch-ups with white and then adding just a little varnish on top of the fresh white. Easy peasy!
To spread the varnish, squirt a generous amount in the middle. I’d start with more than you think you need, just because I think it’ll help prevent uneven coating and streaking. It’s pretty easy to remove the excess.
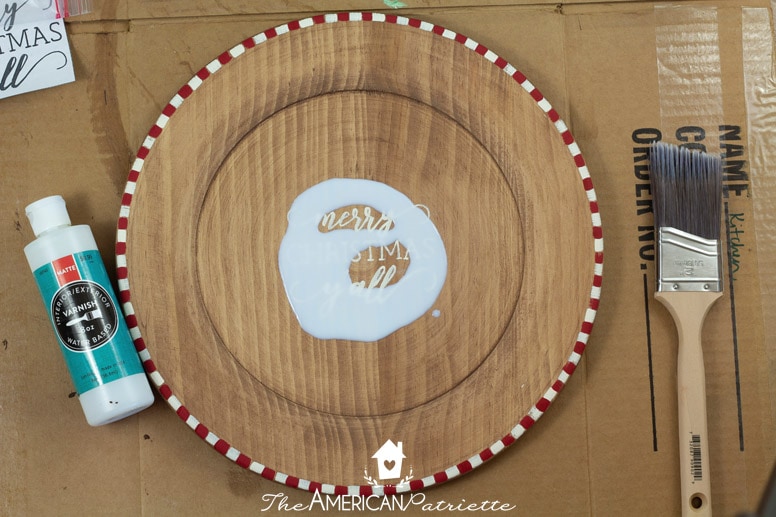
Then spread quickly in a circular motion with the angled brush. You’ll evenly coat the top, making sure to get into the crevice of the rim. You can see there was excess here:
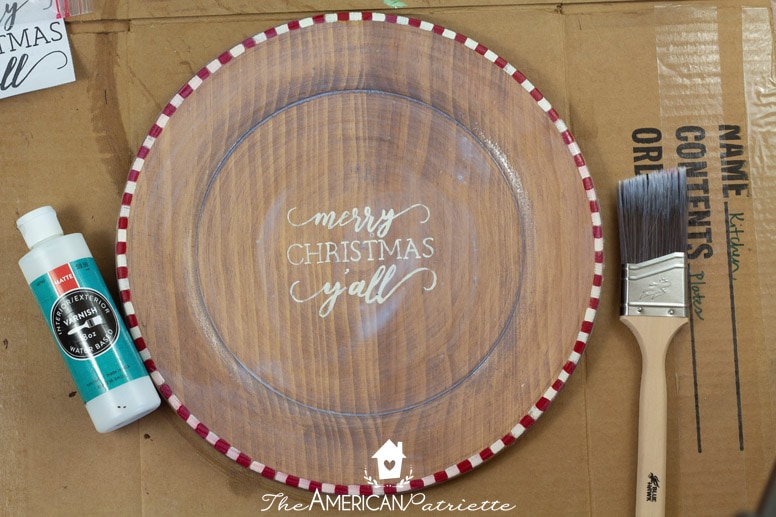
No biggie! I just used the brush to wipe it off and brush it off on the box behind – I always work on old cardboard boxes for projects like this. Makes my DIY life so much easier!
You can see in that bottom right corner above that I wiped off the extra varnish there. See how the platter looks much better now? It’ll dry and that cloudy look will go away.
Tip for this: make sure that after you apply the varnish to the top, do a quick wipe with the brush around the bottom of the platter. Some of the varnish might drip a little, but the brush can easily wipe the drips.
I did 2-3 coats of varnish on my platter. I didn’t want to wash my brush between coats, but I also didn’t want it to dry up, so I stored it in a plastic baggie between coats.
Step 11: Varnish the back
Once the front is completely dry, turn the platter around and follow the same procedure for the back.
Step 12: Allow to dry & then use over & over!
Allow to dry, at least overnight, before using the platter. Then, set some cute paper doilies down and decorate the platter with cookies!
Ah, isn’t it just so adorable?!
I think this is such a fun project! And, once you have all the materials, all you really need is to get additional wooden plates – you can easily make several of these with those paints and paintbrushes. Such a fun gift idea for people!
I know “Merry Christmas Y’all” projects, as well as farmhouse-style projects are so fun for this time of year – I definitely think this one fits the bill. I’m super excited, though, for you to make your own version. As much as I love being a Texan, I hope you love being whatever you are.
But Texans know that we really do have it pretty good down here. 🙂
And I just looooove the way my Wisconsin one turned out! I’m going to give it to my aunt and uncle to enjoy this year – I’ve learned so many of my easy hospitality tips from them, so knowing how much they enjoy having people over, I hope they love this platter!

Be sure to check out all the cookie cutter options below, as well as snag your template to make this!
Here are the options for the templates I’ve created. Again, if you don’t see a common colloquialism here and you think I should add one, leave me a comment!
State-Shaped Cookie Cutters (Find yours!)
Fill out the form to get your free templates!
If you love this project, you’ll love my easy tutorial for homemade home state ornaments! Go check it out!

Love this idea and want to remember it for later? Be sure to pin it to your favorite Pinterest board!
This is so adorable. Where did you find the wooden plate?
Isn’t it so fun?! I got it at Hobby Lobby a few years back. I found it in the unfinished wood section.