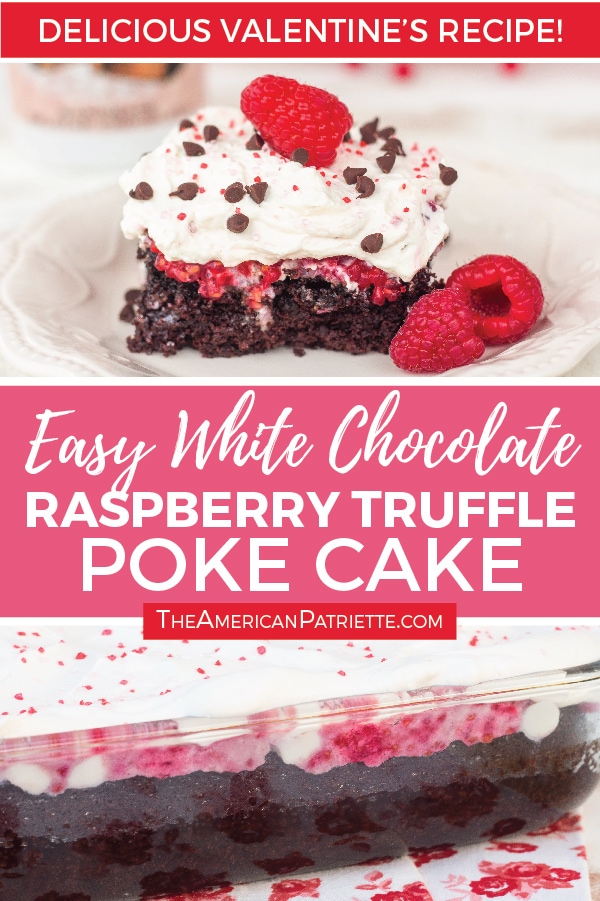
Easy White Chocolate Raspberry Truffle Poke Cake
This easy white chocolate raspberry truffle poke cake with simple homemade whipped cream frosting is the perfect homemade dessert for Valentine’s Day! Such an easy, moist, and flavorful cake made from scratch!

I’m just going to come right out and say it: this cake is GOOD, and you’re going to LOVE it. This easy white chocolate raspberry truffle poke cake is perfect for any time of year, but if you’re looking for something particularly fitting for Valentine’s Day, this is a winner!
With a homemade chocolate cake, sweet raspberry topping (made with real raspberries!), white chocolate chips, and a super easy and light whipped cream frosting, this poke cake is a perfect blend of flavors, textures, and tastes!

Want to walk through the prep steps with me? Let me show you what you need & then let’s get baking!
This post contains affiliate links for your convenience. You can read my full disclosure policy here.
Here are the baking tools you’ll need:
- Stand mixer (or hand mixer) – basically my favorite baking tool ever.
- Whisk attachment for both the cake batter and the whipped cream topping
- Measuring cups
- Measuring spoons
- Wooden spoon
- Spatula
- Deep 9 x 13″ cake pan
- Small saucepan
Okie, doke! Aprons on and let’s go! 🙂
Step 1: Make the cake batter
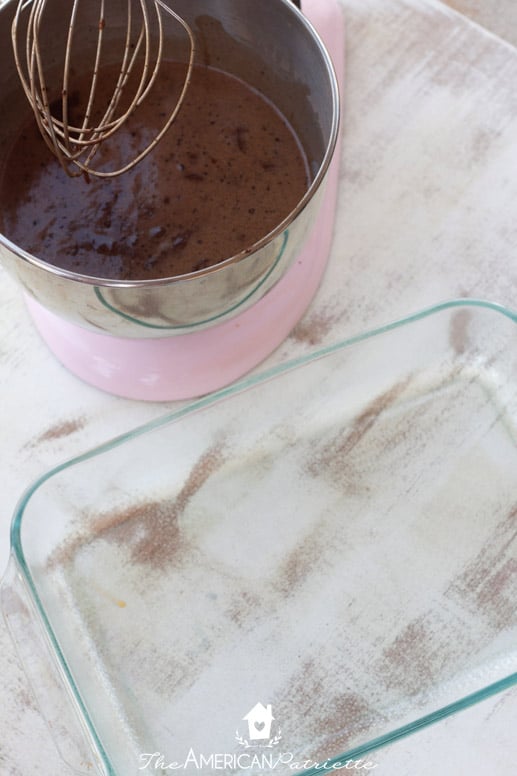
For the cake portion of this recipe, I decided to use this amazing chocolate cake recipe from Add A Pinch…WOW. Soooooo good!
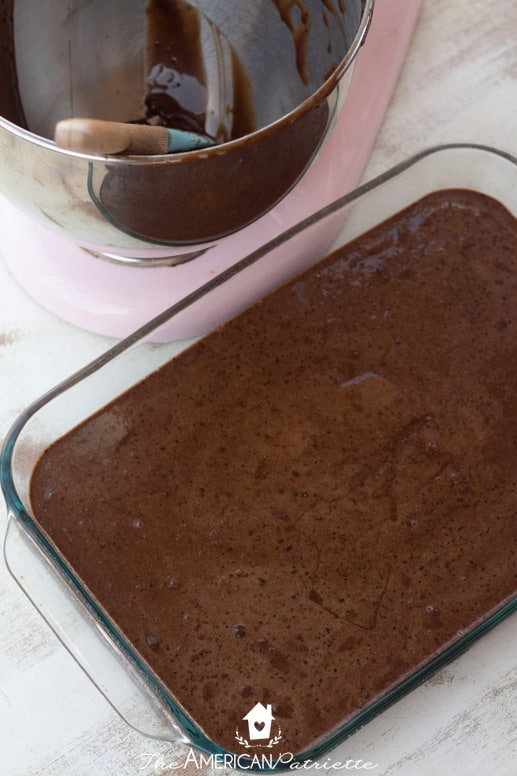
So, first step, mix together that chocolate cake batter, pour it into a greased 9×13 pan, place the pan in a 350 degree oven, and then lick the spatula.
I’d recommend using a deeper cake pan for this recipe if you have that option, but if you don’t, no biggie! The whipped frosting ends up making this cake pretty tall.
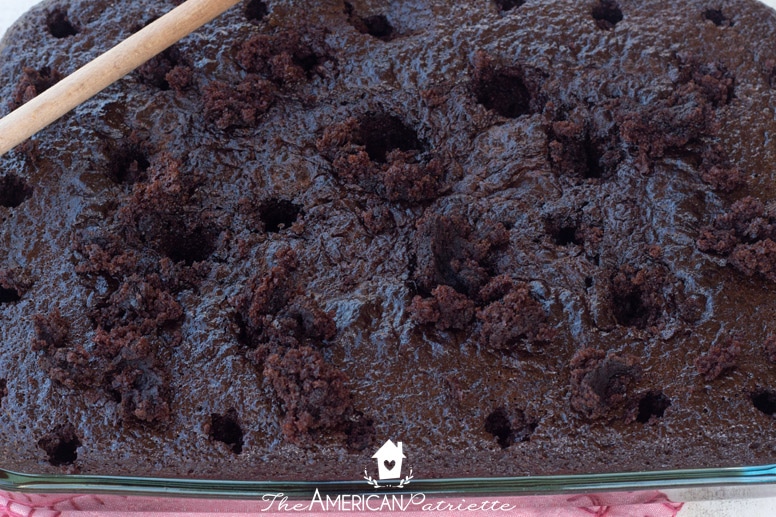
Step 2: Remove from oven & poke holes

I know, looks like total cake mutilation, and well, it kind of is. But, we have to make a way for that raspberry flavor to seep into the cake! Once you pull the cake out of then oven, use the end of a wooden spoon to poke holes all over.
This cake is VERY moist, so you’ll likely pull up some cake with it, but that’s ok. This cake is supposed to be a little messy. 🙂
Set the cake aside and move onto the ooey gooey part: the sweet raspberry topping!
Step 3: Make the raspberry topping
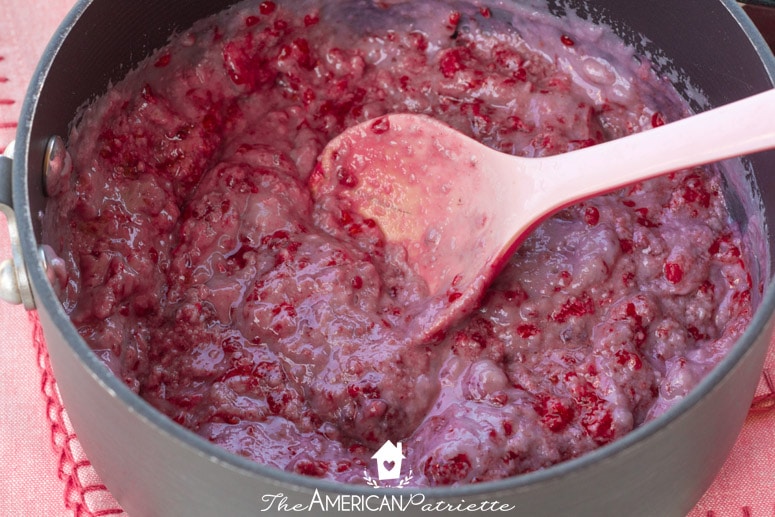
This part is super easy – add a can of sweetened condensed milk to a small saucepan and place on stove top over medium heat. Add 2 c of fresh or frozen raspberries – either one works just fine!
Heat the sauce up until the raspberries start to dissolve into the sweetened condensed milk – about 7-10 minutes. Stir the mixture together every minute or two on the stove to make sure it cooks evenly and doesn’t burn.
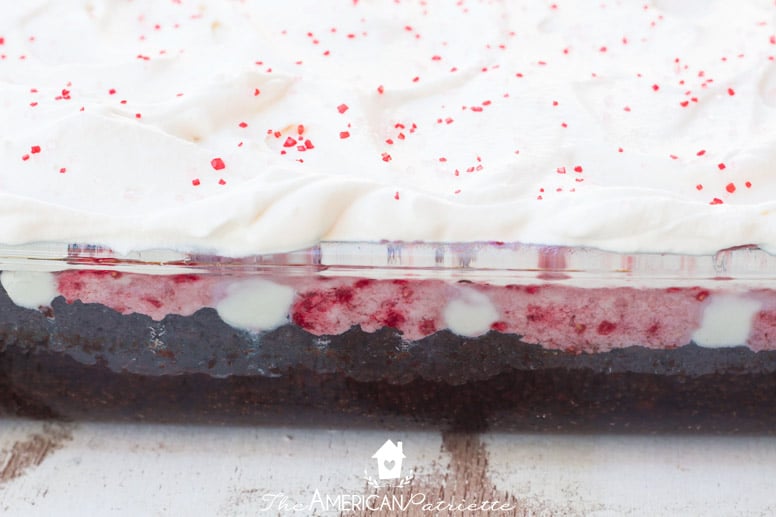
Step 4: Pour white chocolate chips & raspberry topping over the cake
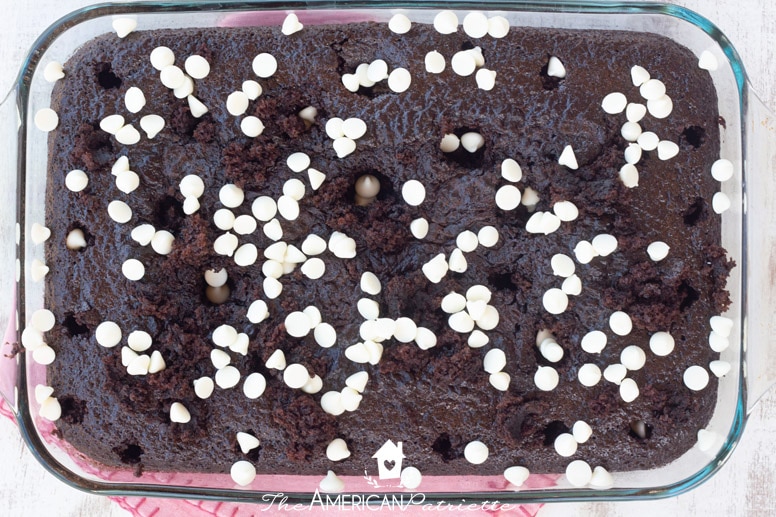
After you finish making the raspberry topping, sprinkle the white chocolate chips on top of the cake. The cake will still be really warm at this point – that’s a good thing! The chips will melt a little on the cake, but they won’t fully melt, so they’ll still have a little bit of crunch. Best of both worlds. 🙂
Then, after you sprinkle on the white chocolate chips, you’ll pour the raspberry topping on and spread it all around.
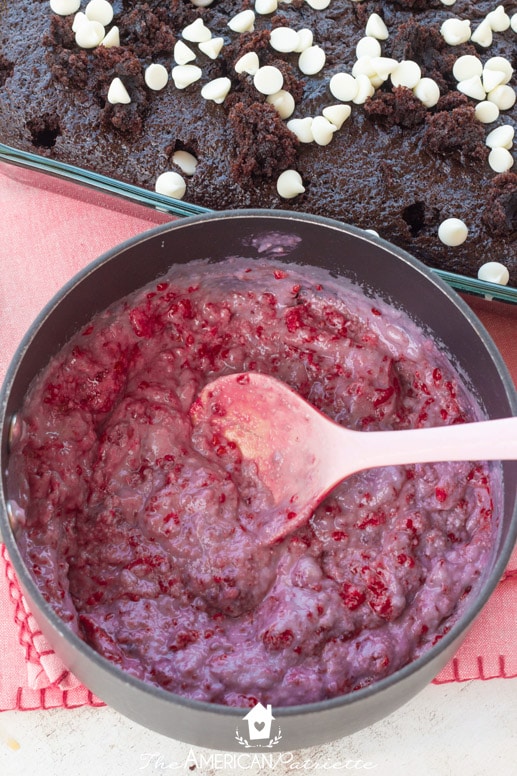
Use a spatula to get it in all the nooks & crannies!

Here’s a tip: if you want a more intense raspberry flavor, sprinkle additional fresh raspberries on top. Pour some raspberries in a bowl, use a fork to mash ’em up a little bit, and then spread them around on the cake.
Step 5: Place the cake in the fridge & then make whipped cream topping
Important tip: if you want the whipped cream to look super creamy on top of the cake, make the whipped topping just before spreading it onto the cake. So, wait to make it until after the cake is fully chilled.
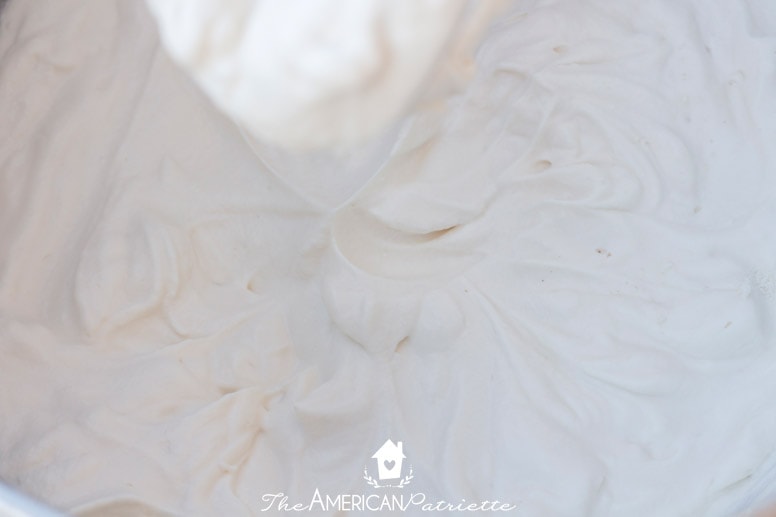
To make the whipped topping, you simply add a few ingredients – heavy whipping cream, vanilla extract, and some powdered sugar into a stand mixer (seriously, you want a stand mixer for this!) for about 6-8 minutes on high speed.
With your mixer running for that long, it may sound like an airplane is getting ready to take off in your kitchen, but trust me on this one!
I would check your whipped cream after a few minutes of mixing, but it’ll likely take your mixer at least 5-6 minutes to get it to that perfectly whipped consistency – you can see in these photos above and below that the cream begins to form peaks.
This is about the time you want to turn the mixer off – if you mix it too long, the frosting will start loosing some creaminess and will get a little…lumpy.
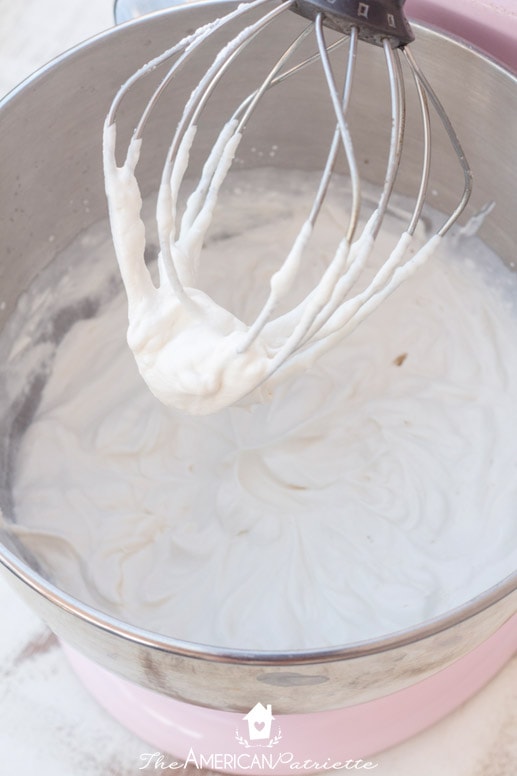
Fresh, just-out-of-the-mixer whipped cream topping spreads so beautifully! You can definitely make it ahead of time and place it in the refrigerator, but it won’t have quite the same consistency for spreading. (It’ll be fine, just not quite as creamy, so this is purely based on preference.)
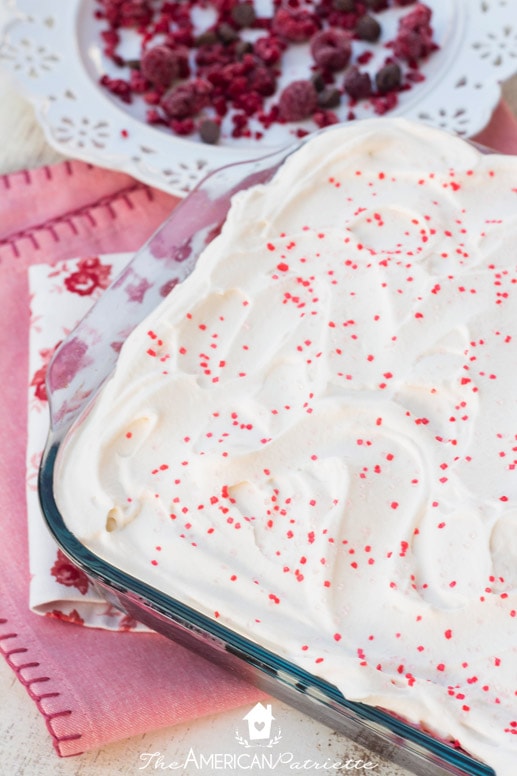
Step 6: Add the whipped cream on top (add sprinkles just before serving)
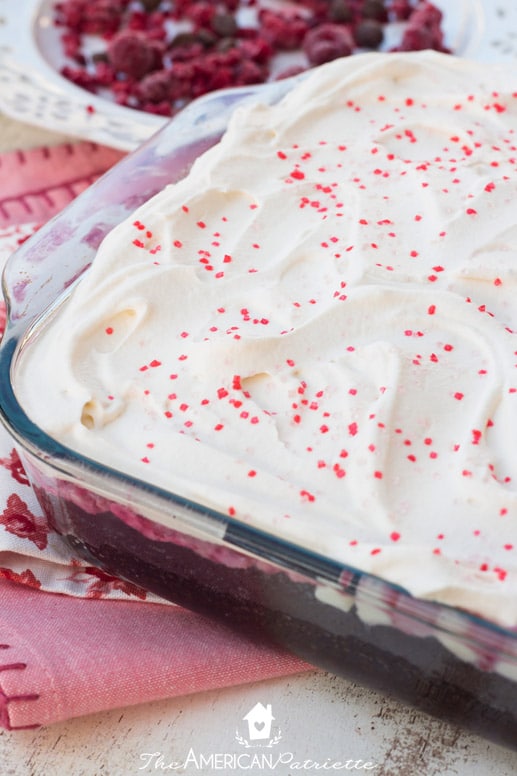
Once the cake is COMPLETELY chilled (yes, not just room temperature – make sure it’s actually cold), then you’re ready to spread that whipped cream topping all over!
Here’s a super important tip: don’t add the sprinkles until you’re ready to serve the cake. If you sprinkle anything onto whipped cream frosting, the frosting eventually soaks it up and it doesn’t look as pretty sitting there on top of the cake!
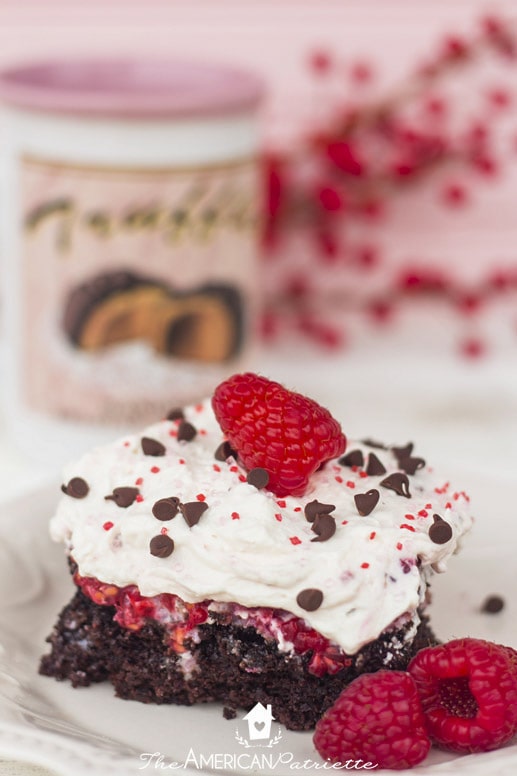
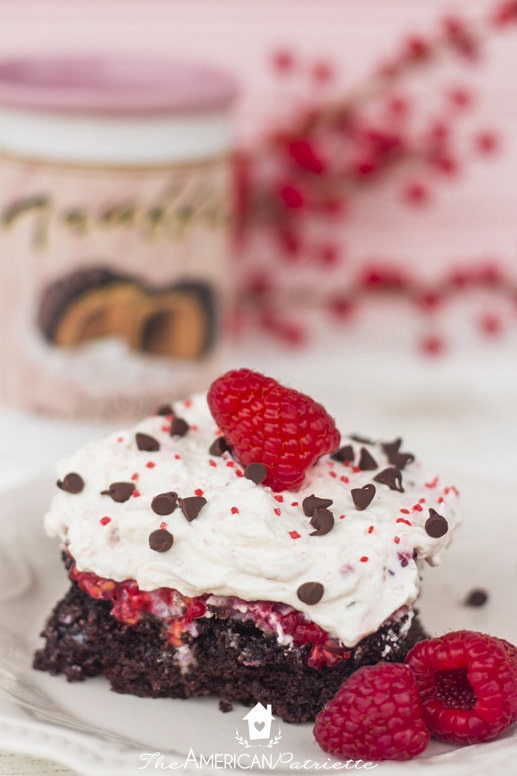
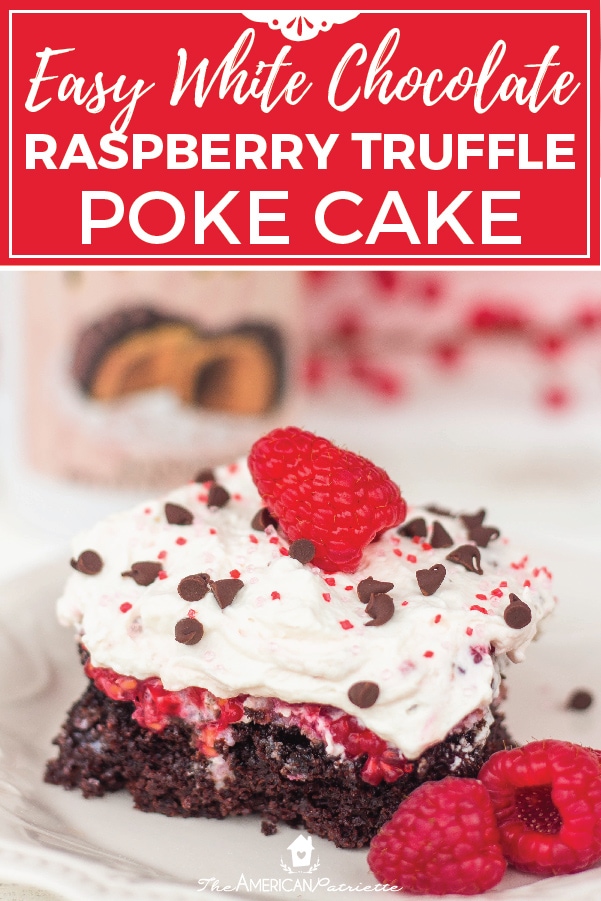
Yum, just look at all that delicious raspberry goodness!
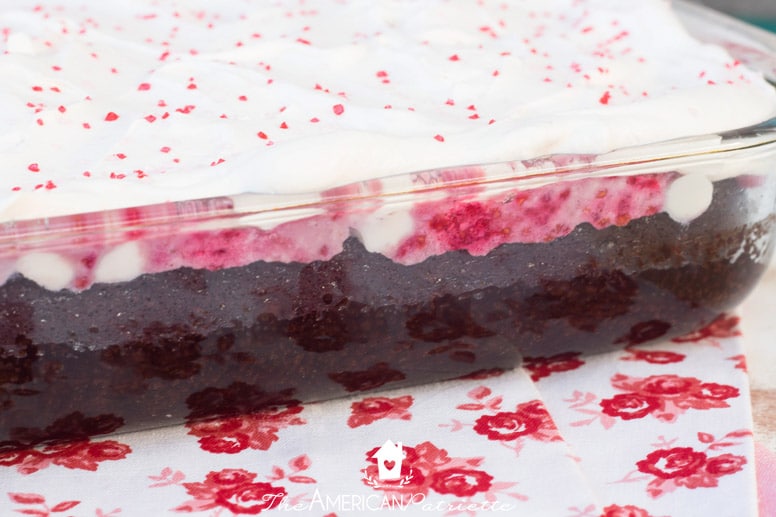
That raspberry filling gets into all the little nooks and crannies of the cake, and believe me, your taste buds will find every bit of it!
Step 7: Share with loved ones & gobble it up!
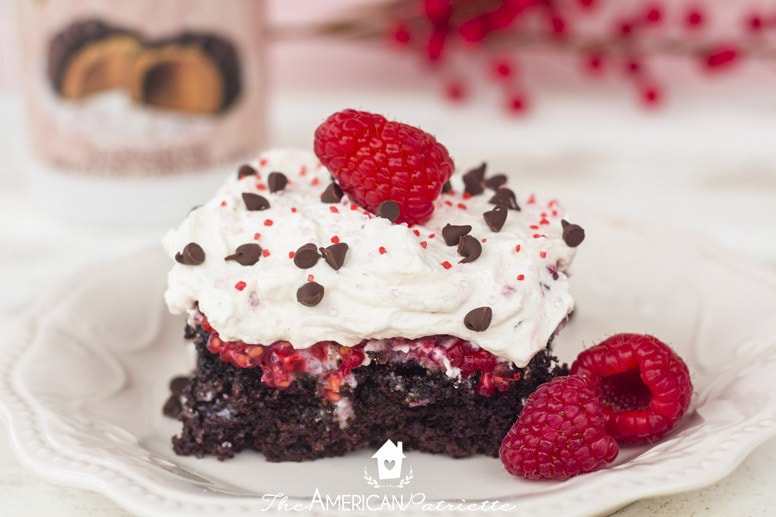
Sprinkle on some little chocolate chips and add a raspberry (or three!) for some garnish. They’ll dress each piece up a little. 🙂
Ok, seriously, doesn’t this just look so good?! You and your people are going to love it! Such a fun treat to share with others on Valentine’s Day! I hope each piece delivered gives you back tons of smiles and hugs! 🙂
Love this idea and want to be sure to remember it for later?! Be sure to save it to your favorite Pinterest board!

Easy White Chocolate Raspberry Truffle Poke Cake
Ingredients
FOR THE CHOCOLATE CAKE
- (slightly adapted from Add A Pinch - such a great recipe!!
- 2 cups all-purpose unbleached flour
- 2 cups granulated sugar
- 3/4 cup unsweetened cocoa powder
- 2 teaspoons baking powder
- 1 1/2 teaspoons baking soda
- 1 teaspoon salt
- 1 teaspoon ground coffee
- 1 cup buttermilk see my notes below
- 1/2 cup vegetable oil
- 2 large eggs
- 2 teaspoons vanilla extract
- 1 cup boiling water
FOR THE RASPBERRY DRIZZLE & TOPPING
- 3-4 c frozen or fresh raspberries divided
- 14 oz can sweetened condensed milk
- 1 c white chocolate chips
FOR THE WHIPPED CREAM TOPPING
- 2 c heavy whipping cream
- 1/3 c powdered sugar
- 1 tsp vanilla extract
EXTRA TOPPINGS FOR GARNISH
- mini chocolate chips
- fresh raspberries
- red & pink sprinkles
Instructions
- Preheat oven to 350.
- Pour dry ingredients for the cake (flour, sugar, cocoa powder, baking powder, baking soda, salt, and coffee) in a large mixing bowl/in your stand mixing bowl and mix together using the whisk attachment.
- While mixing, gradually add in buttermilk and oil. Mix in eggs, one at a time.
- While continuing to mix, add in vanilla extract and hot water. Make sure to scrape the sides of the mixer, and then mix once more until the cake batter is thoroughly blended.
- Pour cake batter into 9x13 cake pan - because the whipped topping makes this a pretty tall cake, use a deeper cake pan if you're able. If you only have a normal sized 9x13 glass casserole dish, that'll do. 🙂
- Bake in oven for 30-35 minutes. My cake needed right at 32 minutes in the oven.
- Once you've tested the middle with a toothpick and it comes out clean, remove the cake from the oven and set it aside to begin cooling down. You still want it warm for this next step, but you don't need it piping hot!
- In the meantime, pour the sweetened condensed milk & 2 c of raspberries into a sauce pan, stir, and place on the stove over medium heat. You can use fresh or frozen raspberries for this - either one works. If the raspberries are frozen, that's fine - you don't have to thaw them before this step (although you can). They'll thaw as they heat over the stove.
- Heat up the sweetened condensed milk and the raspberries until the mixture is hot, stirring regularly. This should take about 5-8 minutes.
- While the mixture is heating up over the stove, use the end of a wooden spoon to poke holes all around the cake. This is making room for the raspberry drizzle to seep into the cake.
- Once the milk and raspberries are hot, remove the sauce pan from heat and set aside.
- At this point, sprinkle the white chocolate chips evenly over the top of the cake. The cake should still be warm, so they'll melt down a bit, but they don't need to melt down all the way - they add a yummy crunch!
- After you sprinkle the white chocolate chips all over the cake, pour the raspberry and sweetened condensed milk mixture over the cake and spread it out with a spatula. It'll be pretty thick.
- This step is optional, but if you want a more intense raspberry flavor on this cake, you'll want to add more raspberries at this point. You used 2 c for the raspberry/sweet milk mixture, so use the remaining raspberries from that 3-4 c listed to spread on top of the raspberry/milk mixture. Simply pour the remaining raspberries in a bowl, gently mash them a little with a fork, and then sprinkle them evenly over the cake. They won't completely coat the cake, but they'll give plenty of additional flavor in each piece!
- Once you've finished putting the raspberry/milk mixture + extra raspberries on top of the cake, set cake aside and allow to cool to room temperature before moving to the refrigerator. Place cake in fridge and allow it to fully chill before adding the whipped topping.
- After the cake is fully chilled, it's time to make the whipped topping! Add the 2 c whipping cream, powdered sugar, and vanilla extract to your stand mixer. Using your whisk attachment, mix the three ingredients on high speed for 6-8 minutes, or until you begin to see stiff peaks form in the cream. Check the progress of the whipped cream after a few minutes, but you'll likely need to whip it for at least 5-6 before you start seeing those peaks. BUT, you don't want to mix it for too long! So, once you start seeing those peaks in the cream, go ahead and stop mixing and you're ready to spread it on the cake!
- Spread the whipped topping on the cake, and place the cake back in the fridge until you're ready to serve. Just before you serve it, garnish the top with Valentine sprinkles, mini chocolate chips, extra fresh raspberries, or a combo of all three!
- Slice, serve, and enjoy with friends and family!
Can I use cool whip instead of whipped cream, and is it possible for the cake to be box made?
Yes, you can use Cool Whip! Just make sure the Cool Whip is thawed when you go to frost the cake – you want it to spread really easily. And yes, you can do a boxed cake, I just always prefer from scratch. 🙂
This looks so much fun!! And like a cake I could make!!!
You can totally make it!! 🙂