DIY Menu Board – Clip Frame for Weekly Meal Plan
Learn how to make a DIY weekly menu board with clips using an old cutting board! A pretty and rustic frame to display weekly meal planning printables.
Anyone else spend a ton of time working on their weekly meal plan, only to forget a day or two later what all they were planning to make?
Maybe it’s just me. But, I bet it’s not. 🙂
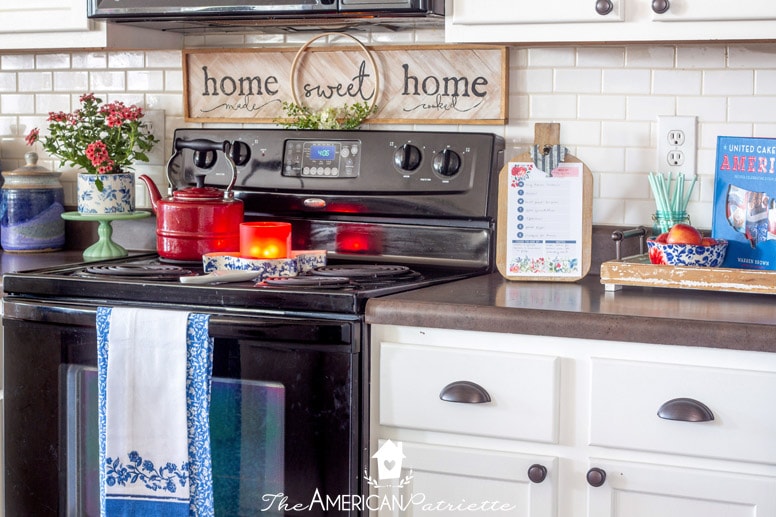
To help keep myself organized, I decided I should start displaying my weekly meal plan in my kitchen, but my kitchen is open and doesn’t really have walls – displaying a dry-erase board or chalk board frame isn’t really an option.
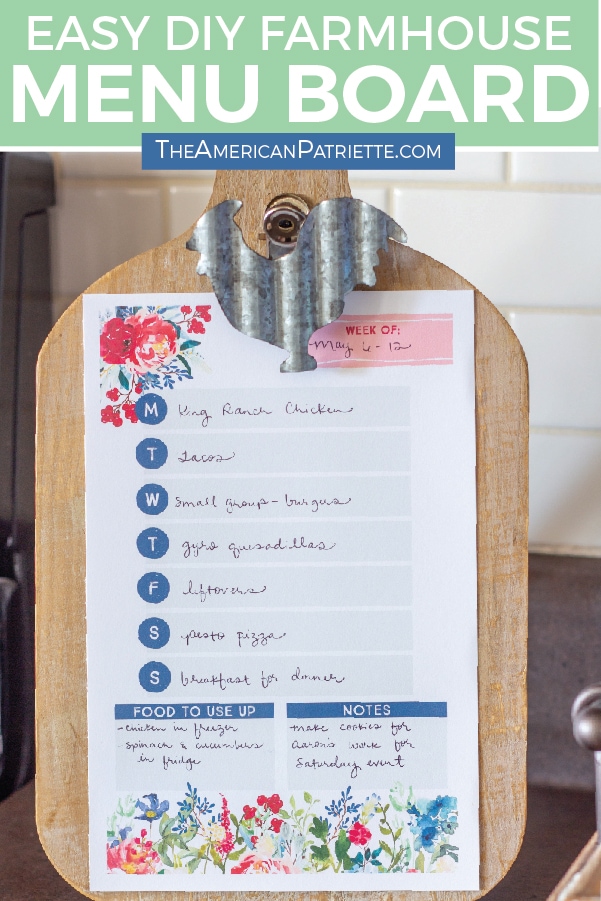
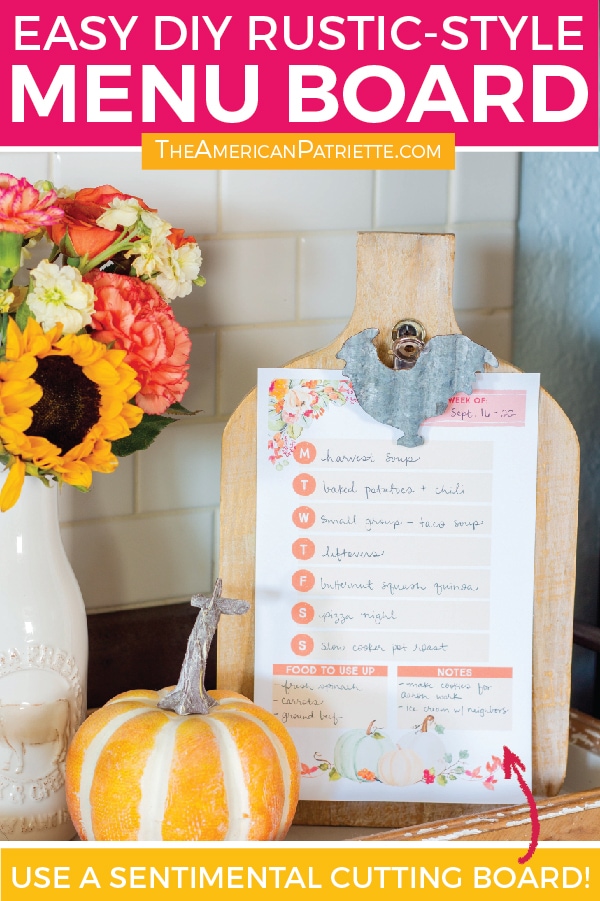
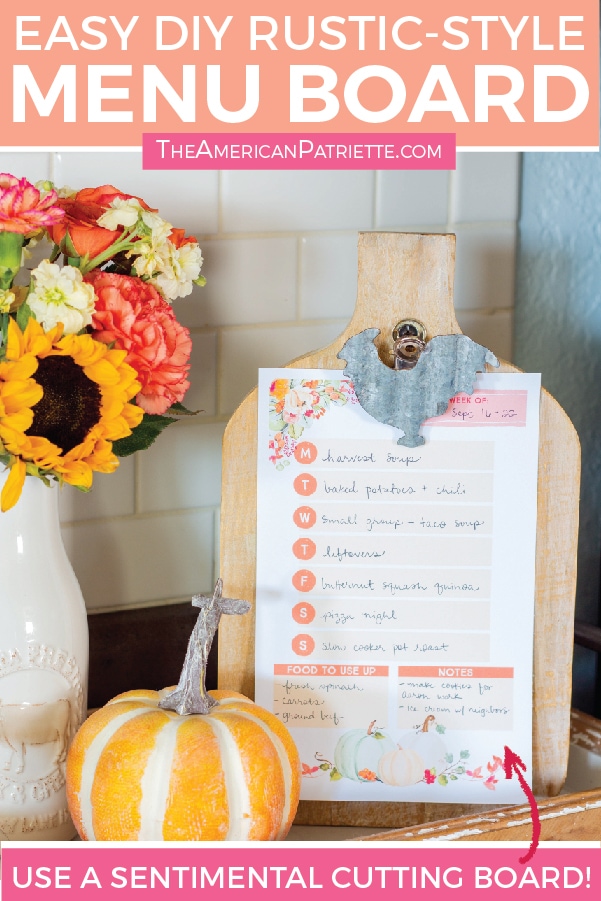
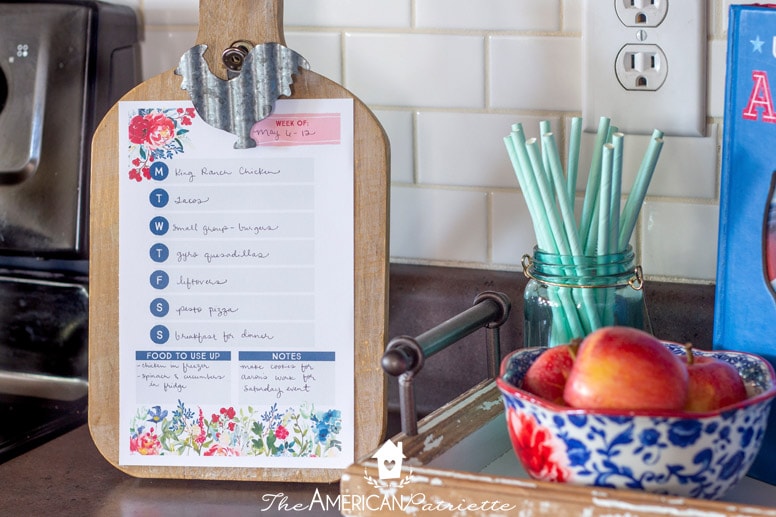
Then – light bulb! I realized I could just display the gorgeous weekly meal planning printables in my Toolkit – I’d just need a clip board frame and be good to go! And THEN, I realized I had an heirloom sentimental cutting board – one I didn’t really want to use for cutting – that I could use for the frame!
So many realizations for one little project, huh? 😉
But, once I got out my sweet, sentimental State of Texas cutting board, I saw that the state seal was smack dab where the clip would need to go, and I obviously didn’t want to cover that up, so I just got a cute rustic cutting board from Hobby Lobby and called it a day.
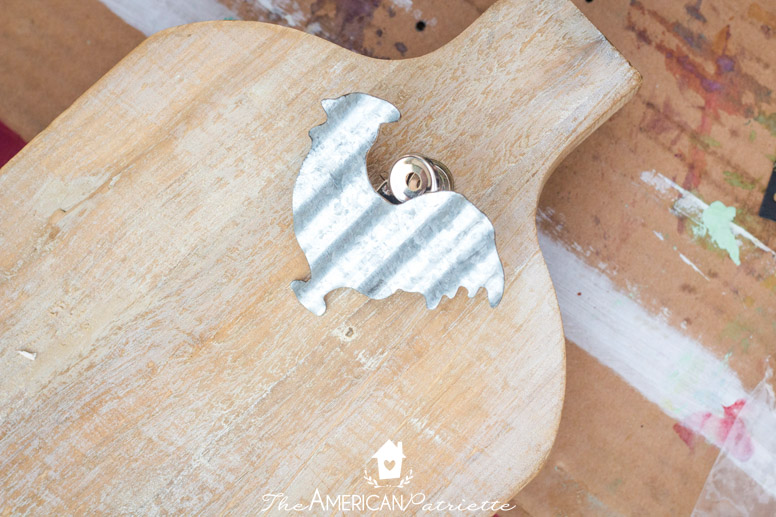
Talk about a super cheap and EASY DIY project for your kitchen! And, to make the clip frame have even more of a farmhouse flair, I decided to use this chicken clip when I found it on the hardware aisle at Hobby Lobby.
Perfect little accent for my country-style kitchen!
You ready to see how easy it is to make one of these adorable rustic DIY menu boards?!
Here are the materials you’ll need:
- Wooden cutting board
- Thin piece of wood (that you may need to trim) for the back stand
- Tool to trim the wood (we just used a utility knife)
- Small hinge & screws to attach the back stand
- Small piece of twine to attach the back stand
- Hot glue
- Metal clip
- Screw to screw in the clip
- Screwdriver + drill bits to attach the back stand & the clip
Okie dokes, let’s get started!
How to make a Rustic-Style DIY Menu Board

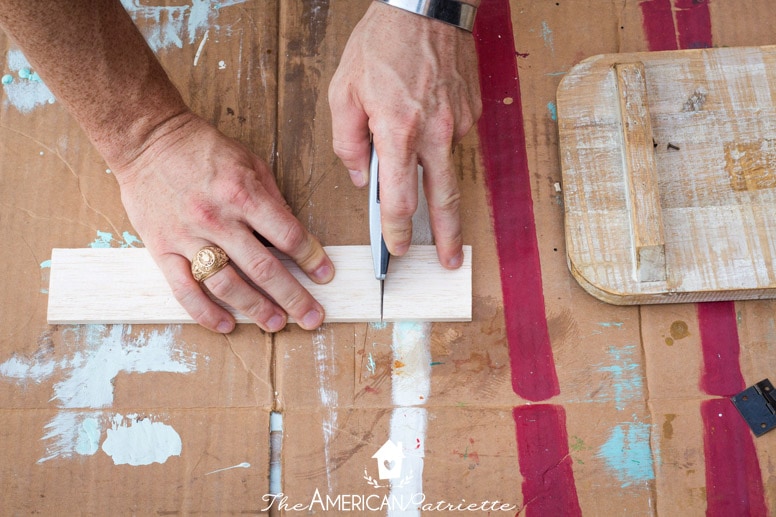
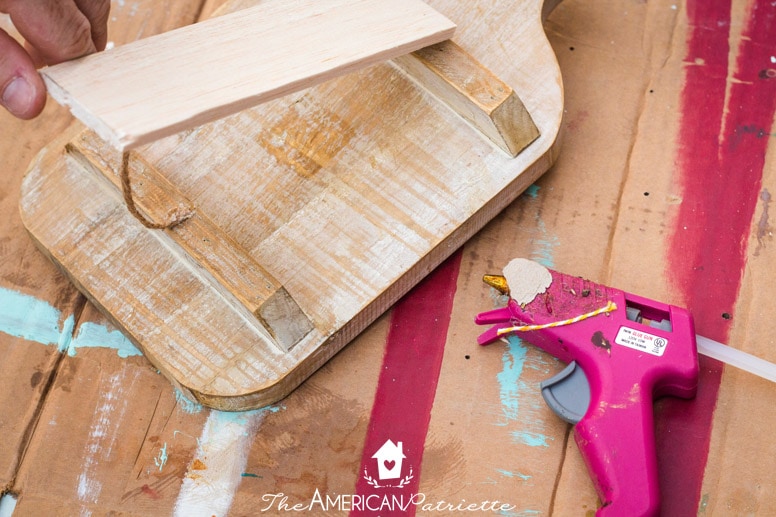
Step 1: Determine the length of your back stand & trim it
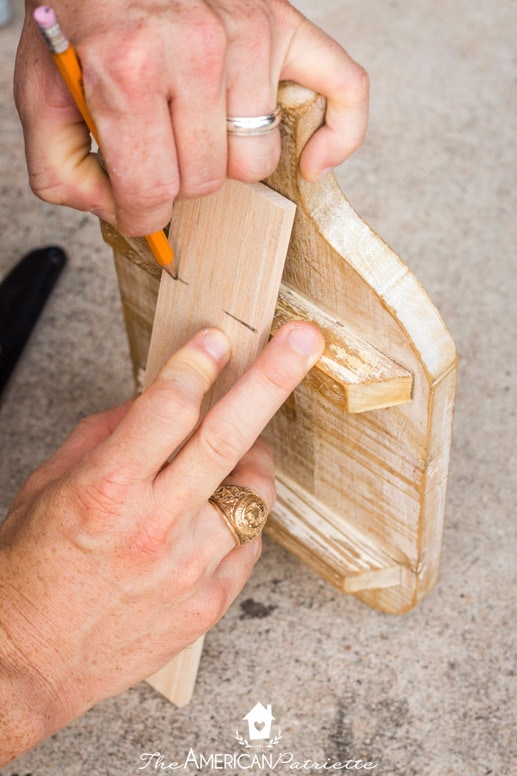
The wood I used for this part was really thin, lightweight wood called Balsa wood – I got it on the wood crafts aisle at Hobby Lobby for a different project and had some leftover.
We measured how long we wanted the back stand, and then cut it with a utility knife. It’s so lightweight that it’s very easy to cut without a saw.
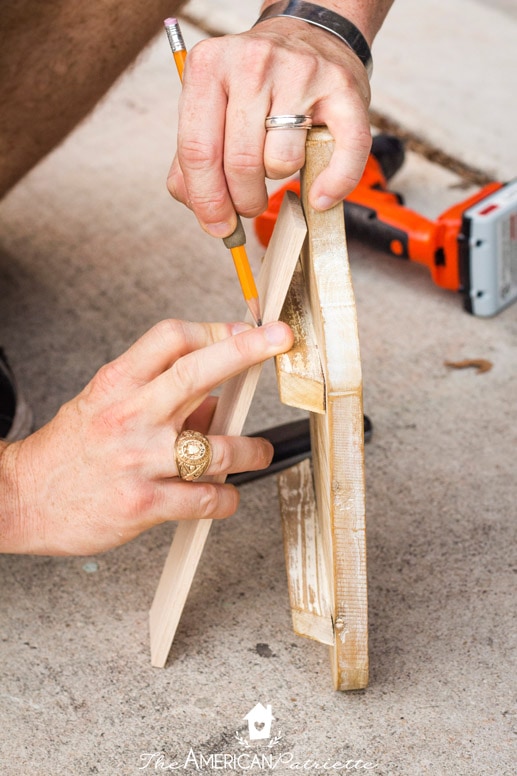
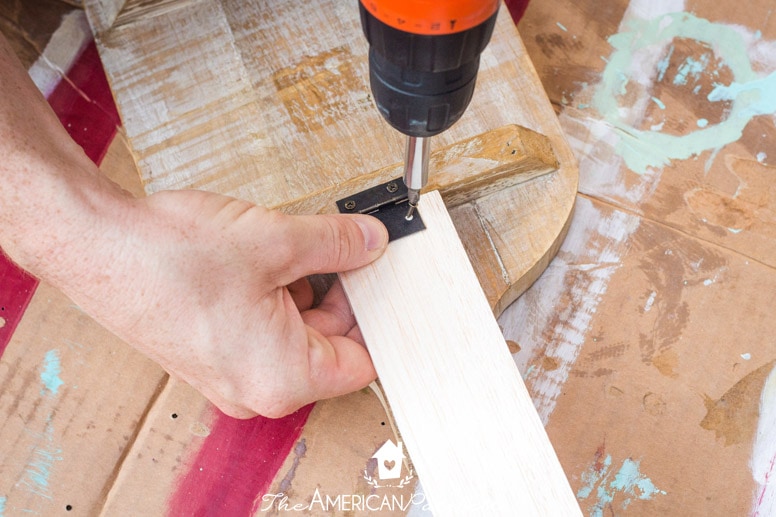
Step 2: Center & attach the hinge on the cutting board & back stand
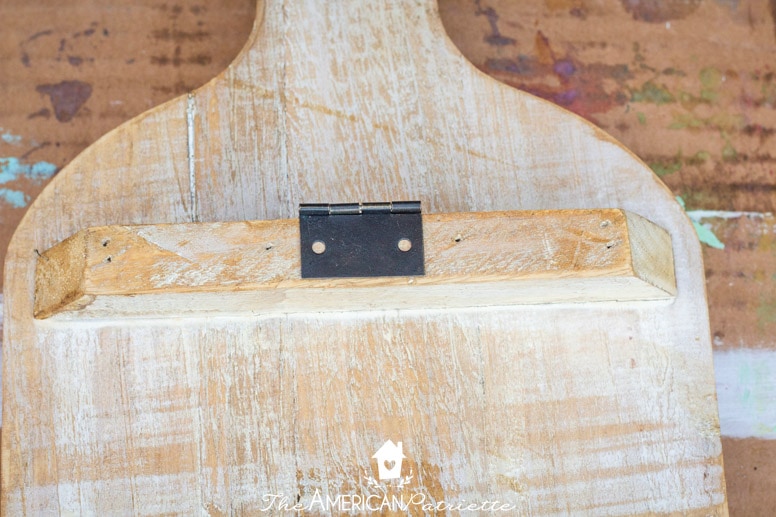
Center the hinge on the back of the cutting board at the height you want it (where the top of the back stand will be).
Make sure you place the hinge so that it opens the correct way – you want it to fold to attach to both the cutting board and the back stand.
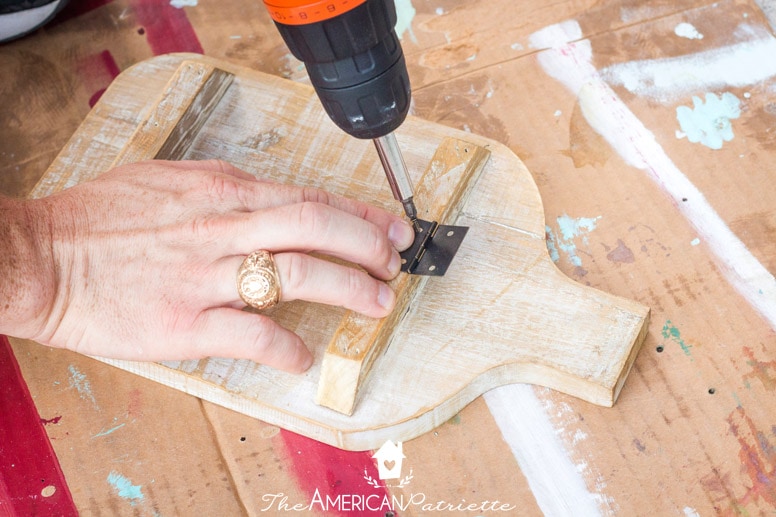
Once you’ve attached it to the cutting board, attach it to the back stand. Easy enough, right?!
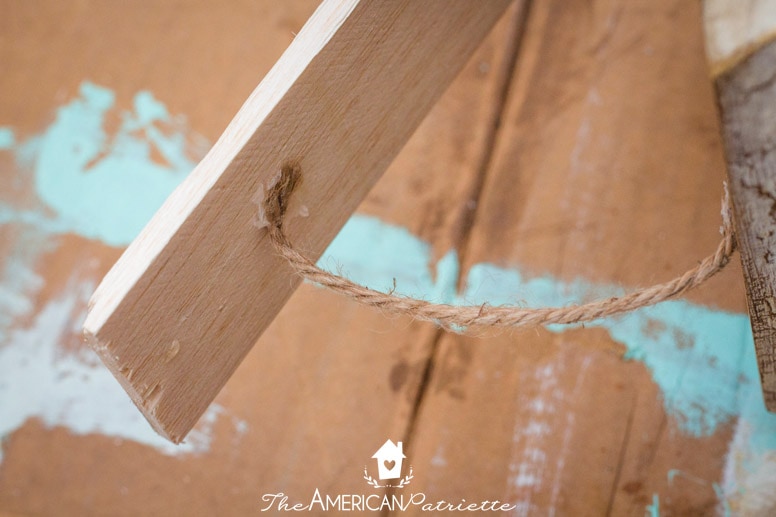
Step 3: Glue twine to cutting board & back stand
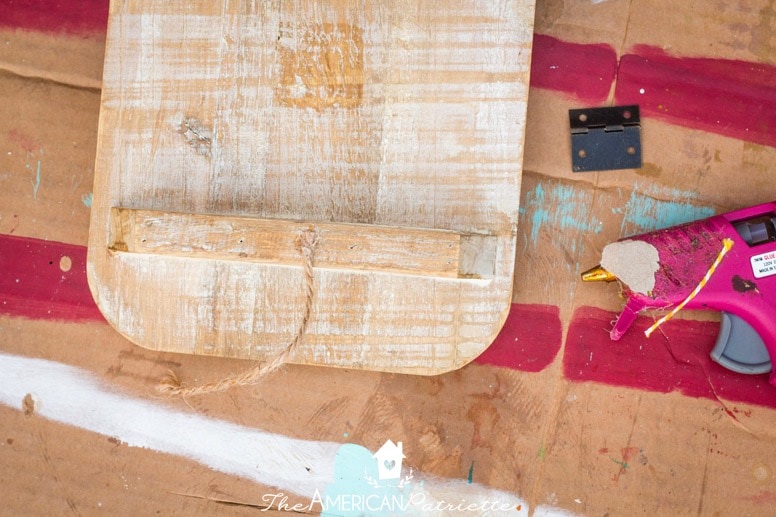
This is something I discovered mid-project we were going to need to do so that the cutting board would stand up at the correct angle. (Most frames have something like this, so that makes sense!)
I just used a piece of twine, cut it to the length I’d need, and then hot glued it to the frame & back stand. Nothing too technical here.
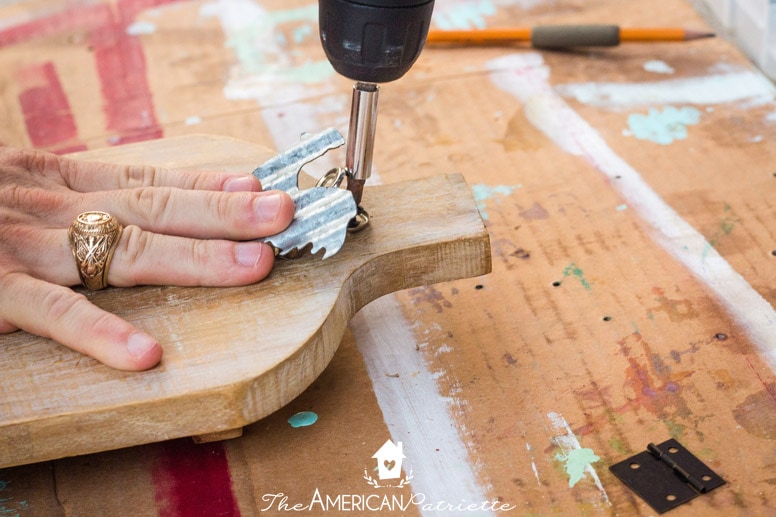
Step 4: Center & attach the clip on the front of the cutting board
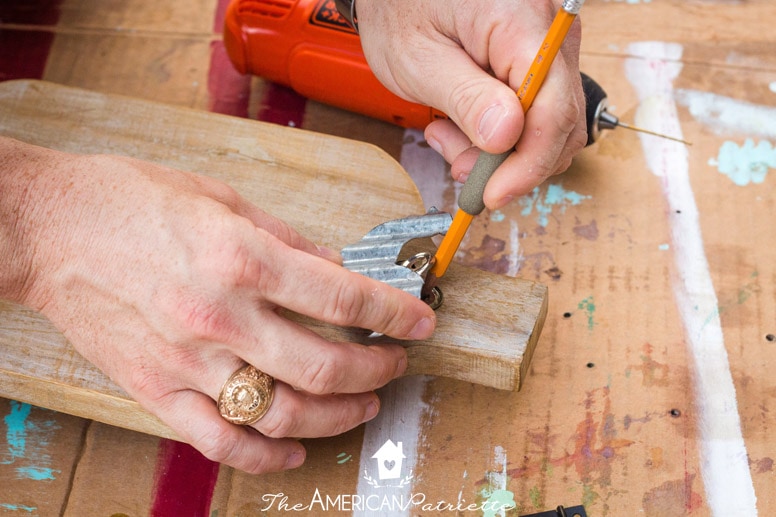
We just eyeballed this part – placed the chicken clip where I wanted it on the board, marked the hole with a pencil, and then drilled a hole with a drill bit to make it easier to attach the clip with a screw.

The angle for attaching the clip with the screw was a little awkward, but we managed to get the job done.
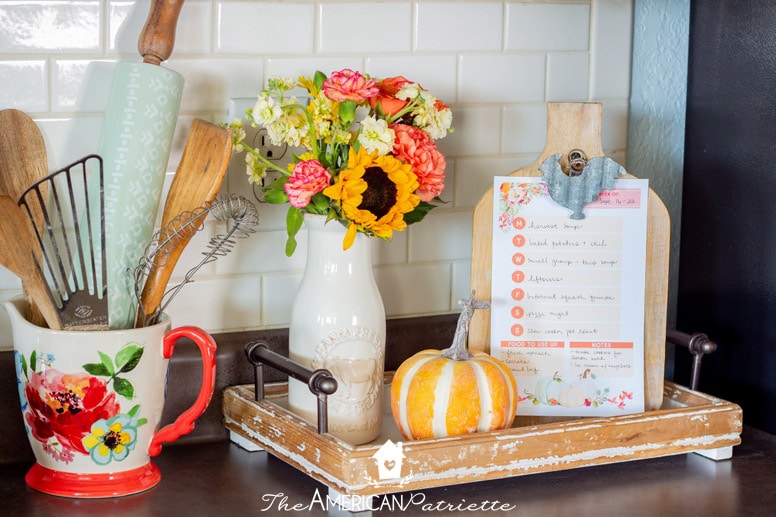
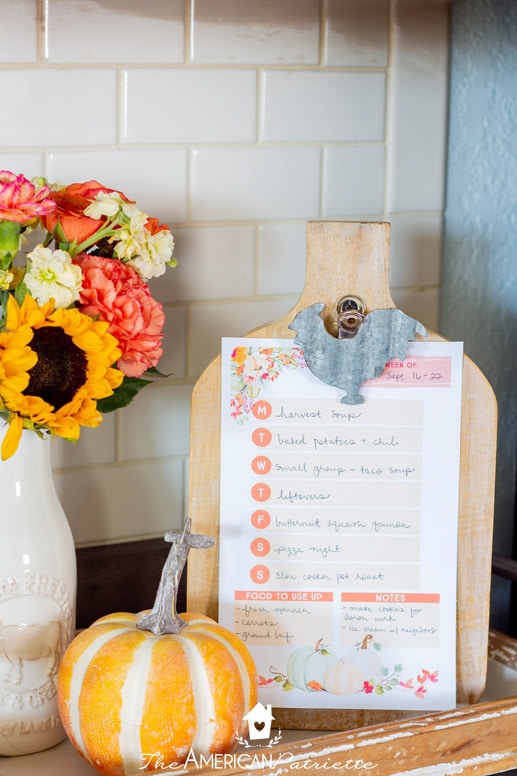
And that’s it folks! This project took us all of about 10-15 minutes, and now I have a super fun, USEFUL clip board frame on my kitchen counter to display my weekly meal plan!
I’m loading up the Home & Gather Toolkit with a seasonal version of each meal planning printable – that way you can change them out for each season and have a super easy way to add some seasonal decor to your counter.
And, since that’s a pretty big clip, I realized I could print several of these weekly meal plans at once, clip them all to the frame, and then just pull the used one off and have several fresh ones directly behind it for the coming weeks.
Go make a fun DIY menu board to display your weekly meal plan! (If you have a sentimental cutting board in your cabinets that doesn’t get use, what a great way to give it some functionality and add some warmth and purpose to your kitchen decor!)
If you’re loving these floral meal planning printables, you can snag a bunch of them in The Home & Gather Printables Toolkit. I love how they help you get organized AND make your kitchen pretty! 🙂
Love this idea and want to remember it for later? Be sure to save it to your favorite Pinterest board!