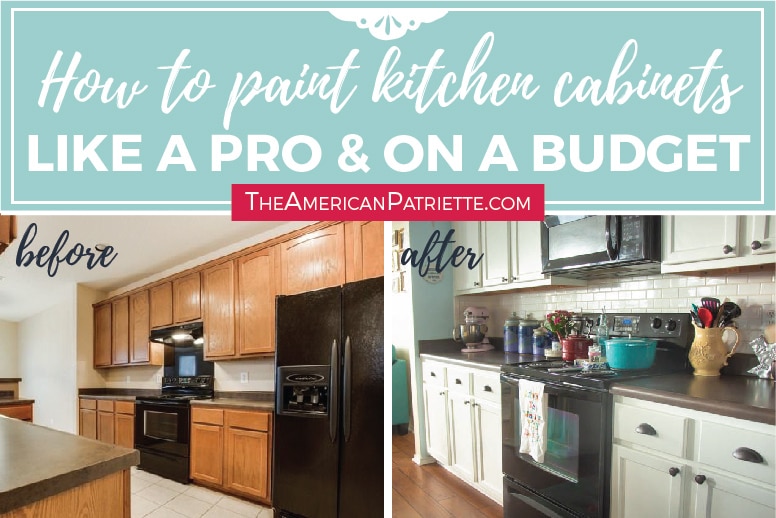
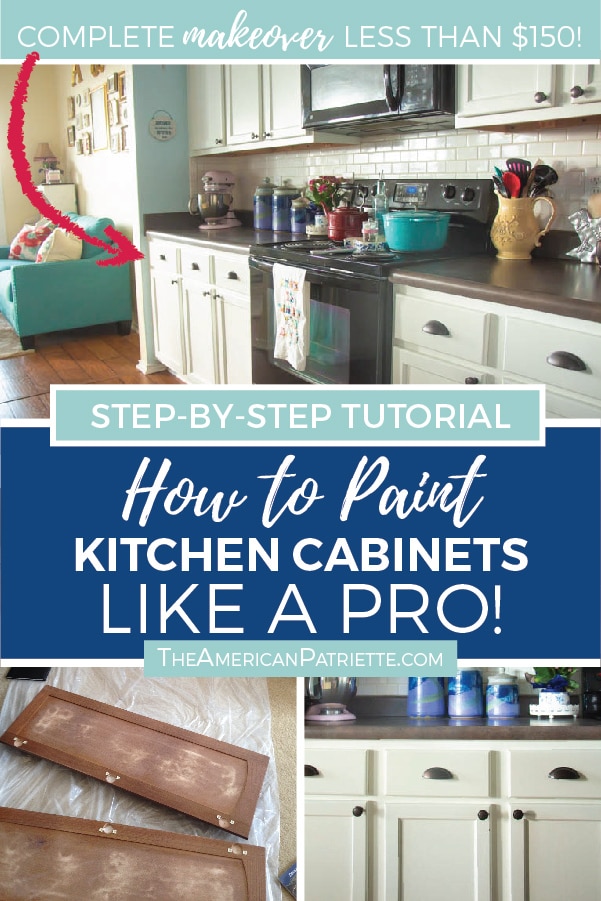
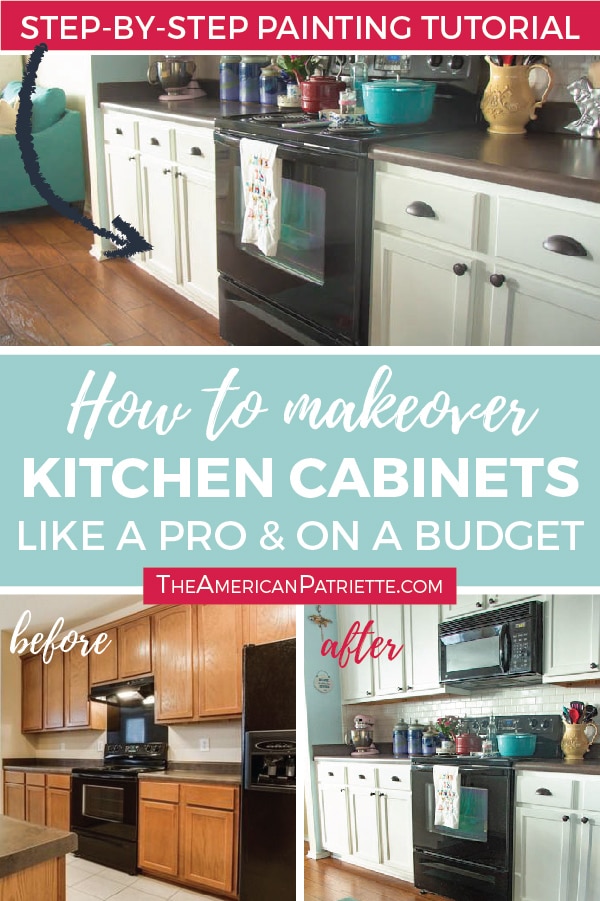
Step-by-Step How to Paint Kitchen Cabinets Like a Pro (and on a budget)!
Wanting to makeover your kitchen cabinets and not sure where to start? This step-by-step tutorial will tell you exactly how we gave our builder-grade cabinets a complete makeover with white paint for about $150 without any fancy tools. The transformation is amazing! Learn how to paint your kitchen cabinets and give them a smooth, durable finish like a pro and on a budget.
If you’re looking for a way to makeover your kitchen on a budget, painting your kitchen cabinets is an AWESOME and very budget-friendly way to update an area where you and your family probably spend a lot of your time.
And, speaking of spending a lot of time, you may also be spending an inordinate amount of time trying to figure out how to paint your cabinets – trying to figure out which process to follow if you’re wanting to do a mini makeover yourself. Look no further – I’m going to share with you, step-by-step, how to paint kitchen cabinets like a pro (and on a budget)! This tutorial is based on what we learned from painting ours, including exactly what primer and paint to use, the tools to use, and the process to follow. Two summers ago, we re-painted our builder-grade kitchen cabinets (and added new hardware to them) for less than $150, and I am STILL in love with them! (You can see how the paint is holding up on these cabinets two years later in this post!)
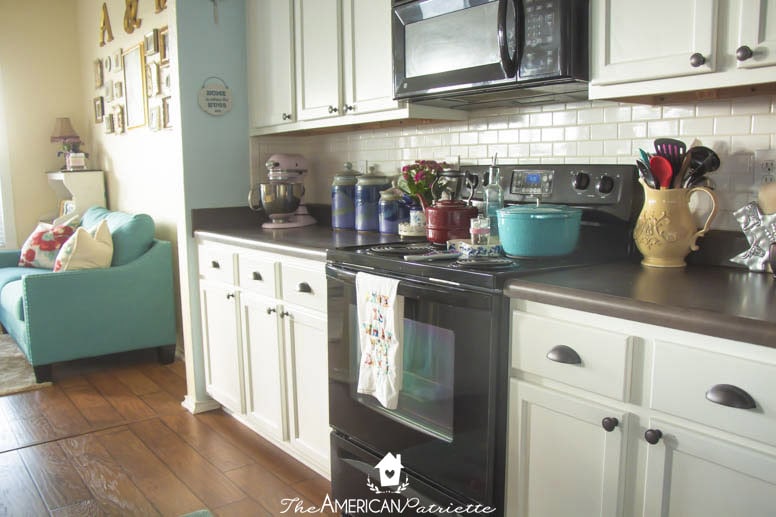
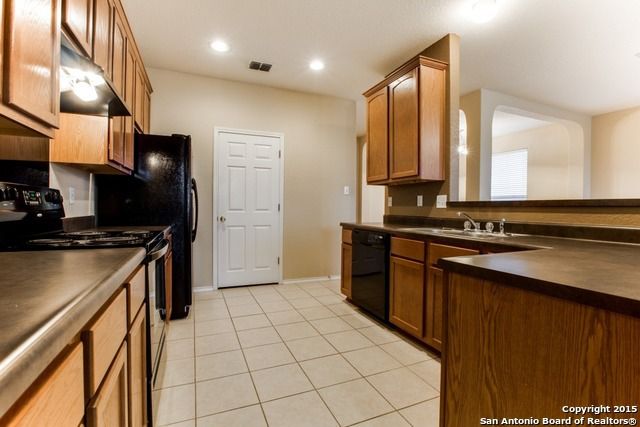
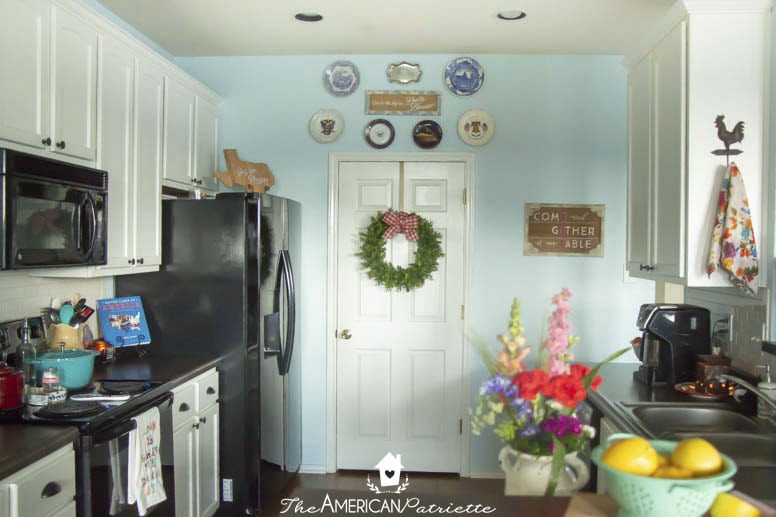
Here are some before & after pictures:
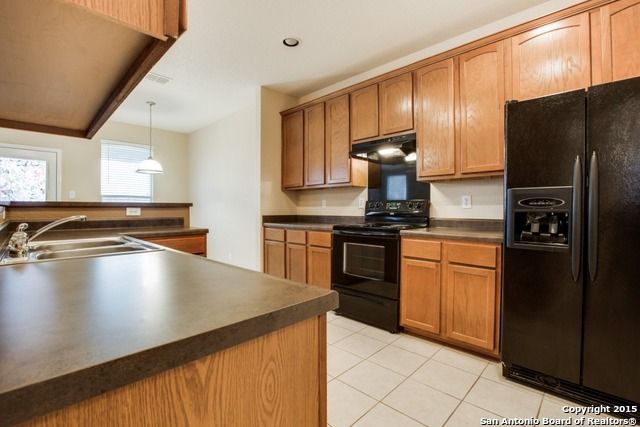
(As I mention below, since I never considered the idea of writing a blog post on painting our cabinets, I didn’t bother taking before and after pictures. Womp womp. So, the only “before” pictures I have are two from when our house was originally on the market (Thanks, SA Board of Realtors for the pics!), and then I found that one photo below of our cabinets in the background as I’m holding my now 3.5-year-old.)
Look at the transformation!!

Here’s a little backstory:
When Aaron and I moved into our house, it seemed like evvvverything was some shade of tan or brown. Even the landscaping. (We moved in August, so, given the Texas heat, that’s not too much of a surprise.) Though it was (and is) a builder-grade house and was super bland and boring when we moved in, it was in great condition, so it was essentially a blank slate for us to add our own personality to it.
I knew one of the first things I’d want to do would be to paint our kitchen cabinets – our cabinets were a shade of brown, most of the walls were an awful shade of peachy tan, we had one accent wall in the kitchen that was, you guessed it – brown!, the counter tops were dark brown…
…you catch my drift.
Requirements I had for re-painting our cabinets
So, while I knew changing up the color of the cabinets would make a huge difference to break up all the browns, I also knew it was going to be a huge project that I did NOT want to mess up. Aaron and I did a lot of research on the best way to paint them. We read so. many. blog posts. I mean, I want to do it right, right?! I had some requirements for the re-painting process as we were figuring out our strategy:
- It had to be budget-friendly (we would’ve spent more money on a nicer house if we had it! But, alas, like most of us, we are on a budget, so in order to make updates, they’d need to be very budget-friendly)
- It had to look high quality without crazy tools we’d likely never use again (i.e. I don’t want to see brush strokes, paint drips, etc. Instead, I want it to look like we used a paint sprayer.)
- It would need to be durable – we live here, for goodness sake! And, we spend a ton of time in our kitchen. And we have kids. And a dog. I want to be able to USE our cabinets and not worry about paint peeling off of them a month after I paint ’em.
- It would need to be doable – Aaron and I are certainly DIYers, but we’re not pros, so the finished product needed to be doable for us and still look professional.
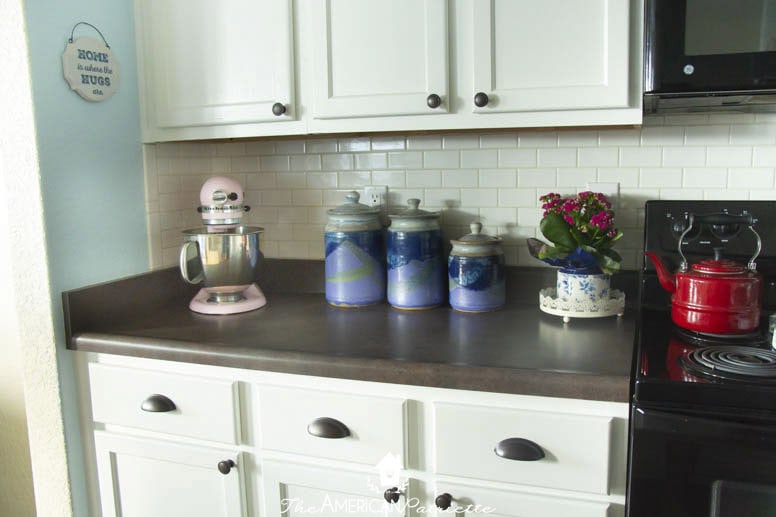
That list might seem a little high maintenance, but I bet you care about the same things! Guess what? I can say the process we followed met ALL of those requirements, and like I said, two years later, I am STILL in love with my beautiful made-over cabinets! Friends, we completely repainted/made-over our builder-grade kitchen cabinets for under $150 – we were able to stay within that budget including the paint, primer, paintbrushes/rollers, AND buying new knobs and pulls for the cabinets and drawers. And they still look amaaaaazing!
I attribute the success of the paint job (and how well it’s held up) to the type of primer and paint we used, and I DEFINITELY recommend them for refinishing cabinets: Zinsser 1-2-3 Bulls Eye Primer & Benjamin Moore Advance Paint. The paint job looks like we did it with a paint sprayer. You can still see the natural wood grain (NOT brush strokes or globs of built-up paint!!) – this dynamic duo is AWESOME for refinishing wood pieces – it has amazing coverage without concealing the beauty of the wood.
Overview of the Process
I’ve been so thrilled to share our cabinet-painting process with others who’ve been curious about painting their cabinets, so I’m so excited to finally be sharing a full tutorial here on how we did it! When we were re-doing our cabinets, I didn’t think about it being a tutorial to share on my blog, so I didn’t take step-by-step pictures – I am SO BUMMED. But, stick with me, because even though we don’t have as many pictures as I’d like, I’m going to give you a very thorough explanation of how we did everything, what materials we used (and would absolutely recommend), and recommendations for tips and tricks to help you save time AND do the project well. First, I’ll give you an overview, then I’ll list all the tools needed for the job (I’m including the hardware on here, but look to my follow-up post about how we easily installed it), and then I’m going to guide you, step-by-step, how to paint your cabinets so you’re as happy with yours as we are with ours!
Here’s an overview of what you’ll do – we’ll get into the details in a bit of exactly how to do this and what tools to use:
- Remove cabinet doors and the hardware (and knobs, if applicable), label them so you make sure you keep the right hardware with the right doors (I’ll show you how we did this)
- Remove drawers. Place cabinet doors & drawers outside for sanding.
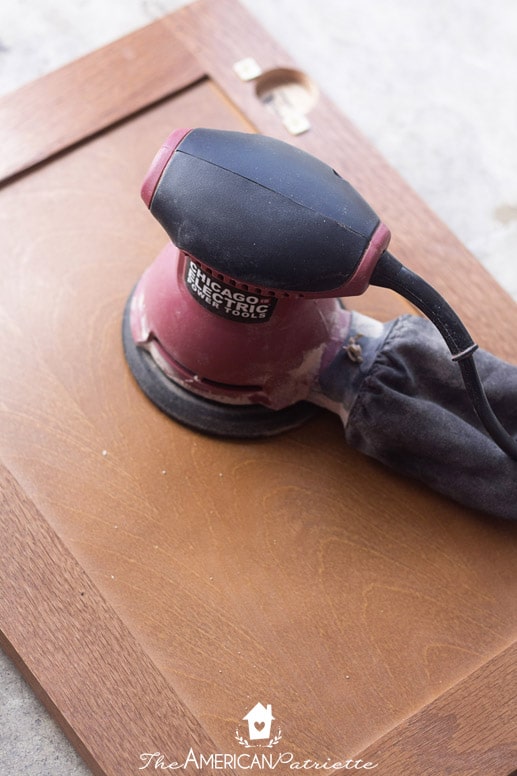
- Sand doors and front of drawers. This is super important for a high quality paint job and it really doesn’t take very much time if you have a sander (we have one that was super inexpensive and has gotten us through several DIY projects – absolutely worth the $25ish we spent on it!!). Wipe them all down after sanding to get ’em ready for priming and painting.
- Prime the cabinets & drawers
- Paint the cabinets & drawers
- Reinstall the hardware to the cabinets to reattach them in the kitchen
- Attach knobs and pulls if needed
This post contains affiliate links for your convenience. You can find my full disclosure policy here.
How to Paint Kitchen Cabinets Like a Pro (and on a Budget)!
Before we get started on the step-by-step tutorial, let’s go over the materials you’ll need.
Material’s You’ll Need:
- Battery-powered drill (for removing cabinet doors from cabinets, for removing & reinstalling the hardware, and for installing the knobs/pulls)
- Sandwich bags/plastic baggies for keeping the hardware organized – you need as many baggies as you have cabinet doors
- Sharpie for labeling the cabinet doors & baggies
- Orbital Sander (believe me, you NEED this and it will be a life-saver and game-changer with how easy it’ll make this and all of your DIY projects. I can’t believe how many pieces of furniture I refinished before getting one of these…takes a fraction of a time to do projects now that I have this!!) The one we have isn’t on Amazon Prime, but here are a bunch that have great reviews and aren’t very expensive. We only paid about $25 for ours and it’s been a great tool for us.
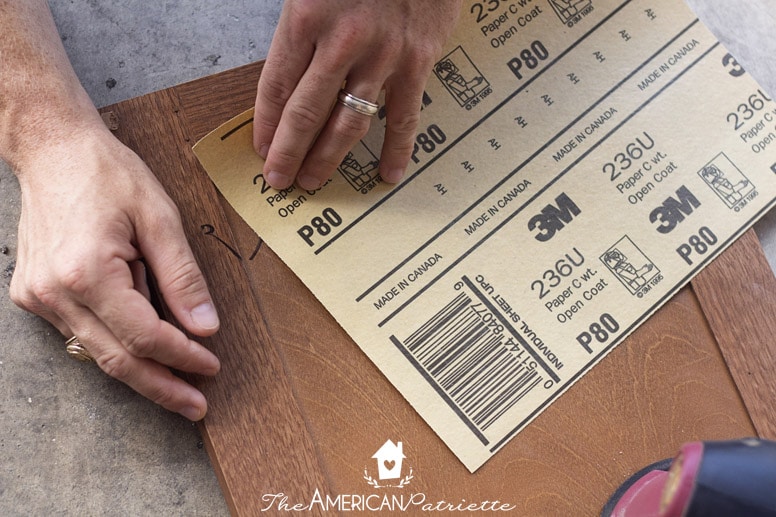
- Round hook and loop sandpaper that’ll fit your orbital sander – you need three different grits: coarse (60-80), medium (120-160), and fine (200+) – here are several options for big assortments for a great price
- Old rags: you’ll need at least one or two damp ones plus a couple of dry ones
- Tack cloth
- Plastic drop cloth (enough for you to lay out all of the cabinet doors and drawers)
- Wax-lined paper cups (you really want to get wax-lined ones to prevent the paint from sticking to them) – you can get these at the dollar store. Think: cups you’d use for kids at the bathroom sink.
- 1 Quart of Zinsser 1-2-3 Bulls Eye Primer (this is now the only primer I use for projects!!) – depending on how many cabinets/drawers you have, you might need more, but this is all we needed.
- 1 Gallon of Benjamin Moore Advance Paint (we used the satin finish) – I absolutely 100% recommend this paint now for any painting I’m doing if I’m not distressing the piece. It is AMAZING and one of the crucial keys for durability and a natural finish without brush strokes or roller marks. You can find this at Benjamin Moore retailers near you. Nope, not a sponsored post. Just seriously, seriously love this stuff.
- Painter’s tape – we used 1″
- Good quality 2″ angled paint brushes (don’t skimp on this!) – you just need two per person painting (one for primer, one for paint). We’ve used Purdy & Wooster brands and both work well.
- Foam roller brushes & rollers for cabinets and doors (2-4 roller brushes per person, maybe 1-2 rollers per person) – this part of the secret sauce to getting a GREAT paint finish!
- Fine grit finishing sanding sponge
- Knobs & pulls for cabinet doors & drawers if you’re getting new ones. We used these knobs and these pulls to help give off the cottage/farmhouse look and to match our counter tops. SUCH a good deal!!
- Drill bits (for installing the knobs/pulls if you didn’t already have hardware on your cabinets)
Ok, are you ready to get started?! Let’s get to work!
Step 1: Remove Cabinet Doors & Hardware from Cabinets/Remove Drawers
The way our cabinet doors were hung, it mattered which hardware we kept with which cabinet doors, so we made sure to label our doors & organize the hardware so we knew how to pair them up again after we finished painting. After Aaron removed each door, he labeled it, put the hardware in a plastic baggie, and then labeled the baggie to match the corresponding door.
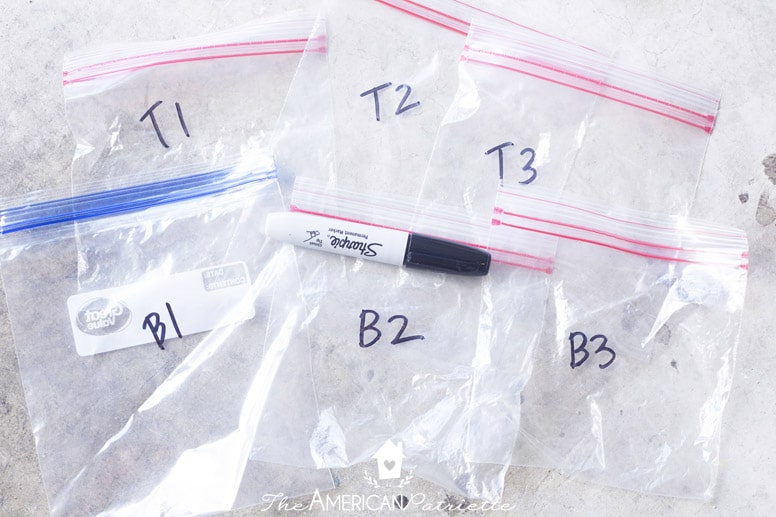

He labeled it in the notch where the hardware would sit (and since it’s indented, we knew we wouldn’t end up painting over it). You may need to do something a little different if your hardware isn’t placed the same way ours is, but no biggie! Just figure out the best way to keep ’em organized.
Step 2: Sand the Cabinet Doors & Drawer Fronts
Now that we have an orbital sander, refinishing a wood piece is sooooo much easier! It’s definitely one of my favorite DIY tools! We sanded down all of the doors using the orbital sander & three different grits of the hook and loop sandpaper. We sanded each door and drawer front down with the course paper, then did another round with the medium, and then another with the fine. Aaron said it’s important to run back over them with the fine grit so that you remove any scratches and scuffs from the rougher paper.
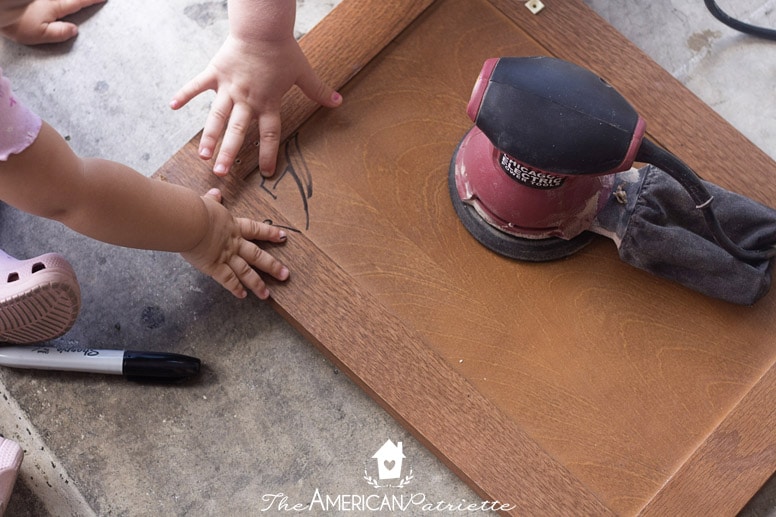
(My kids playing with our set-up as we try to capture some pictures to show you part of the process…)
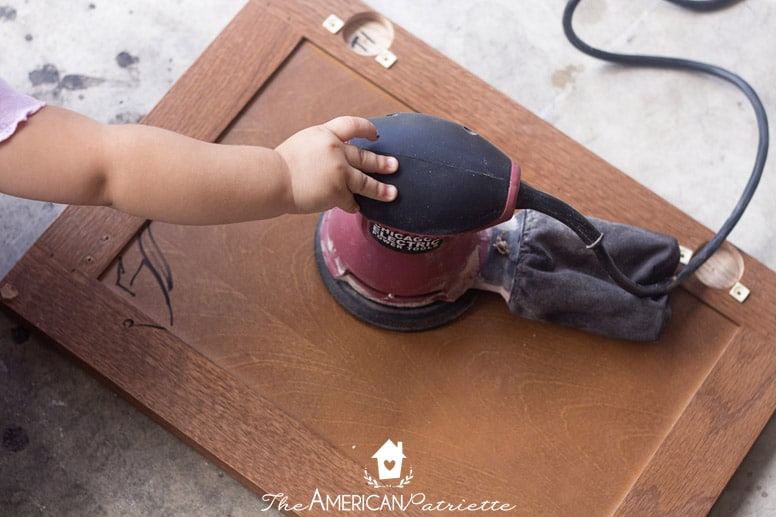
(…notice that sharpie mark in the corner of the cabinet? Artwork of my 18-month-old. Glad it’s just the back of the bathroom cabinet!)
After sanding down all the doors and the front of the drawers with the orbital sander, we used some regular ‘ole sandpaper to sand down in the grooves just to be thorough.
Here’s part of the operation we had going in our garage when we were working on the project:
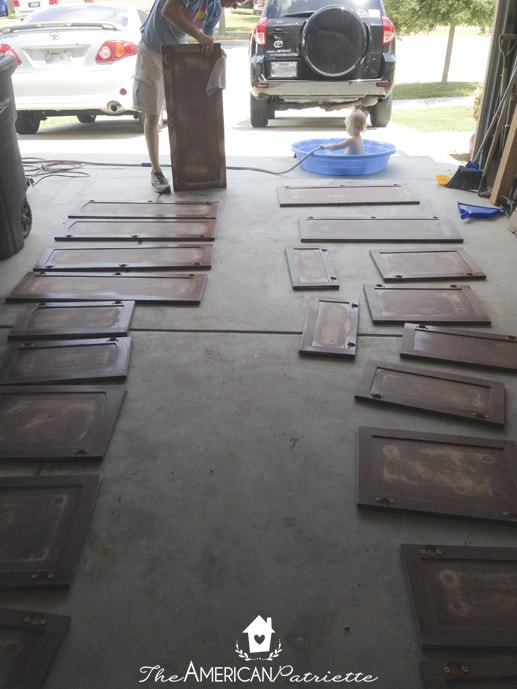
We only had our older daughter at the time of refinishing these cabinets a couple of years ago. That kiddie pool kept her entertained for a bit while we worked! Good way to get some DIY projects done outside! Don’t worry, she was well-supervised the entire time. 🙂
Important notes about sanding: 1) We didn’t bother sanding the backs of the drawers. We weren’t too concerned about it since you don’t see them! 2) We also didn’t sand the actual cabinet parts that are fixed to the kitchen walls. That would’ve required a bunch of sanding in the kitchen (hellloooo mess I do NOT want to deal with), so we opted to just wipe them down well with a damp rag and dish soap in order to remove any grease or grime on them – that was the only prep work we did on them before priming.
Step 3: Wipe Down Sanded Surfaces
Use a damp rag (however many you need!) to wipe down all of the sanded surfaces. Follow up with a dry rag, and then with a tack cloth. The tack cloth helps get every little particle off of the cabinets & drawers so that the dust from sanding doesn’t end up in the paint.
Step 4: Start Priming!
Lay out all of your plastic drop cloth (tip: if you’re doing this in your garage or outside, make sure you set some heavy things down on the drop cloth so the breeze doesn’t blow it up and then get it stuck in the paint on the cabinets…it’d leave a mark, and that’d be so sad!), and then set your cabinet doors & drawers on the drop cloth. We have quite a few cabinet doors, so we had doors strewn all about our house! In the garage, in the office, in the living area, and even in our bedroom!
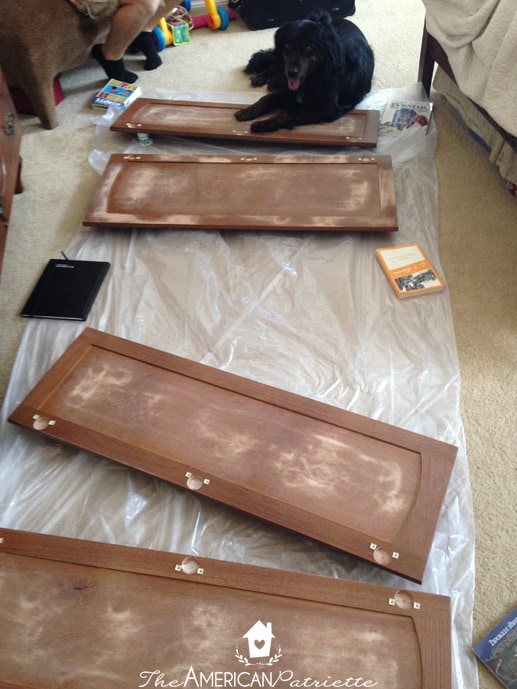
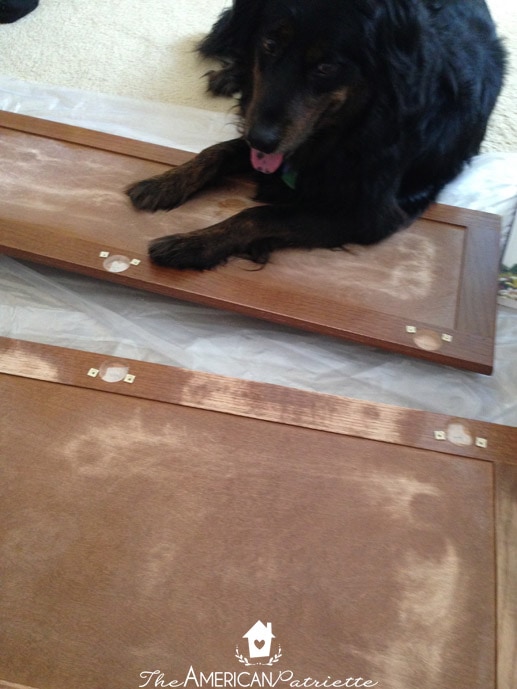
Gipper makes himself right at home in and on all of our home projects. #whenhelpingishurting
I wish we had photos of us priming the cabinets, but alas, I just never thought about writing a blog post on it! I don’t think I originally thought I’d be as thrilled with the results as I am, so I just never thought about taking photos as a tutorial to share!
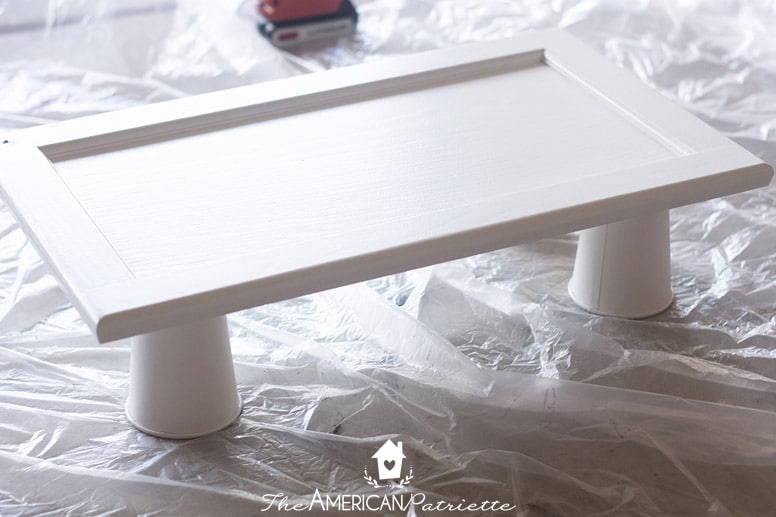
For both priming and painting, we elevated the doors using small wax-lined cups. This prevented any of the plastic drop cloth from touching the wet paint, and it also prevented paint from pooling at the bottom. We specifically used wax-lined ones to prevent sticking of the cup to the paint. This is just an example – the cups we used were much smaller. They’re the kid-sized ones you’d use at the bathroom sink.

We first primed the back of the doors – again, using Zinsser 1-2-3 Bulls Eye Primer. We did TONS of research on the right stuff to use, and so many other DIY bloggers were recommending that exact primer, so we decided to give it a shot. Since then, I’ve been exclusively using that primer for all of my home projects that need to be primed – it’s really done a great job.
Steps for priming:
- First, use an angled paint brush to paint any grooves in the cabinet. For example: on this door below, I would’ve used the brush to paint all along that inner part (where you see the raised wood).
- Then, roll your foam roller in the primer and coat the entire back of the door + sides with primer using the roller. It’s super important that you immediately follow up with the roller – this will help prevent any brush strokes from showing up.

- Let the primer dry to the touch (we probably just gave it about 30 minutes or so, but that’ll depend on your weather conditions – whether it’s hot/cold, rainy/sunny/humid – when you’re doing this project – it was super hot here, so it dried very quickly!).
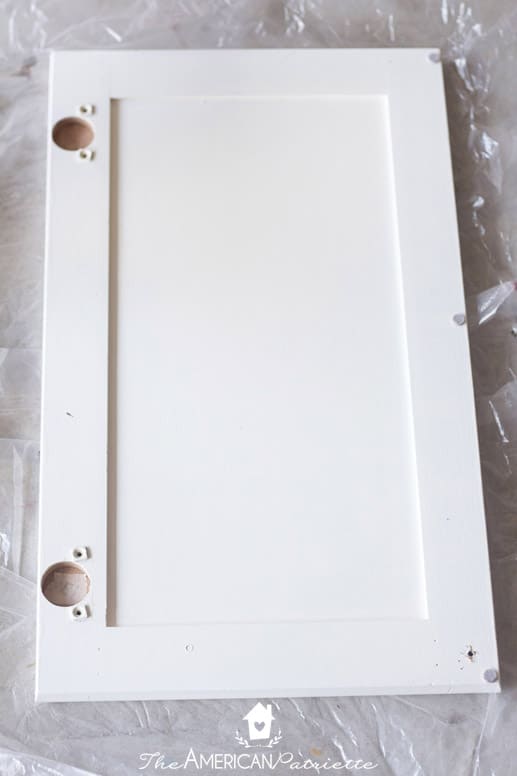
- Then, follow the same steps for a second coat. We did 2 coats of primer on our cabinet doors and drawers, so you’d probably be just fine with two coats. The Benjamin Moore Advance paint has great coverage, so you don’t need to make the cabinet door 100% white with primer before moving onto painting.
- After we did 2 coats of primer on the back and let the primer completely dry (we gave it more dry time the 2nd go round to ensure that the cups didn’t leave any marks on the primer when we flipped it to do the front), we turned the doors around and followed the same process on the front: paint brush to line any grooves, and then coat the entire rest of the front of the door with the foam roller. Let it dry to the touch, and then come back with your 2nd coat.
- After the last primer coat was completely dry, but before applying the first coat of paint, we used the fine grit finishing sanding sponge to lightly go over all of the doors and drawers. This is a super important step – it helps smooth any wood grain that elevated/swelled in the process of getting wet from the primer.
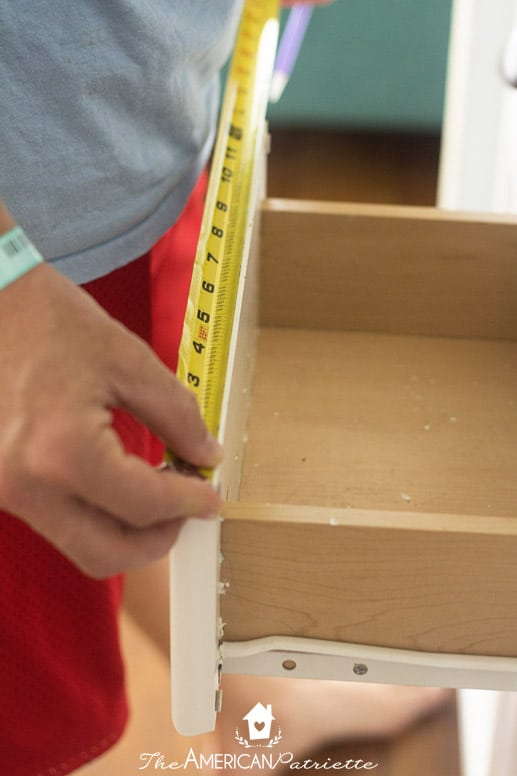
- For priming the drawers, we only wanted to paint the wood front that showed. There was no need to paint the inside of the drawers. (You can kind of tell from this picture of Aaron measuring the drawer for hardware below – we only painted the front/back of that front wood piece of each drawer.) If you do the same, you’ll need to use painter’s tape to tape off the part of the drawer that touches the front. After you’ve taped off, then you’ll prime the front of the drawer using both the paint brush and the foam roller – use the paint brush in the grooves, and then use the roller to cover everywhere else.
Note on priming: during the time that we waited for coats of primer to dry on the doors and drawers, we primed the cabinet themselves (fixed to the wall in the kitchen). First, use painter’s tape to tape off anywhere you don’t want the primer to end up – perhaps just where the cabinets meet the wall. Then for priming, we used a brush where necessary (in corners and on the top molding), but we mainly used the foam rollers. We also did 2 coats of primer on these. We opted not to prime/paint the actual inside of the cabinets and just left them as is – they were in fine condition, and that saved a TON of work! Plus, you only see them when you open the cabinets. So seriously, not worth it!
Step 5: Ready to Paint!
You’re going to follow the same basic steps for painting as you did for priming. Here we go!
Steps for painting:
- Again, start with painting the backs first. This is important, just because this will help prevent any cup marks from forming in the paint on the front of the cabinets. Follow the same process as priming: use a paintbrush (unless you cleaned your primer brushes really, really well, I’d start with a new angled paintbrush) to paint in and around any grooves, and then follow up with the foam roller and completely cover the back and sides of the cabinet door with the Advance paint – just continue on down the line for all of the doors! We allowed for about 3ish hours for dry time on the paint before adding another coat, but again, the weather conditions will vary the dry time, so follow the directions on the paint can if you’re in doubt on how long to wait between coats. We painted our cabinets in July in TX – super, super warm. I don’t think it was really humid, but definitely take humidity into account for your dry time.
- For painting the drawers, paint the back side of the front piece first, and then you can position the drawer to where you can paint the rest of the front side of the front piece.
- And, same as with priming, when we were waiting for coats to dry, we used that time to paint the cabinets fixed to the kitchen wall.
- After you let the first coat dry on the back of the cabinets, repeat and do another coat. Allow for adequate dry time between coats – for us, again, that was about 3ish hours.
- Before turning the cabinet doors over and setting the painted side (back side) down on the cups, we let the doors fully dry overnight, just to avoid any kind of marks from the cups in the paint. We ended up with very few marks (and you really can’t even see them), so this worked well for us!
- Repeat the same kind of process for painting the front: paint brush in grooves, roller over surface. Wait until it’s completely dry – maybe 3ish hours – and then apply another coat. We did 3 coats on the front.
- Once the doors/drawers were completely dry (let the last coat dry overnight), just like after the primer coats, we used the super fine grit finishing sanding sponge to even out any raised wood grain. Just lightly go over all the doors/drawers/cabinets on the wall in the kitchen with the sponge.
So, recap on painting: We did 2 coats of paint on the back of the cabinet doors, and then 3 coats of paint on the front. We did 3 coats of paint on the drawers, and 2 coats of paint on the cabinets attached to the kitchen wall. This coverage was perfect for us!
An important note: just make sure you immediately follow up painting with the brush with the foam roller. This really prevents you from seeing any brush strokes. That foam roller is awesome! While you want to use a generous amount of paint on the roller to get good coverage, just make sure you’re examining each piece before you move on to the next cabinet door to make sure paint doesn’t pool up or drip anywhere.
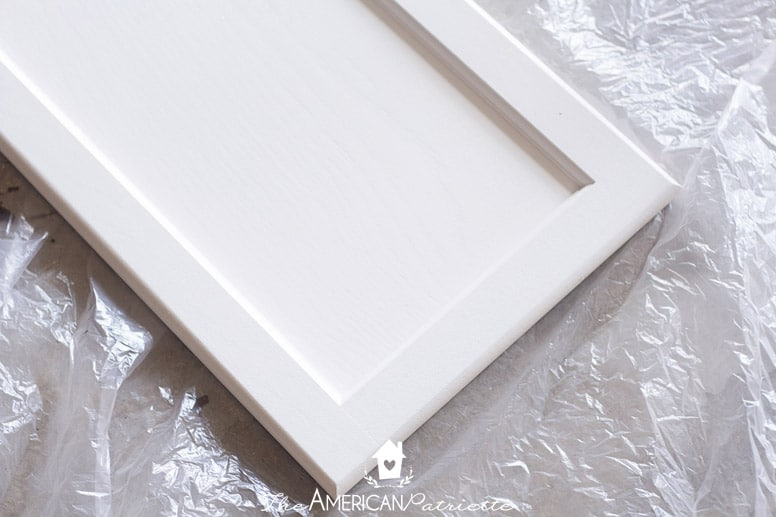
Look how beautiful that coverage is, y’all! This primer/paint combo + using the foam rollers produces amazing results!!! You can’t tell from these photos, but you can still see the grain of the wood in all the cabinet doors/drawers. I really wanted a natural-looking and very smooth paint finish. I definitely think this mimics the look you’d get from using an expensive paint sprayer. So gorgeous!
Another note: we also put those small felt sticky pads on each door and drawer. Definitely helps reduce noise, but also helps prevent any chipping where the door/drawer meet the cabinet.

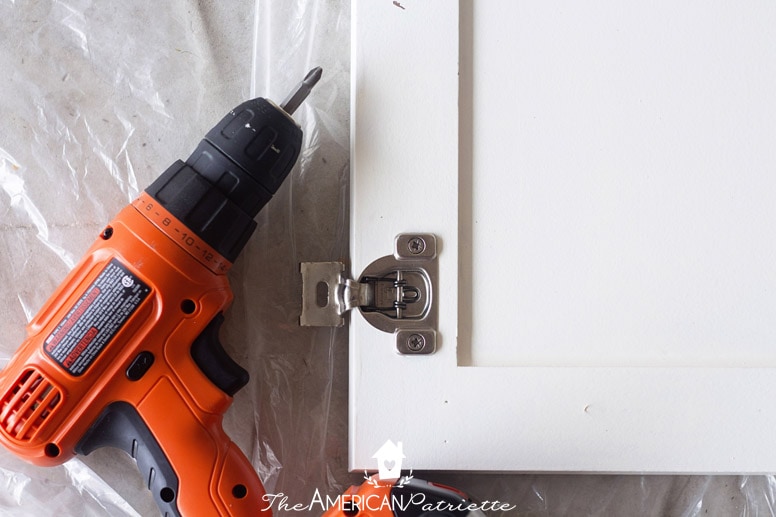
Step 6: Reattach Cabinet Hardware
Once your cabinet doors are completely dry, you can go ahead and reattach all of the cabinet hardware. We used our cordless drill and it made this soooo much easier than if we had to manually screw all the pieces in with a screwdriver! It also made the process so much faster to have all the hardware organized in those baggies – we didn’t have to do any thinking as we reattached the hardware.
Step 7: Reattach Cabinet Doors to Cabinets & Place Drawers
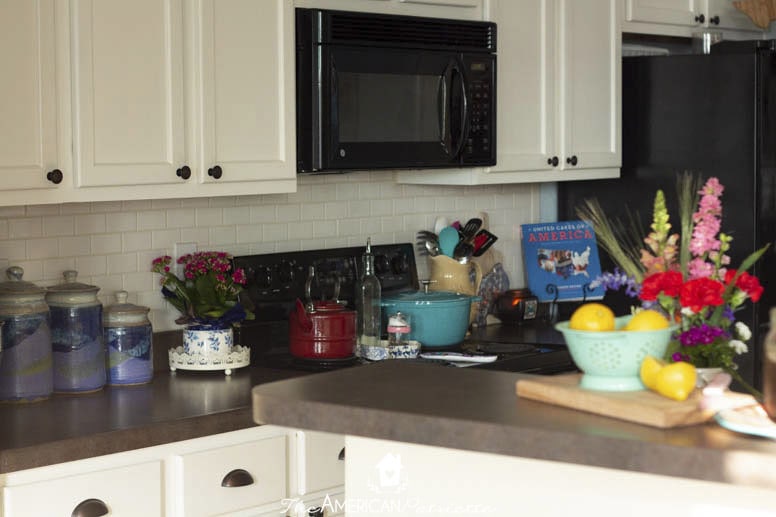
Once you’re sure the doors/drawers/cabinets are dry, you’re ready to put everything back! Here’s a picture right after we finished the cabinets and drawers and moved on to putting up the subway tile back splash. I was LOVING my new fresh kitchen look! Gosh, that white paint made a huge difference!

Step 8: Attach Knobs/Pulls to Cabinets
I know not all cabinets/drawers require knobs and pulls (ours didn’t), but I think those simple additions make a huge difference – not only do they add charm and character, I think they also just make it easier to open and close the doors and drawers. You can read Part 2 of this blog post series on how to easily attach knobs/pulls to the doors/drawers, especially if you didn’t already have knobs/pulls on yours.
More info on the kitchen cabinet makeover:
If you’re planning to install knobs/pulls on the doors and drawers, hop on over to Part 2 of this series to see how we easily did this (with very little measuring)!
I still cannot believe we redid our cabinets for less than $150. I am so thrilled with the transformation – the kitchen is so much brighter, more cheerful, and way more fun to hang out in!
Go check out my post on how this paint is holding up on them after 2 years of life in our kitchen. (Spoiler alert: I’m still in love with them!)
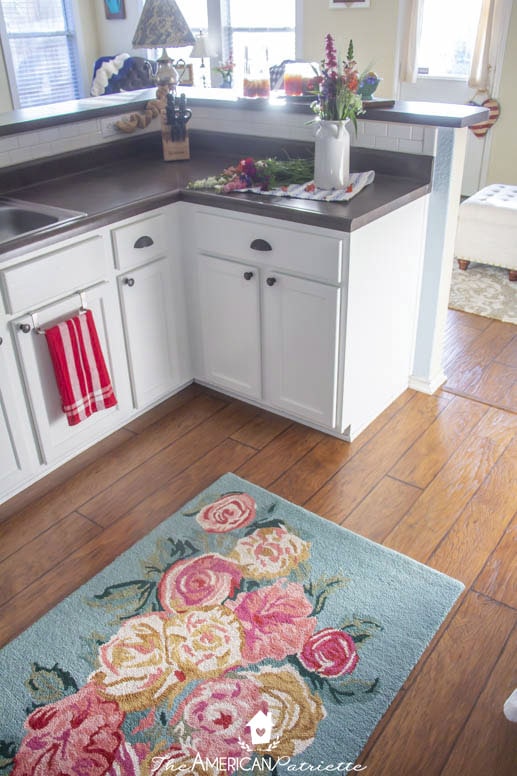
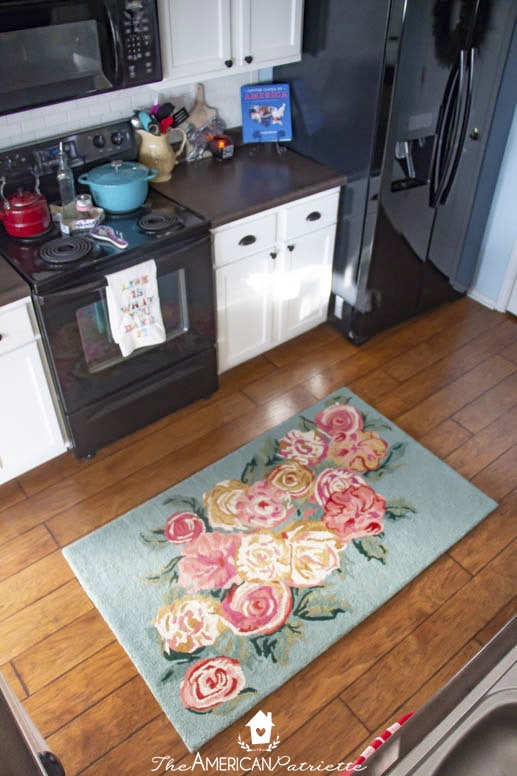
Side note: if you love that rug as much as I do, you can get it here! It is definitely one of my absolute favorite items in my house!!!
Want to make sure to save this project for later?! Be sure to save it to your favorite Pinterest board!
I’m super excited to follow your steps to redo our wood colored kitchen cabinets! I’m wondering if the cabinet doors on the cups fall over when you’re painting them. It looks like they could get knocked off the cups easily. Did you have that problem?
Thanks!
We didn’t have any issues! But, I will say, we painted our bathroom cabinets the other day the same way, and I had forgotten to get cups, so I did without them and it was fine! I just made sure they were fully dry before turning them over and painting on the other side. Didn’t have any issues.
We are planning on painting the cabinets in our new house. Your cabinets came out so well, thank you for all the tips! Question, did you paint underneath the cabinets? The reason I am asking is I was at a friends house and her house was a flip. I was sitting down at her island and saw all the old wood under her cabinets and I really was not a fan of that look and wondered if people also paint underneath.
Yes, we painted everywhere the eye could see! 🙂
I’m thinking of painting my oak cabinets, though I have been warned it is a big job. Can you tell me how long it took to paint your cabinets?
It took us a solid 4-5 days. We weren’t working the entire time, but in order to allow dry time for both primer & paint + a couple coats of each, we needed to plan for that long.
Did you follow the same process of sanding for the wood that surrounds cabinets and drawers that are attached and can’t be removed like the drawers and cabinet doors or did you just use primer?
We just used primer – no sanding inside! Didn’t want to deal with the mess, and it’s totally fine. You’ll need to do some touch-ups within a couple of years, but we’ve had no peeling or anything. We’ve only had to do touch-ups where there’s constant abrasion (i.e. at the very bottom of the cabinets where the vacuum cleaner hits them), where my pans hit the bottom part as I pull the baking sheets in and out regularly, etc.
This looks amazing and I am getting ready to do the same to my kitchen! Could you please let me know what shade of white you used? Thanks so much!!!
Yes, I used Simply White! A few years later and I’m still loving our cabinets! 🙂
Did you just use the standard foam roller or what size nap did you use to get that lovely end result?
I used foam rollers that said they were specifically for cabinets and doors – got them from Lowe’s! They’re about 6 inches in length.
I was so surprised to see you used foam rollers and brushes. I did my cabinets over 20 years ago. I did all the steps you did and used foam rollers and brushes. Many people told me NOT to use foam but I did anyway. Like yourself I wanted the sprayed on look and for the wood grain to show. Here it is 20+ years later and they still look like the were just refinished. Everyone thought I had replaced the cabinets or had them professionally done. The trick is the foam rollers – I am convinced of that. Plus, taking my time to do all the steps. I have 17 cabinets and it took me about 3 weeks to do all the steps. I also painted the inside of my cabinets as they were painted black (or very dark brown). They are also easy to just wash off when anything gets on them. Great job and it looks fantastic.
Yes, I totally swear by those foam rollers! That is AMAZING that yours have held up for 20 years!! WOW! What kind of paint did you use?! I don’t think the paint we used – Benjamin Moore Advance – existed 20 years ago.
Omg! I’m impressed! First, at how big of a difference it made!!! Your kitchen looks like a brand new kitchen now. The fact that you did all of the transformation with only $150 blew me away. That’s awesome. We don’t have our house yet, but I know that when we do, all of our projects will have to be budget friendly. Especially with a mortgage to pay every month. Thanks for sharing all the steps in detail! This will be very helpful when the time comes for us. 🙂
Thank you!! 🙂 Yes, we love it!! The cabinet project cost around $150, and then the back splash project also cost about $150…we did the back splash immediately following the cabinets since the kitchen was already a mess with projects. I could not get over the difference $300 worth of work made in there. It was unbelievable!! Now I just need to get a new sink and my kitchen is pretty much DONE!